Are you tired of looking at those unsightly scratches or dents on your beloved motorcycle or car? If so, it’s time to explore the world of do it yourself auto body repair! Taking on DIY repair projects not only saves you money but also enhances your skills and instills a sense of accomplishment. Imagine transforming your vehicle back to its former glory without the hefty labor costs of a professional shop. With the right tools, techniques, and a little patience, you can handle a variety of issues such as paint touch-ups, rust removal, and bodywork repairs right at home. Not only does this empower you as a vehicle owner, but it also allows for a deeper understanding of your ride, promoting greater care and maintenance. You’re not just fixing a car; you’re nurturing a relationship with it. For those looking for a comprehensive understanding of maintenance, learn more about common engine maintenance mistakes to ensure your vehicle is in peak condition as you embark on your DIY journey.
Essential Tools and Materials for DIY Auto Body Repair
Embarking on a DIY auto body repair project can be both fulfilling and cost-effective. To achieve the best results, having the right tools and materials is crucial. Here’s a list of essential items that every DIYer should consider:
Common Tools Needed
- Wrenches and Socket Sets: Versatile auto repair tools necessary for loosening and tightening bolts.
- Screwdrivers: Flathead and Phillips screwdrivers are fundamental for various applications, from removing panels to adjusting fittings.
- Pliers: A good set of pliers, including needle nose and slip joint types, will help in gripping, twisting, and cutting wires or small parts.
- Hammers: A ball-peen hammer and a rubber mallet are excellent for shaping dents and aligning panels.
- Sanders: Use electric or manual sanders to smooth out surfaces prior to paint application.
- Clamps: These are essential for holding pieces in place while you work.
Necessary Materials
- Auto Body Filler: A crucial material for fixing dents or scratches before painting.
- Primer: Helps paint adhere to the surface and provides an even base for color.
- Auto Paint: Choose high-quality automotive paint that matches or complements your vehicle’s current color.
- Clear Coat Spray: Adds a protective layer over the paint and enhances shine.
- Masking Tape and Paper: These are vital for protecting areas of the car that shouldn’t be painted.
- Cleaning Supplies: Use a degreaser and clean cloths to prepare surfaces for repair.
With these essential auto repair tools and body repair materials, you’ll be well on your way to conducting effective repairs on your vehicle. Happy repairing!
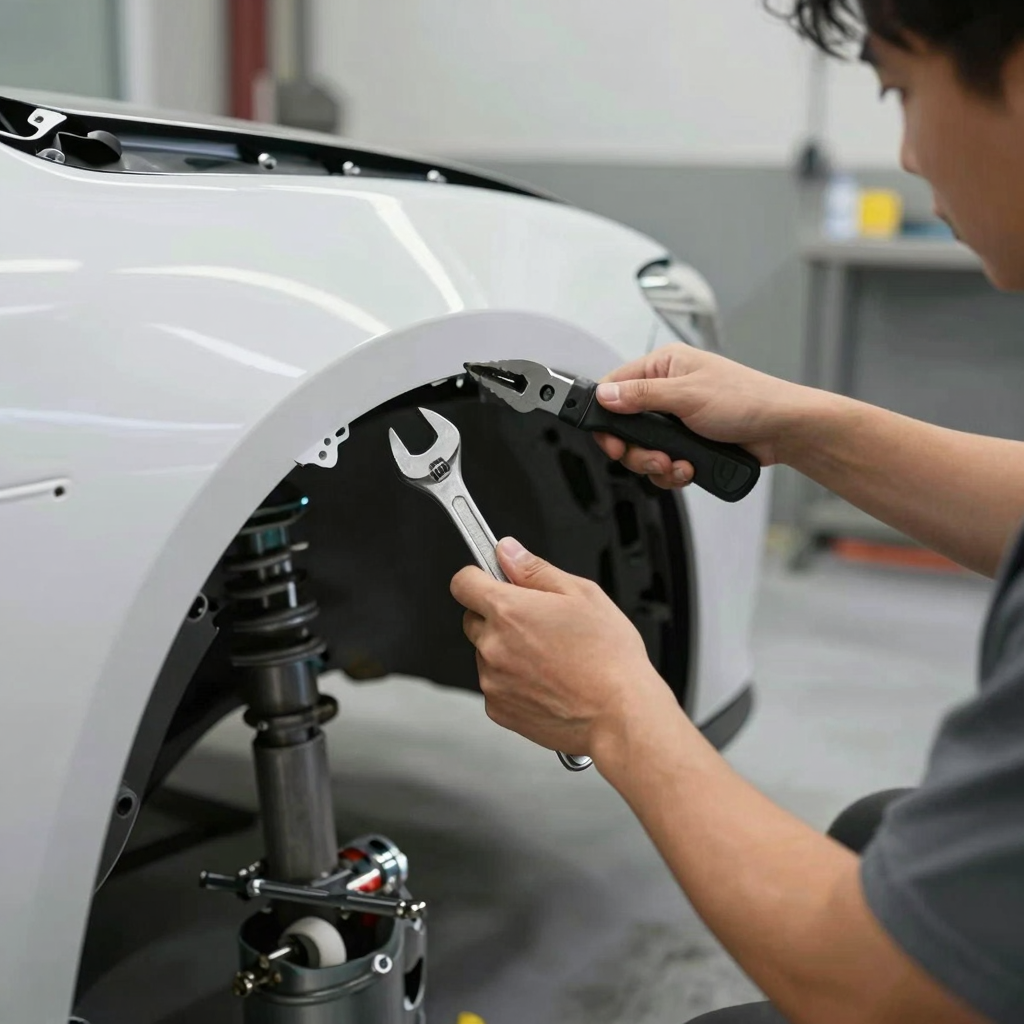
A Step-by-Step Guide to DIY Auto Body Repair
Performing simple auto body repairs can save time and money while giving you the satisfaction of fixing your vehicle yourself. This guide outlines how to repair common issues like scratches and dents, utilizing a friendly and straightforward approach.
What You’ll Need
Before starting, gather essential tools and materials:
- Safety Gear: Safety glasses, gloves, and a respirator mask.
- Hand Tools: Wrenches, screwdrivers, and a hammer.
- Body Repair Tools: Dent puller, sanding block, and body filler.
- Painting Supplies: Spray gun, masking tape, primer, and topcoat.
- Cleaning Supplies: Rubbing alcohol and a clean cloth.
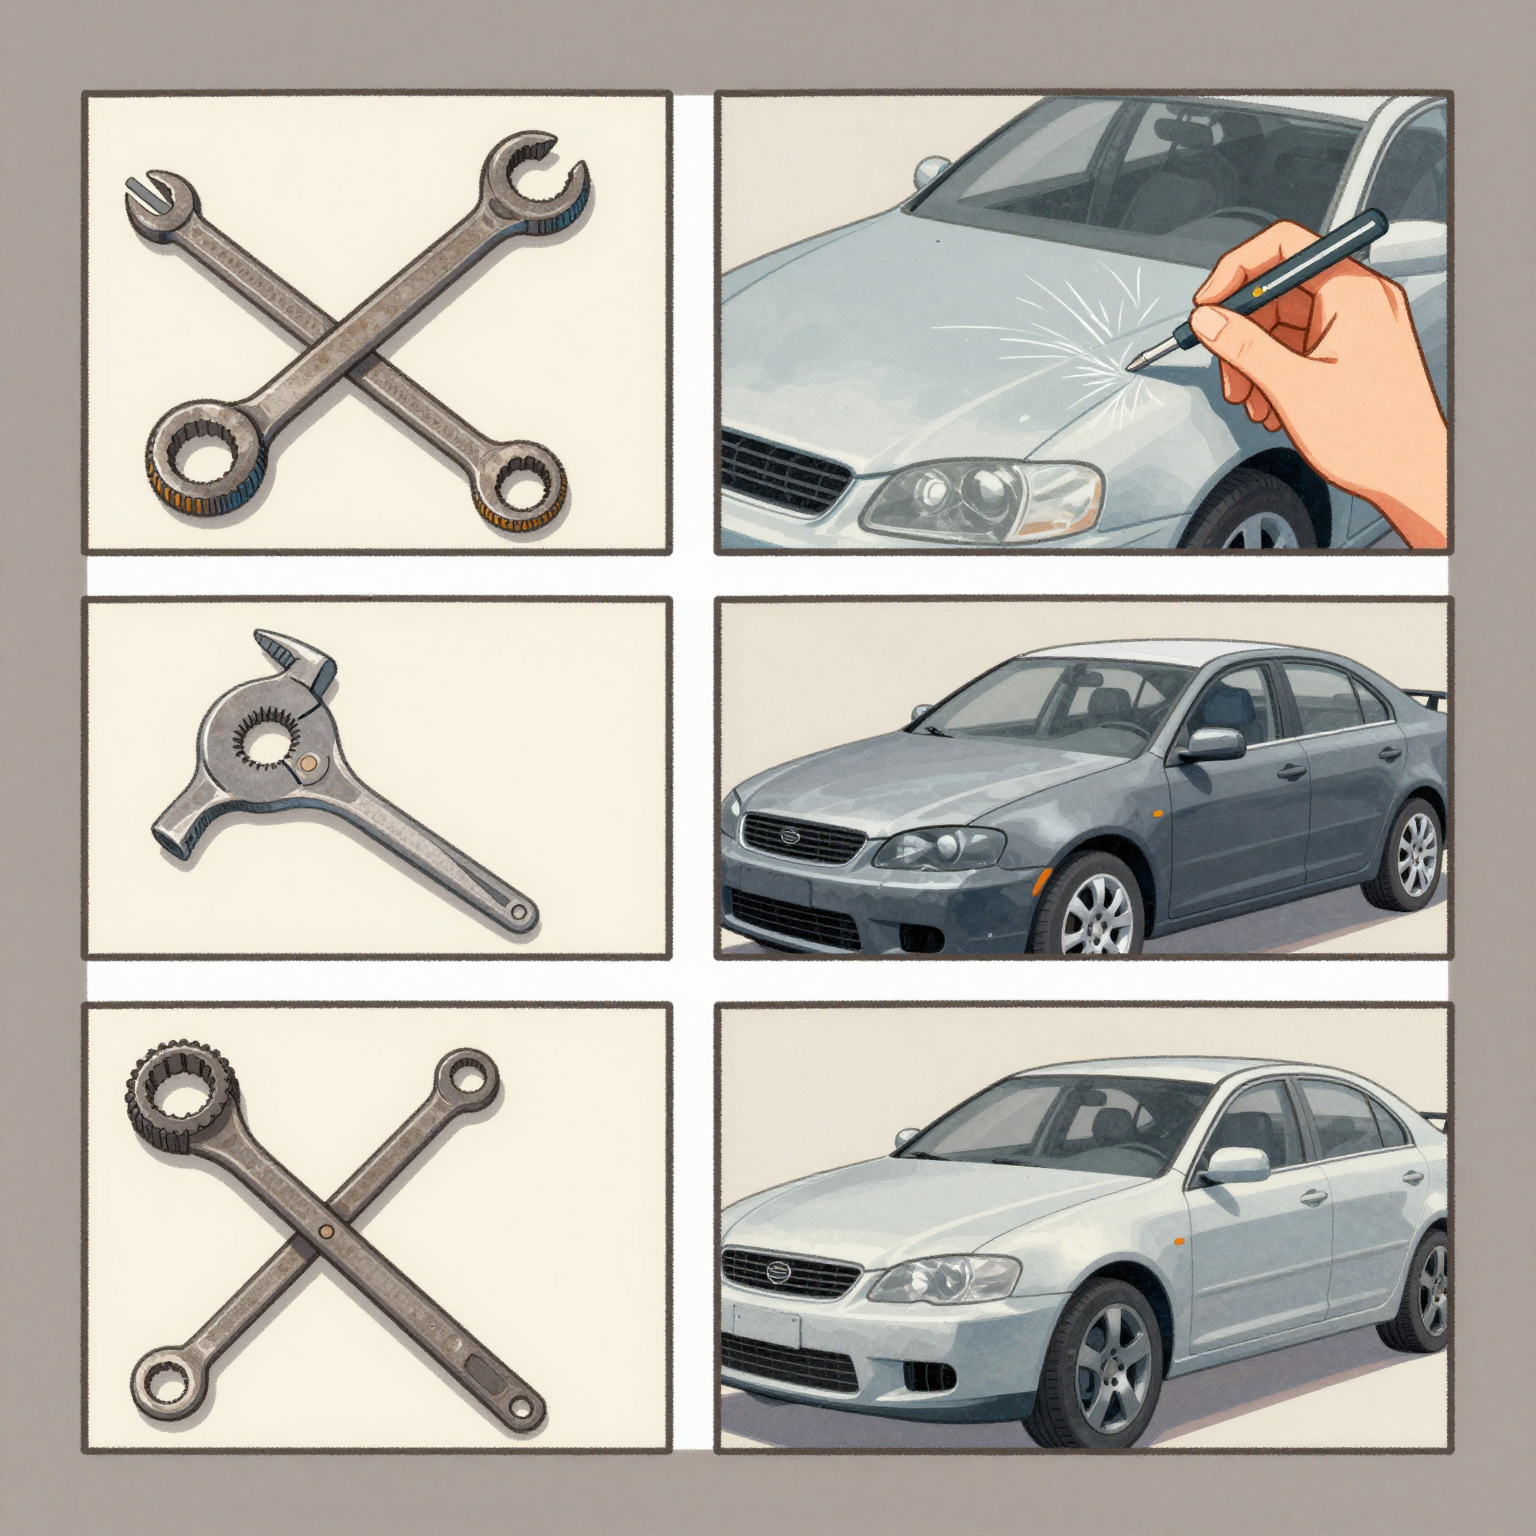
Step 1: Assess the Damage
Start by examining the scratch or dent carefully:
- Scratches: Check if they’re only on the clear coat or if they penetrate to the paint.
- Dents: Look for surface imperfections and determine if the metal has buckled.
Step 2: Clean the Area
Before repairing:
- Wash the affected area thoroughly to remove dirt and debris.
- Use rubbing alcohol on a clean cloth to ensure no oils are present.
Helpful Tip: If you’re interested in other DIY maintenance tips, check out our guide on common engine maintenance mistakes.
Step 3: Prepare for Repair
- For minor scratches, you can often use touch-up paint. If the scratch is deep:
- Sand the area with fine-grit sandpaper until it’s smooth.
- Apply body filler using a putty knife if needed, and let it cure.
Step 4: Paint the Area
- Mix your paint: Ensure you have the correct color matching your car.
- Apply a primer coat thoroughly, ensuring even coverage.
- Once the primer dries, lightly sand it.
- Use a spray gun (or touch-up brush) to apply the base coat.
- Let it dry completely before applying a clear coat to seal the paint.
Step 5: Finish Up
- After the final coat dries, buff the area with a soft cloth to match the shine of the rest of the vehicle.
- Clean your tools and workspace to prevent accidents during future repairs.
Essential Tools Chart
To help you visualize what you’ll need, here is a chart of essential tools:
| Category | Essential Tools for DIY Auto Body Repair | Notes |
|---|---|---|
| Air & Power Tools | Air Compressor, Pneumatic Sander | Essential for tasks such as paint spraying. |
| Hand Tools | Wrenches, Screwdrivers, Hammer, Pry Bar | Basic tools for disassembly and alignment. |
| Body Repair Tools | Dent Puller Kit, Body Hammer, Dolly, Sanding Block | Used for reshaping metal panels and smoothing dents. |
| Painting Supplies | Spray Paint Gun, Primer, Filler | Key for achieving a smooth, durable finish. |
Source: Auto Body Tool Mart
Conclusion
DIY auto body repair can be easy and rewarding. With a little practice and the right tools, you can keep your vehicle looking great without costly professional help. For more detailed DIY guides, feel free to browse our blog.
| Repair Method | Cost | Time | Ease of Execution |
|---|---|---|---|
| DIY | Low ($50-$500) | Moderate (4-10 hours) | Easy to Moderate |
| Professional | High ($500-$5000) | Fast (1-5 days) | Depends on Expertise |
Key Points:
-
Cost:
-
DIY repairs often require upfront investment in tools and materials, but can save money overall.
-
Professional repairs guarantee quality but can be significantly more expensive.
-
Time:
-
DIY repairs can take longer if the individual lacks experience or if extensive work is needed.
-
Professionals can often finish repairs more quickly due to expertise and access to better equipment.
-
Ease of Execution:
-
DIY might seem easier for minor damage like small dents or scratches.
-
However, complex repairs, like frame damage, are generally better left to professionals.
Considerations:
For those looking to perform their own repairs, starting with simpler tasks can build confidence and skills. Read our guide on avoiding maintenance mistakes to ensure success in your DIY endeavors.
To learn about additional techniques and methods, consider checking the types of car body repairs available to drivers.
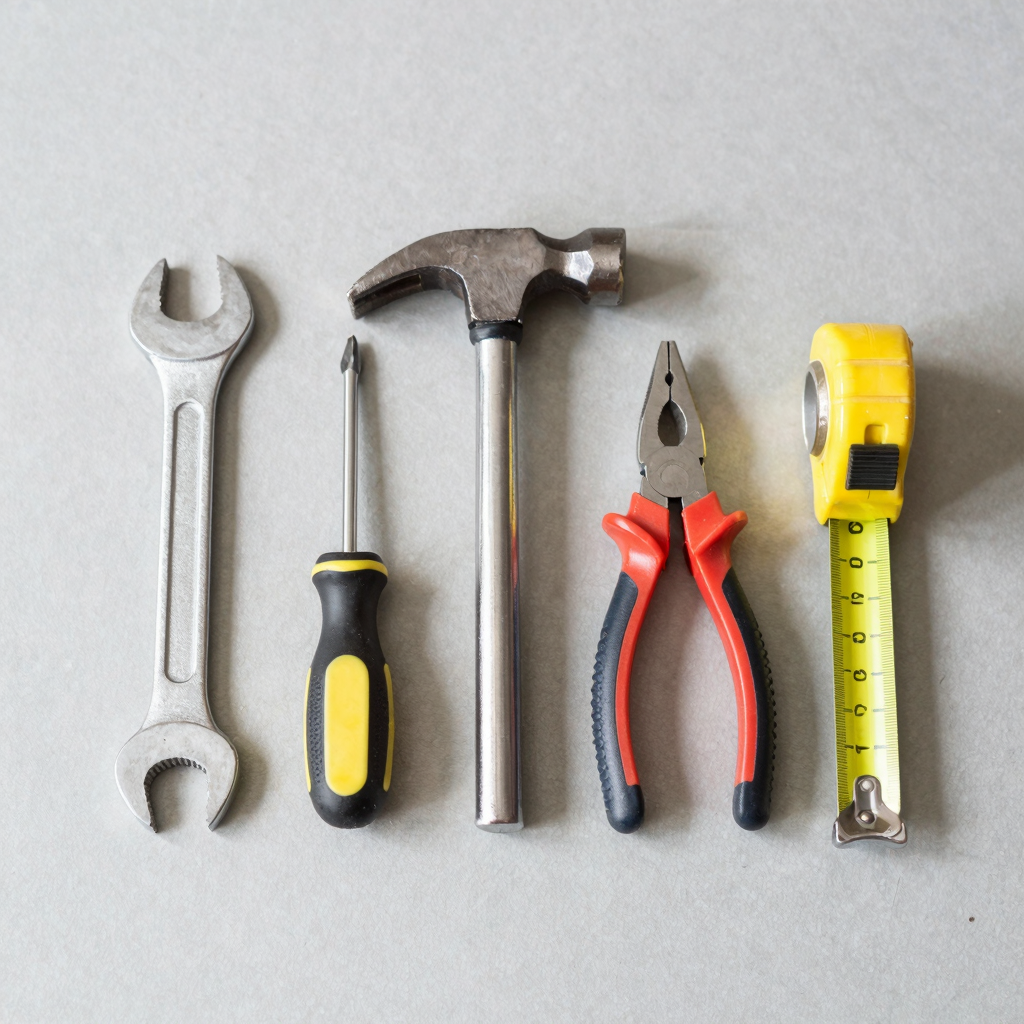
Common Repair Tools for DIY Auto Body Repair
When tackling DIY auto body repair, having the right tools is crucial for ensuring quality results. Here’s a list of essential tools that every auto enthusiast should have:
- Wrenches: Various sizes for loosening and tightening bolts.
- Hammers: Useful for shaping metal and removing dents.
- Screwdrivers: Both flathead and Phillips, for removing and securing panel screws.
- Pliers: Great for gripping, twisting, and cutting metal or wire.
- Tape Measure: Essential for measuring distances and ensuring precision in repairs.
These tools are fundamental whether you’re working on a small dent or major bodywork. They provide the control and effectiveness needed for successful repairs on your vehicle.
Essential Safety Tips for DIY Auto Body Repairs
When it comes to DIY auto body repairs, prioritizing safety is crucial to ensure a smooth and injury-free experience. Here are some important safety tips to consider before starting your project:
1. Wear Proper Protective Gear
- Safety Glasses: Protect your eyes from debris and harmful chemicals.
- Gloves: Use rubber or nitrile gloves to avoid skin contact with solvents and sharp materials.
- Mask: A dust mask or respirator is essential, especially when sanding or working with toxic substances.
2. Work in a Well-Ventilated Area
- Ensure you are working in a space with adequate airflow to avoid inhaling fumes, especially those from paints or solvents. Open windows and doors, or use fans to facilitate ventilation.
3. Use the Right Tools and Equipment
- Always utilize tools designed for auto repair. Check that all tools are in good condition and appropriate for the job.
- Jack Stands: Never rely solely on a jack for support; always use jack stands on a flat surface to prevent the vehicle from rolling or collapsing.
4. Follow Instructions and Guidelines
- Carefully read the instructions for any products you are using, such as adhesives or paints. Understanding how to use these items safely can prevent accidents and improve outcomes.
5. Clear the Work Area
- Remove unnecessary objects from your workspace to reduce the risk of tripping or losing tools in a cluttered area.
- Keep fire extinguishers nearby if you are working with flammable materials.
6. Be Aware of Potential Hazards
- Recognize potential risks such as burns, cuts, and electrical hazards, especially when working under the vehicle or near fuel lines. For more insights on the dangers of DIY repairs, check this safety guide.
7. Don’t Rush the Process
- Take your time to ensure each step is completed correctly. Hasty repairs can lead to mistakes that could compromise safety and quality.
By adhering to these safety tips, you can enjoy a rewarding and safer DIY auto body repair experience. Always keep learning and don’t hesitate to seek professional advice if you feel overwhelmed. For more tips on common auto maintenance mistakes, click here.
Engaging in DIY auto body repairs can be a rewarding experience, allowing you to save money and learn valuable skills. However, like any project, it comes with its set of challenges. Here are some common problems you might encounter during auto body repairs, along with solutions and troubleshooting tips to help you succeed.
1. Paint Issues
Problem: Paint runs, drips, or uneven coats can ruin the appearance of your repair.
Solution: Always ensure you apply paint in thin, even layers. Start with a primer to create a smooth base. If you notice runs, use a fine-grit sandpaper to smooth out the area once the paint is dry, and then reapply the paint.
Tip: For a professional finish, consider using a clear coat after your main paint application to enhance shine and durability.
2. Dents and Dings
Problem: Small dents may not pop back out easily, especially if they’re deep.
Solution: For minor dents, use a hairdryer or heat gun to warm the area, followed by the application of aluminum foil and dry ice to create a rapid cooling effect that can pop the dent out. Alternatively, consider using a suction cup dent puller or a specialized dent repair kit.
Tip: Need more help? Check out this article on minor auto body repairs.
3. Rust Formation
Problem: Rust can form under the paint, especially if the repair area wasn’t properly prepped.
Solution: If you discover rust, sand it down to bare metal and treat it with a rust converter before repainting. Always ensure proper sealing and painting techniques to prevent future rust development.
Tip: A good maintenance routine can prevent rust. Learn more about car maintenance.
4. Misalignment of Body Panels
Problem: After repairs, body panels may not line up correctly.
Solution: Use hinge adjustment and alignment bolts to tweak the positioning of doors and panels. If everything looks fine but is still misaligned, it may be worth checking for underlying damage to the frame.
5. Adhesive Failures
Problem: Adhesives used for attaching panels or molding might not hold, leading to gaps or loose components.
Solution: Make sure you’re using the correct adhesive types and applying them according to the manufacturer’s specifications. Ensure surfaces are clean and appropriately prepared prior to application.
Tip: Keep a list of the right tools at hand to prevent issues when working on your repairs.
Conclusion
DIY auto body repair can be challenging, but with some patience and the right techniques, you can navigate most common issues. Always remember to take your time, prep correctly, and don’t hesitate to consult guides or professional help when necessary. Happy repairing!
User Testimonials on DIY Auto Body Repair
One of the most satisfying aspects of DIY auto body repair is hearing about the success stories from fellow enthusiasts. These testimonials encourage and inspire others to take on their own projects. Here’s a notable quote from a DIY auto body repair enthusiast:
“I was initially hesitant to tackle my own paint job, but after watching a few tutorials and gathering the right tools, I took the plunge. The feeling of sanding down the old paint and applying that flawless finish was incredible! I felt a sense of achievement that made all the hard work worth it.”
This quote illustrates the rewarding nature of completing a DIY project, highlighting that while challenges exist, the outcome can be highly gratifying. Many DIYers echo similar sentiments, emphasizing personal growth through these projects. Another user shares:
“After a major wreck, I thought my truck was done for. I sourced parts from local junkyards and took my time to learn each step. The process was arduous, but seeing my truck on the road again gave me a rush like no other. I couldn’t have done it without the support and resources available online!”
As you can see, undertaking DIY auto body repairs not only saves money but also creates a profound sense of accomplishment. Users regularly document their journeys, showcasing the resources available today, from online tutorials to forums where knowledge is shared eagerly among car enthusiasts.
If you’re contemplating your own DIY project, you might find it helpful to learn more about common auto repair mistakes to prevent unnecessary setbacks. With determination and the right information, you can transform your vehicle and have fun in the process!
Exploring Cost Savings in DIY Auto Body Repair
Do-it-yourself (DIY) auto body repair can be a rewarding adventure for motorcycle and auto owners, especially when it comes to saving money. While professional repair services can be reassuring, they often come with a hefty price tag. Let’s explore the potential cost savings of opting for DIY repairs versus hiring professionals.
Comparative Costs
- DIY Minor Repairs: Typical costs for minor repairs such as small dents or scratches can be as low as $100 if you do it yourself. This often includes the cost of materials such as sanding tools, paint, and clear coat.
- DIY Major Repairs: More extensive repairs, like fixing larger dents or body panel replacements, might set you back around $300. It requires more materials and time but still offers significant savings.
- Professional Minor Repairs: Conversely, hiring a professional for minor repairs can typically cost around $500. This doesn’t take into account potential markup on parts and labor fees.
- Professional Major Repairs: For major repairs, professionals may charge upwards of $1200, which reflects the complexity and labor involved. This price tag can lead to a surprising difference in costs, especially for those who are willing to invest time and effort into DIY.
Visual Representation of Cost Differences
The following chart illustrates the stark differences in cost between DIY and professional repair services:
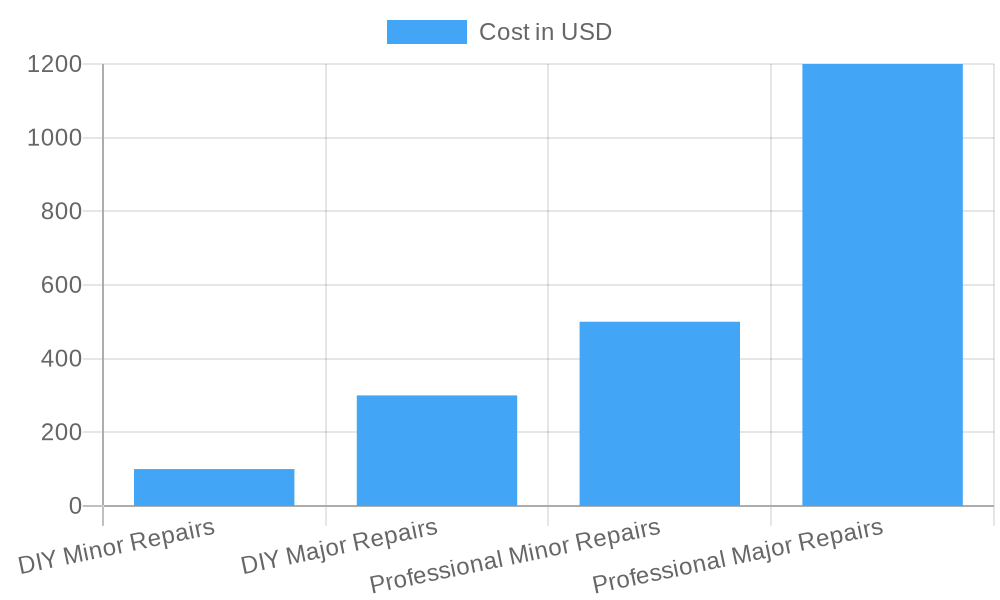
In summary, while DIY auto body repairs require a commitment of time and effort, the financial savings can be considerable. With knowledge, patience, and the right tools, many car and motorcycle enthusiasts can tackle repairs that would otherwise cost a small fortune. For more tips on DIY maintenance, check out our guide on saving with DIY oil changes!
Embracing DIY can equip you not only with savings but also with valuable skills for future upkeep.
Conclusion
In conclusion, DIY auto body repair can be a rewarding endeavor that saves both time and money. As we’ve explored, it’s crucial to assess the damage, gather the right tools and materials, and follow detailed instructions to achieve professional-looking results. Whether you’re tackling minor scratches or more significant dents, the resources and tools are widely available, making it more accessible than ever for motorcycle and auto owners alike.
While engaging in DIY repairs can be fulfilling, it’s important to recognize when the damage is beyond your skill level. In such cases, professional services can deliver results that meet high-quality standards. That’s where Summit Fairings comes in. They offer a range of services tailored for both DIY enthusiasts and those who prefer expert assistance.
By exploring their offerings, you can ensure that your vehicle remains in peak condition without compromising on quality. Learn more about their services here.
Remember, whether you choose to get hands-on with DIY repairs or seek professional help, taking proactive steps to maintain your vehicle will always pay off in the long run. So, roll up your sleeves, grab those tools, and get started on making your vehicle shine!
For more insights into maintaining your vehicle effectively, don’t miss our posts on common engine maintenance mistakes that everyone should avoid!