Plastic bumpers are a common feature in today’s vehicles, providing both aesthetic appeal and protection. However, they are susceptible to a range of damage, from minor scratches to more severe cracks. For both motorcycle and auto owners, knowing how to address these issues can save time and money while maintaining vehicle integrity. This guide explores effective methods for repairing different types of bumper damage, tailored for enthusiasts, auto repair shops, and parts distributors. As you advance through each chapter, you’ll gain insights into handling minor scratches, paint chips, dents, and small breaks, empowering you to tackle your bumper repair needs with confidence and expertise.
From Faint Scratches to Fresh Shine: A Practical, Non-Invasive Guide to Repairing Minor Bumper Scratches on Plastic
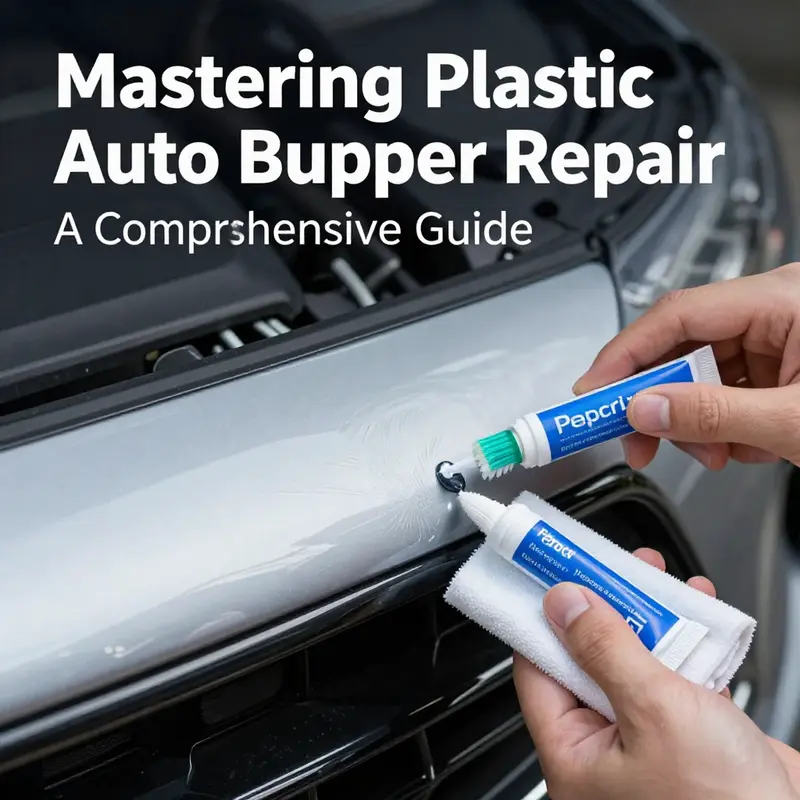
A plastic bumper bears the scratches and scuffs of daily life, a visible mark of the miles you’ve traveled and the moments you’ve shared. For many drivers, those fine lines are a cosmetic nuisance rather than a sign of structural trouble. The goal here is not to repaint or rebuild the bumper, but to restore the surface so it looks near new and remains protected from wear. When you’re facing shallow abrasions, the path of least resistance is a thoughtful, stepwise approach that respects the bumper’s material and the surrounding paint. The process begins with a careful assessment. Run a gloved finger along the scratch and observe whether the mark sits only on the clear coat or if the paint beneath has been breached. Even a subtle cue—dust catching on a tiny groove, a slight dulling of the sheen, or a shallow, narrow line—helps determine the best remedy. If you’re certain that the plastic itself is intact and the damage is cosmetic, you can proceed with a simple, low-risk plan. If the scratch has cut through color or clear coat, you’ll need to calibrate your method to prevent further damage and achieve a seamless blend with the surrounding surface. Cleanliness is the first ally in any cosmetic repair. Before you apply any treatment, wipe the area with a clean microfiber cloth and a small amount of isopropyl alcohol or a plastic-safe cleaner. This removes oils, wax residues, and dirt that can hinder adhesion or create halos after polishing. The goal is to present a clean canvas so any corrective product—whether paste, wax, or a polish—can do its work without fighting grime. When you’re ready to test a remedy, begin with the gentlest option and proceed conservatively. A common mistake is to overcorrect with aggressive abrasives, which can widen the scratch or dull the surrounding paint. Instead, treat the repair like a small sculpture: remove the flaw, but preserve the integrity of the whole surface. The toothpaste method is the quintessential low-risk option for very light surface scratches. Choose a white, non-gel toothpaste with mild abrasive properties, not a gel variety or a whitening paste that might include harsher compounds. Apply a tiny amount to a soft, lint-free cloth and rub the scratch in a slow, circular motion. Work in two- to three-minute sessions, applying light pressure. The circular motion helps break down the micro-abrasives that contribute to the visible line. After you’ve moved the cloth across the scratch, wipe away any paste with a fresh section of the cloth and then buff the area to a shine with another clean microfiber. If the scratch remains faint but discernible, a second pass is permissible, but never press so hard that you alter the surface texture or create new scratches. The important part is to avoid overdoing it; this method is best for the gentlest of blemishes. Once the area looks even, seal the improved surface with a quality automotive wax. The wax adds a protective shield, helps repel moisture, and often enhances the repaired region’s gloss so it blends more smoothly with the rest of the bumper. If you find that the scratch is still visible after toothpaste and wax, you can escalate to a more targeted approach that doesn’t involve repainting or refinishing the entire panel. A color-matched touch-up pen can address slightly deeper scratches that have exposed the primer or base coat. Begin by ensuring the area is clean again with isopropyl alcohol. Shake the pen well for at least 30 seconds to mix the pigment uniformly. Apply the paint in thin, even layers, following the direction of the scratch to minimize a build-up that could appear obvious. Allow each layer to dry thoroughly, typically 10 to 15 minutes, before applying another. The goal is a gradual, translucent fill that sits flush with the surrounding paint without creating ridges. After you reach a satisfactory coverage, you can finish with a light wax or clear sealant. The wax helps to blend the repaired line with the adjacent finish and provides UV protection to guard against future fading and oxidation. For those seeking a more dynamic restoration approach, a dedicated automotive scratch repair compound offers a helpful middle ground. These compounds are formulated to fill micro-scratches and restore gloss without affecting the base color. Apply a small amount to a foam or microfiber pad and work the product into the area with light, even pressure using a circular motion. As you buff, you’ll notice the compound filling the minor grooves and lifting the surface back toward a uniform sheen. Wipe away any residue with a clean microfiber and inspect the area under bright light. If necessary, repeat once more, then finish with a gentle polish to bring out the final gloss. The emphasis here remains on non-invasive correction: the objective is less about erasing every trace of wear and more about making the marks visually inconspicuous while preserving the bumper’s original material and color. Time, in this context, is your friend. Minor scratches were not created overnight, and their aftermath doesn’t demand urgent, drastic measures. However, addressing them promptly—ideally within a day—prevents dirt and debris from settling into the micro-grooves and turning a cosmetic issue into a stubborn reminder. The more quickly you act, the more likely you’ll preserve a near-perfect finish with minimal effort. It’s also important to set realistic expectations. These approaches are well suited to shallow, cosmetic damage where the plastic remains intact and the paint is still adhered. They are not a substitute for professional assessment when the underlying panel exhibits structural concerns, soft spots, or any crack that might propagate under stress. In those cases, attempting a DIY fix could mask a problem that warrants formal repair, potentially compromising safety or long-term durability. If you’re uncertain about the depth of the damage, a cautious rule of thumb is to treat any line that feels deeper than a light scratch as a signal to pause and seek guidance. An informed decision might involve a quick consult with a local body shop or a professional repair technician who can visually inspect the bumper and advise on the most appropriate course of action. For readers who want a broader discussion of scratch repair beyond the cosmetic, there are accessible guides that expand on paint layers, substrate compatibility, and color matching. You can explore a more comprehensive walk-through that delves into repainting if the damage is more extensive than minor surface wear. For a deeper dive into the paint-repair process, see this guide on how to repair auto paint scratches. how to repair auto paint scratches. Bringing in the larger context, it’s also worth noting that some repair tasks require more precise tools or controlled environments to achieve professional-grade results. A clean, dust-free workspace, a modest heat source for careful softening of the surface, and a careful hand are the hallmarks of a successful cosmetic fix. In this realm, patience is a virtue. You don’t have to rush the process; you can spread the steps across an afternoon if that helps you maintain a steady pace and measure progress against the scratch’s visibility rather than against a clock. Beyond the practical steps, consider this: the bumper’s surface is an outer shield against the road, and the finish you restore has downstream implications for resale value and perceived care. A well-executed minor-scratch repair not only improves aesthetics but also preserves the integrity of the clear coat and underlying paint. It reduces the likelihood of oxidation and weathering that can occur when the paint layer is compromised. The outcome is a bumper that looks more like it did when new and a driver who feels more confident driving off with a finish they can be proud of. As a closing thought in this particular chapter, remember that your approach to minor cosmetic damage sets the tone for margins of error in subsequent repairs. If you attempt a method that creates new micro-scratches, you may find yourself chasing a larger, less forgiving finish. So proceed with care, apply a light touch, and escalate only when you’ve exhausted the gentler options. When you arrive at a result you’re happy with, treat the treated area as you would any other part of the car: wash regularly, wax periodically, and inspect after a wash for any signs of residual dullness or micro-scratches that might indicate a need for a follow-up polish. By maintaining discipline in your routine, you extend the impact of your repair and keep the bumper looking cohesive with the rest of the vehicle. If the scratch is stubborn or if you notice a color mismatch after the repair, it’s reasonable to pause and re-evaluate. Sometimes a small, targeted touch-up layer must be followed by additional polishing or a subtle re-wax to achieve the best blend, especially on a curved surface where light reflects differently across the contours. In short, cosmetic bumper repairs are a blend of science and artistry: the science of knowing which product to use and the artistry of applying it with even, patient strokes. With the right approach, even the faintest scratch can fade into the background, leaving a bumper that looks refreshed rather than repaired. External resources and a broader technical framework are available to help you decide when a repair should remain cosmetic or when it should transition to a more robust restoration plan. For those seeking foundational knowledge on related topics, a reputable external guide on automotive repair offers detailed procedures and safety considerations that complement the practical steps outlined here. External resource: https://www.autodesk.com/solutions/automotive-repair-guide
From Chips to Shine: Restoring Paint Chips and Clear Coat on Plastic Bumpers
Bumpers take a beating. They’re the first line of defense against road debris, and a single stone, a bit of sand, or a parking lot scrape can nip away at the glossy surface. When that damage sits on a plastic bumper, the repair approach splits into two paths: surface-level chips that haven’t breached the color layer, and deeper chips that have exposed primer or even the plastic itself. The goal is not only to restore appearance but to protect the underlying material from moisture and oxidation. The most effective method depends on how far the damage has penetrated and whether the clear coat remains intact. For shallow surface marks that haven’t penetrated the clear coat, a careful buff and polish can often restore gloss and reduce visibility. A polishing compound, used with a dual-action polisher and a soft microfiber pad, can abrade away micro-scratches and renew the surface without introducing new damage. This approach is fast, noninvasive, and ideal when the bumper’s color and clear coat remain pristine. It’s also a gentle reminder that some damage is more cosmetic than structural, and in such cases, a quick, measured touch-up can buy time until a more comprehensive repair becomes necessary. If you want a deeper dive into scratch repair as a precursor to more involved work, you can explore our guide on How to repair auto paint scratches. The link offers a focused look at reducing micro-scratches and reviving gloss, which forms a useful preface to addressing chips that have advanced beyond mere surface marks.
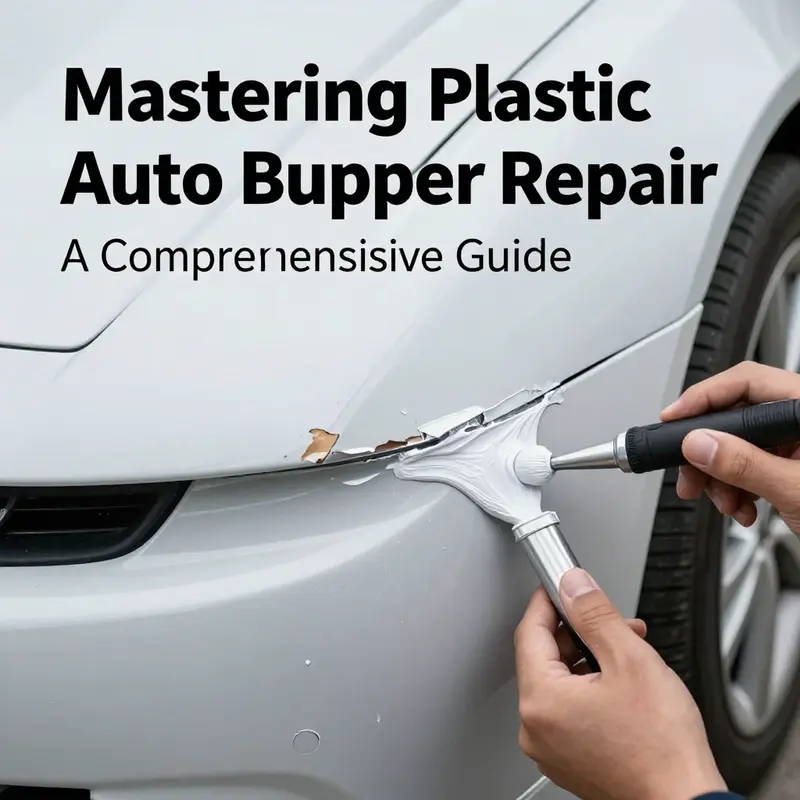
When chips extend through the clear coat and the base color is exposed, the repair must begin with careful preparation to ensure an even, long-lasting finish. The process outlined here follows a deliberate sequence designed to maximize adhesion and color fidelity while minimizing the risk of re-damage. Begin with a thorough cleaning of the damaged area to remove dirt, grease, and wax. Any residual oils can interfere with primer and paint adhesion, so wipe the area with a plastic-safe cleaner or isopropyl alcohol, then let it dry completely. The next step is to gently feather the edges of the damaged zone. A fine abrasive like 2000-grit sandpaper is ideal for plastic bumpers, because it reduces the transition line between repaired and undamaged areas without removing too much material. Light, even sanding around the perimeter of the chip creates a subtle bevel that helps the new paint lay down smoothly. This step is crucial; it’s what prevents a new chip from showing up as a sharp corner after the repair cures.
With a smooth edge established, the bumper is primed to receive new color. Use a plastic-compatible primer designed for automotive bumpers. Priming is the hinge between old and new layers; it improves adhesion for the subsequent color coat and helps compensate for any minor surface inconsistencies introduced during sanding. After the primer has cured according to the product’s instructions, the color application begins. Matching the factory color code is essential for an invisible repair. For larger areas, an airless sprayer can deliver a thin, even coat that minimizes runs and sags. For smaller chips, a high-quality color-matched touch-up pen can be used, but the paint must be laid down in multiple ultra-thin layers. Let each layer dry fully before applying the next. The goal is to establish uniform color density without building up a noticeable ridge along the chip edge. Once the pigment layers have achieved the desired depth, a clear coat is applied. The clear coat acts as a protective seal and helps to restore the surface’s gloss by evening out the reflective characteristics of the repair with the surrounding area. After the clear coat dries, the area should be cured away from direct sunlight and heat for the recommended period to prevent solvent entrapment or solvent pop.
Color matching remains one of the trickiest aspects of bumper repair. Auto paints, especially on plastics, can react differently to the substrate than the original paint. The color beneath the clear coat can be affected by the amount of heat the bumper has absorbed, the thickness of the paint layers, and the surface’s humidity during application. To mitigate mismatch, work in small, controlled sessions and perform color checks in multiple lighting conditions. If the chip is on a curved surface, take extra care to account for perspective differences when evaluating color density. In some cases, you may need to repaint a slightly larger area to achieve seamless blending with the adjacent panels. The goal is not to achieve perfection in a single pass but to create a uniform field of color that’s visually continuous with the rest of the bumper.
A few practical considerations can prevent common pitfalls. Use products that are specifically formulated for plastic bumpers, as standard automotive paints may not adhere well or flex with the bumper’s material. Plastic primers, plastic-friendly fillers, and compatible topcoats reduce the risk of cracking or peeling as the bumper flexes over road surfaces. Do not skip the test spray step when using new color formulations or unfamiliar spray equipment. A quick test on an inconspicuous area can reveal color drift, layer thickness issues, or spray technique flaws before you commit to the repaired area.
If the damage is extensive—larger chips, several adjacent chips, or areas where color is deeply compromised—consider revisiting the option of a professional repair. A body shop can address color matching with more precision and can manage the human-factor challenges, such as sensor calibration or bumper-specific reconditioning. Even when you prefer a DIY approach for as much of the work as possible, a professional can finalize the finish to the same gloss level and depth as the surrounding surface, ensuring the repair holds up to long-term exposure to sun, temperature changes, and road chemicals.
In terms of curing and handling after the repair, patience is a virtue. Do not wash the vehicle or expose the bumper to direct sunlight for at least 72 hours after the final clear coat has been applied. Curing time is essential to prevent solvent evaporation from causing micro-cracking or haziness. If you’re repairing a bumper with embedded sensors or lighting, adhering to precise calibration procedures is non-negotiable. Mismatched sensors can affect safety features, and the cost of rework is often higher than the initial effort of a careful paint-and-clear application.
Beyond the practical steps, there’s a broader philosophy to bumper repair. The objective is not to recreate a perfect museum finish but to achieve a robust, weather-resistant repair that blends with the vehicle’s aesthetics. When done thoughtfully, the repaired area becomes a near-invisible patch that can withstand repeated minor encounters with rocks and parking lot abrasions. Attention to edge quality, careful layering, and a patient curing period make the difference between a repair that lasts and one that requires frequent touch-ups.
For readers seeking a focused technique on surface-level repair as a foundation for more extensive work, a helpful reference is our guide on How to repair auto paint scratches. This resource provides a concise, practical overview of buffing and polishing that complements the more involved process of chip repair when the clear coat is damaged.
If you want to delve deeper into the science of interacting with plastic bumpers, including how to select primers and paints that tolerate bumper flex and exposure to UV rays, remember that the materials you choose should be compatible with the bumper’s original composition. For example, some bumpers are polypropylene (PP), others may be ABS or a blend. Matching the welding rod or filler material to the bumper’s actual polymer is important if you ever need structural repairs beyond cosmetic color work. Even when the damage is strictly cosmetic, choosing the right materials reduces the likelihood of future cracking and color delamination.
Finally, the broader context of damage repair emphasizes planning and prevention. Regular cleaning, prompt attention to chips before they rust or corrode, and keeping a small repair kit with the right color-matched paints and primers can help you manage minor issues before they escalate. If you have collision coverage, it’s worth checking whether a portion of bumper repairs is covered by insurance, especially in cases where the damage extends beyond the cosmetic surface or affects safety-critical components. In many cases, a well-executed cosmetic repair can preserve the bumper’s function and appearance without the need for a full panel replacement.
For readers seeking additional, externally sourced guidance to supplement these steps, you can refer to AutoCare’s detailed guide on repairing paint chips on plastic bumpers, which offers practical tips and visuals that align with the methods described here. This external resource provides a broader, professionally oriented perspective on achieving durable, aesthetically consistent results across a range of bumper types and circumstances.
Internal link note: For a focused technique on surface-level scratch repair, you can review our article titled How to repair auto paint scratches.
External resource: https://www.autocare.com/repairing-paint-chips-on-plastic-bumpers/
null
null
Repairing Cracks or Small Breaks in Plastic Auto Bumpers: A Practical Guide to Strong, Seamless Repairs
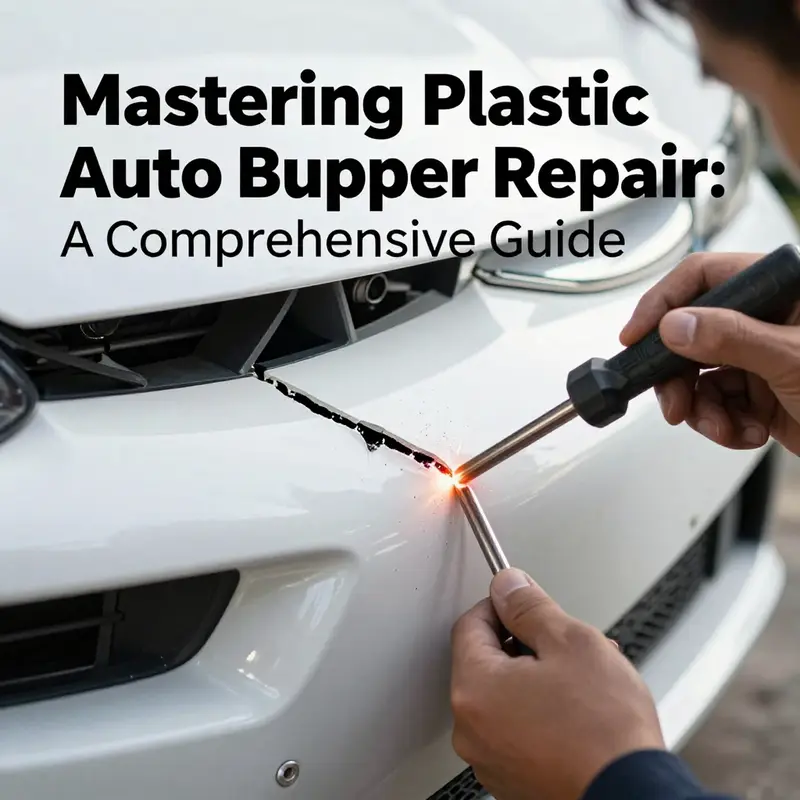
Cracks and small breaks in plastic auto bumpers are more common than many drivers expect, and they don’t always spell the end of a bumper’s usefulness. A crack can range from a hairline setback that barely breaks the paint to a more pronounced fracture that runs across a mounting point or along a seam. The path to a durable, visually seamless repair hinges on evaluating the crack’s size, location, and impact on structural integrity, then choosing a method that restores strength without sacrificing appearance. The process starts with a clear-eyed assessment. If the crack is short, shallow, and does not compromise the bumper’s attachment points or protective function, it often responds well to a method that reinforces the seam and fuses the plastic. If the crack runs deep, threatens mounting points, or has spread along a critical edge, the repair becomes more complex and may require replacement to preserve safety and alignment. The key is to approach crack repair with respect for the bumper’s material, the physics of heat and plastic flow, and the finish that sits on top of the repair. The most reliable repairs tend to blend sound engineering with careful cosmetic work, ensuring the repaired area can bear up under impact and weather without looking obviously out of place. When done properly, a crack repair can be almost indistinguishable from factory work, but it requires patience, the right tools, and a mindful sequence that respects the bumper’s original intent.
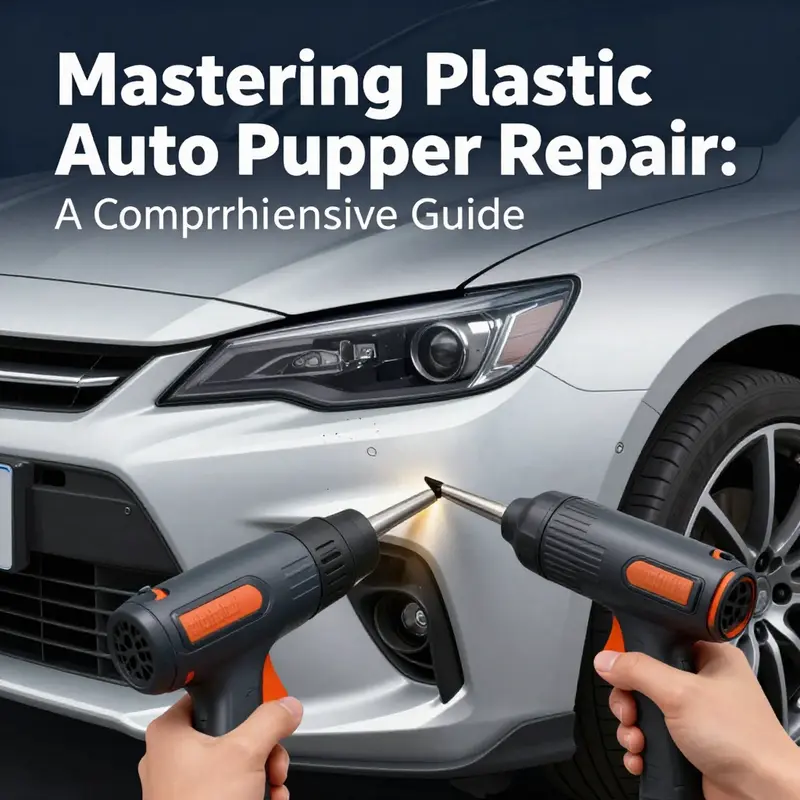
In practical terms, the repair approach breaks down into a few core options, each suited to different crack characteristics. For many small cracks, plastic welding from the backside offers a robust, structural repair. This method relies on a plastic welder to melt compatible filler material into the crack, effectively fusing the edges and creating a continuous bond that distributes stress away from the fracture line. The same principle applies whether the bumper is made from polypropylene (PP), polycarbonate, ABS, or a similar thermoplastic: you must match the filler rod to the bumper’s base polymer. Preparation is everything. Begin by thoroughly cleaning the area around the crack with a degreaser to remove oil, wax, and old paint that might impede adhesion. Any paint near the crack should be carefully ground back to expose fresh plastic, but you should avoid removing more material than necessary. Gentle sanding helps create a rough surface that the weld can bite into, providing a mechanical grip in addition to the chemical bond that the heat creates.
Once the surface is clean and prepared, masking tape plays an understated but essential role. By taping the crack edges on the exterior side, you keep the edges aligned and prevent shifting during the welding process. Alignment matters because a misaligned edge can produce a glossy, compensating gap that weakens the repair and stands out visually once painted. The actual welding step requires steady hands and a controlled rhythm. Set the plastic welder to a temperature range typically around 250 to 300°C, and feed the compatible filler rod steadily into the crack while moving the gun along its length. The aim is to create a continuous, uniform bead that penetrates the crack from one side to the other, not to “blob” extra material that could warp the surface. As the filler flows, you should see the crack gradually disappear within the fused region, the edges melding together in a way that mimics the way a piece of fabric is stitched. The motion should be calm and deliberate, not hurried. Rushing can cause overheating, which risks warping the surrounding plastic or creating new stress points along the seam.
After welding, patience again becomes your ally. Allow the repair to cool fully before you begin any finishing work. A common mistake is to rush to sanding while the material is still warm, which can smear the edge and reduce strength. Once cooled, begin with a coarse abrasive—often around 120 grit—to level the weld bead with the surrounding surface. Progressively refine the finish with finer grits, moving through 220 and 400, and ultimately 600 grit to achieve a flush, smooth surface that doesn’t raise a reflection or cast an obvious shadow where the crack once lay. If the weld bond sits slightly proud, careful feathering with the sanding block will help it disappear into the general contour of the bumper. The goal is a seamless transition between repaired and original plastic, a transition that becomes especially important if the bumper will again face the rigors of road debris and minor impacts.
Aesthetics matter, but so does protection. After sanding, applying a plastic-specific primer is a wise next step. Primers designed for plastic provide the key to a durable paint bond, helping the color coat adhere evenly and resisting chipping near the repair line. It is worth noting that the final appearance is heavily influenced by the painting environment. If you can access a spray booth or a well-ventilated, dust-free space with controlled temperature and humidity, the finish will be more uniform and longer lasting. In such a setting, you can lay down a base coat that matches your vehicle’s color, followed by a clear topcoat that seals the repair and adds depth. If color matching is a concern, you should consider a professional finish, especially on vehicles with metallic or pearlescent coatings where even tiny shade variations become noticeable. A cautionary point: for any repair that touches the visible face of the bumper, keep the work area clean and free of dust. Even microscopic particles can show up as specks in the final finish, and removing them without compromising the surrounding paint can be tricky once a topcoat is applied.
If the crack is minute and the edges clean, there is a simpler alternative that some technicians and DIY enthusiasts prefer for certain plastics: epoxy resin adhesive. This method is most appropriate for pinholes or hairline cracks that do not extend into critical mounting regions or affect the bumper’s integrity. The process begins with the same rigorous cleanliness standard—the surface is degreased, dried, and then slightly prepped with a light scoring to help the adhesive grip. A small hole at the end of the crack is drilled to prevent propagation; this is a well-known technique in frame repair because it interrupts the path of a crack and reduces the deliberate tension that would otherwise drive it forward. The two-part epoxy resin is then mixed and applied precisely into the crack, ideally with a micro-syringe or small applicator to avoid excess squeeze-out. The cure time must be respected, which often means leaving the area undisturbed for several hours. Once cured, the surface can be sanded and painted as with the welded repair, though epoxy repairs are typically less forgiving if they show at the surface, so the finishing steps demand extra care to hide the repair line.
In weighing the options, always remember the fundamental principle of material compatibility. The welding rod must match the bumper’s base polymer. PP requires a PP-compatible filler, ABS calls for ABS-compatible products, and so forth. Mismatches can create weak bonds or lead to differential expansion under heat, causing the repaired area to crack again or to warp differently than the surrounding plastic. The slightest mismatch can become a visible flaw after the paint cures, particularly on high-gloss finishes where reflections can reveal even small inconsistencies. The backstory of the repair, then, is not only about fusing edges but about respecting the chemistry of plastics and the physics of heat. Properly executed, a welded repair can be as strong as the original seam, providing a reliable restoration that allows the bumper to bear future stresses without repeating the failure.
Even with a solid repair, there are limitations to consider. Very large, deep cracks that extend through the bumper or crack near mounting points can compromise structural performance and alignment. In such cases, a replacement may be the safer and more predictable path. The decision to replace should consider safety systems integrated into the bumper, such as sensors and lighting, which can complicate a repair and drive up rework costs if not matched exactly. If you know that your bumper contains integrated radar, cameras, or advanced sensors, you should approach replacement with professional involvement to ensure sensors align correctly after installation. In the long run, replacement can offer a cleaner appearance, consistent color across the panel, and the assurance that the bumper will perform as designed in another collision. The expense associated with replacement is real, but when viewed against the risk of a failed repair mid-traffic or after a subsequent collision, the value of doing it once and doing it right can be compelling.
The decision to proceed with a repair rather than a replacement often comes down to a balance of cost, time, and cosmetic tolerance. A well-executed crack repair can return the bumper to a like-new appearance and preserve the vehicle’s aesthetic, but it does require patience and the discipline to follow each step carefully. If you are uncertain about color matching or the correct welding technique, or if the bumper houses sensitive components, seeking professional help can save time and reduce the risk of a less-than-perfect result. The process outlined here is designed to empower a careful, patient DIY approach while preserving the option to escalate to professional service when required. In all cases, safety should guide every decision. A rigid, aligned bumper not only looks better but performs more reliably in real-world impacts, where correct mounting and structural integrity can be the difference between minor cosmetic damage and a safer, more protective front end.
For those who want to explore more about how finish and color considerations can be integrated with structural repairs, the broader topic of paint and color restoration can be informative. If you’re curious about how paint repairs can blend with a cracked seam, see How to Repair Auto Paint Scratches. While the primary goal of crack repair is structural and seam integrity, a thoughtful approach to color can help the repair fade more gracefully into the rest of the bumper. This consolidated workflow—from surface prep to welding or adhesion, to finishing and color matching—offers a cohesive blueprint that can be adapted to a wide range of bumper types and vehicle makes. It’s a reminder that even when a crack seems small, the best results require disciplined technique, the right material choices, and a clear plan for how the repaired area will perform over time.
In closing, cracks and small breaks in plastic bumpers are not inherently catastrophic. They are a repair challenge that, when tackled with a precise welding or adhesive approach, disciplined finishing, and careful color work, can yield a result that stands up to the next road encounter. The most durable repairs create a repaired seam that behaves like the original plastic, distributing load and resisting further propagation. The subtlety of the finish matters as much as the strength of the bond, and the true test lies in how well the repaired area ages with weather, sunlight, and repeated impacts. If you follow the sequence—cleaning, aligning, welding or patching, finishing, priming, and painting—you increase your odds of a repair that remains invisible to the casual eye while delivering the practical resilience your bumper needs. For those seeking deeper guidance or professional-grade insights, there is always more to learn from detailed procedural resources and expert manuals, and a careful approach will keep you moving with confidence.
Internal link for further reading: How to Repair Auto Paint Scratches.https://motorworksautorepair.com/blog/how-to-repair-auto-paint-scratches/
External resource for professional-grade procedures: Plastic Bumper Repair Process. https://www.autobodyrepair.com/plastic-bumper-repair-process
Final thoughts
Repairing plastic auto bumpers can often seem daunting, but with the right techniques, it becomes straightforward and manageable. From addressing minor scratches to fixing deeper cracks, each method outlined equips you with the tools and confidence necessary to maintain your vehicle’s aesthetic and structural integrity. Learning these skills not only saves on repair costs but also allows you to take pride in your vehicle’s appearance. Armed with this knowledge, you’re ready to handle bumper repairs like a pro.