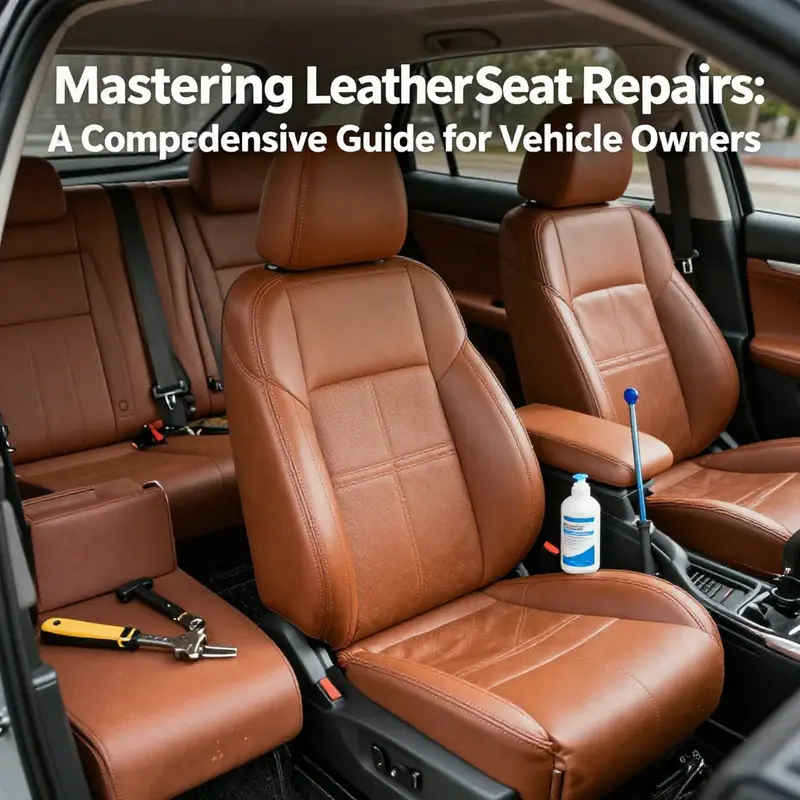
Leather auto seats add a touch of luxury and comfort to your vehicles, but they require care and maintenance to keep them looking pristine. From minor scratches to large tears, leather seats are susceptible to wear and damage over time. For motorcycle owners, auto enthusiasts, and professionals in auto repair shops, knowing how to efficiently repair leather seats can save costs and enhance the longevity of your vehicles’ interiors. This guide delves into three major categories of leather seat repairs: addressing minor scratches and wear, fixing small tears and holes, and managing large tears alongside the value of professional services. By the end of this article, you’ll be well-equipped to tackle leather seat repairs with practical, expert-backed strategies.
Restoring Subtle Wear on Leather Auto Seats: A Seam-by-Seam Guide
Leather seats carry a quiet tone of a car interior and minor wear can dull that tone. This guide walks you through a seam by seam approach to restoring subtle wear without creating new problems. Approach is patient and measured, focusing on blending texture and color so the repair disappears into the grain. Begin with a careful prep and a plan for the surface under the lights you normally use in your car or garage.
Step 1: Prep and test. Remove surface dust with a clean microfiber cloth. Use a mild leather cleaner in a small amount on another cloth to lift surface oils. Wipe clean and allow to dry completely. Inconspicuous patch like along a seam or near a cup holder is best for testing color match and texture.
Step 2: Assess depth. Very light surface scratches may respond to conditioning alone. Deeper lines that catch the fingernail will require a filler or repair paste. If the scratch is depressed, the goal is to fill and level to the surrounding surface while preserving the grain.
Step 3: Condition first for very shallow wear. A high quality leather conditioner can plump fibers and reduce the visible depth of fine scratches. Apply a small amount to a clean cloth and work into the scratch with circular motions until the surface looks more even. Wipe away any excess and wait for the area to dry. If the scratch is still visible after conditioning, move to filler and color matching.
Step 4: Fill and level shallow scratches. Use a color matched repair paste or filler designed for leather. Apply a tiny amount directly into the scratch, then gently feather the edges to blend with the surrounding surface. Let the filler set per product directions, typically 15 minutes or longer. Lightly sand with very fine micro sandpaper, following the grain, to further blend. Remove dust with a tack cloth or damp cloth and let dry completely.
Step 5: Color and grain matching. Apply a thin layer of pigment or dye that matches the seat color. Build in multiple ultra thin coats rather than one thick layer. Let each coat dry fully before applying the next. If the grain texture feels flat after filling, use a micro-sponge tool or a textured pad to reintroduce the grain pattern while the dye is still pliable.
Step 6: Texture and finish. After color has dried, carefully reintroduce texture along the repaired area with a micro-sponge or by gently brushing with the grain direction to resemble the original surface. A light buff with a clean cloth helps blend gloss levels with the surrounding leather. The goal is not a perfect replication of texture, but a seamless transition that reads as one piece on close inspection.
Step 7: Conditioning and sealing. Apply a light layer of leather conditioner to the repaired area to restore suppleness and help bind color. Depending on product instructions, a leather sealer or gloss reducer may be applied to harmonize the finish with the rest of the seat. Allow the area to cure in a stable environment for 24 to 48 hours before heavy use or exposure to heat.
Step 8: Prevention and routine care. Regular conditioning every 1 to 3 months keeps the leather supple and less prone to visible wear. Protect the seat from direct sun with sunshades or UV window treatments, and avoid harsh solvents or cleaners on the repaired patch. Use seat covers or mats in high traffic zones if possible to preserve the repaired area.
When to seek professional help. If the wear is larger than a few millimeters, involves deep cracks, or affects the stitching or padding beneath, a professional upholstery service can re-dye, retexture, or patch with a matching piece of leather, ensuring durability and a seamless look. A shop with automotive upholstery experience can also re-color and emboss to match texture precisely and can check for underlying padding wear that may undermine a DIY repair. The best approach balances your time, budget, and the importance of color match and texture consistency. If in doubt, a consultation can help determine whether a DIY fix will hold or if professional service is the prudent option.
A practical note on measurement. Before and after each step, compare the repaired area to adjacent pages of leather in the seat to ensure the color and texture stay in harmony. Small deviations in shade can become noticeable in bright light, so keep testing in consistent lighting as you work. And remember that patience is the key; rushing can create an obvious seam or pooling that draws attention rather than concealment.
This seam by seam approach keeps the repair incremental, controllable, and reversible in the sense that you can back off and rework a layer if the color is off. By the end, the repaired zone should read as a light touch of care rather than a repair, preserving the seat’s overall tone and feel. For a concise reference, you can return to this guide or consult a professional guide to repairing auto leather seats for a short overview of techniques and decision points.
From Fray to Finish: Repairing Small Tears and Holes in Leather Auto Seats
The first sight of a small tear in a leather car seat can feel like a crack in the confidence you have in your vehicle. Leather seats carry a sense of luxury and durability, but they are also living fabric, bending and flexing with every ride. A small tear or a light hole is not the end of the interior, but it is a signal that careful, deliberate repair is possible. When the damage is minor, a DIY repair can recover most of the seat’s original look and feel, saving time and money and preserving the overall vibe of the cabin. The approach hinges on a simple truth: leather is a layered material. There is the top surface layer, a grain pattern that gives the seat its texture, and beneath that a more supportive backing. The repair strategy for small tears leverages that structure. By cleaning thoroughly, filling with a color matched compound, smoothing so the repair sits in, and then layering color to blend, you can restore continuity to the surface. It is not about invisibility alone; it is about resilience, so the repaired area can withstand the next few seasons of daily use without cracking again. When done with care, the patch or filler disappears into the grain, and you can forget the tear ever happened as you reach for the door handle and slide into the seat with confidence.
Repairing small tears also carries a practical lesson about leather maintenance. The same rules that guide professional restoration apply on a smaller scale: prepare the environment, work in modest temperatures with controlled humidity, and give each layer time to cure. The steps below weave together cleaning, filler work, cap and color matching, and finally an optional texture touch. They are written to feel like a single, continuous process rather than a checklist that breaks the flow. This approach respects the seat as a single surface that tells a story of recent road trips and daily routines, not simply a repair problem waiting to be solved. The goal is to restore appearance and flexibility without creating a new point of failure. In the end, the repaired area should flex with the rest of the seat, and the texture should remain as natural as possible. To deepen your understanding, consider visiting a broader, machine-assisted guide linked within this chapter. For a practical, comprehensive overview, see this detailed guide from Motor Works: Repairing Auto Leather Seats.
Before you begin, set expectations that the repair will be most durable when the tear is less than about 1 centimeter and located away from high stress points such as seat edges or bolsters. If a tear runs along a seam or sits near a pivot point of the seat adjustment or the bolster itself, the edge may flex differently than the rest of the surface, which can lead to a recurrence of damage or a visible seam line after repair. In those cases, or if the tear extends through the grain at a critical angle, professional assessment becomes prudent. The aim here is to equip you with a solid, lasting DIY solution for the most common minor cases, while acknowledging when the job requires a careful hand and specialized tools. The materials you choose should be automotive grade and color matched to your seat, but you do not need to invest in a full professional kit to start. A midrange DIY kit, plus a little patience, is often enough to achieve a durable result for small tears. The cost can stay well under fifty dollars for the essential components, which makes the process accessible and practical for most drivers who notice a scuff or a slender slit while cleaning their interiors.
Begin with the most fundamental step: cleaning. A clean surface is the bedrock of any repair. Dirt, oil, and sweat dull color and can interfere with how a filler adheres and how the dye absorbs later on. Use a neutral leather cleaner and a soft cloth, gently working in small circles across and around the damaged area. The goal is to lift contaminants and allow the leather to dry completely. Do not rush this step, because any residual grease can prevent the filler and dye from bonding evenly. While you clean, consider elevating the ambient conditions to a comfortable room environment. The repair will be more predictable if the air is not humid and the temperature sits between fifteen and twenty five degrees Celsius. A dry surface helps solvents from the dyes to evaporate evenly, which reduces the chance of blotching and color variation after you apply the stain or tint. If you share your vehicle with sunlight or heat, park in shade for the repair window and use a fan to keep the air moving without directly blowing heat on the leather. A well ventilated area is important for any dye or solvent, and it also makes the process more comfortable.
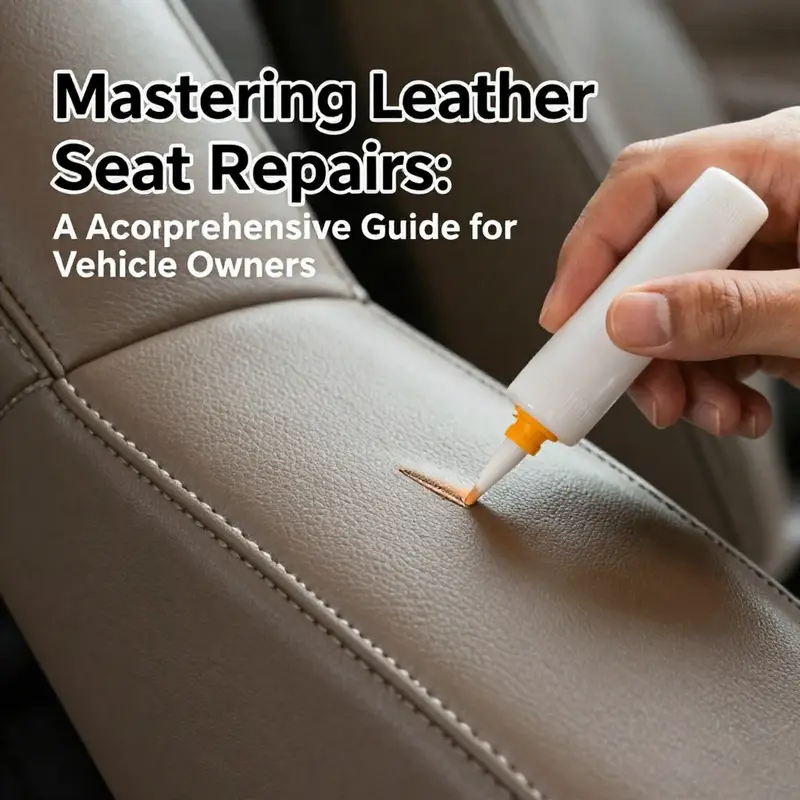
With the surface clean and dry, you are ready to address the tear itself. For minor tears less than a centimeter, the repair typically begins with an automotive leather filler. Choose a filler that is compatible with leather and designed for automotive use. Using a fine applicator or brush, apply the filler into the tear, making sure to fill the gap completely. It is essential to work the filler into the base of the tear so that the surface looks continuous and there is no hollow edge where the leather can peel again. The goal is a level surface that sits flush with the surrounding grain. After application, allow the filler to dry. In most cases, 15 to 30 minutes is enough for initial set, but always follow the manufacturer’s instructions for curing times. If your environment is cooler or more humid, the drying time can extend; patience here pays off in the long run because premature sanding can create ridges or indentations that leave the repair obvious.
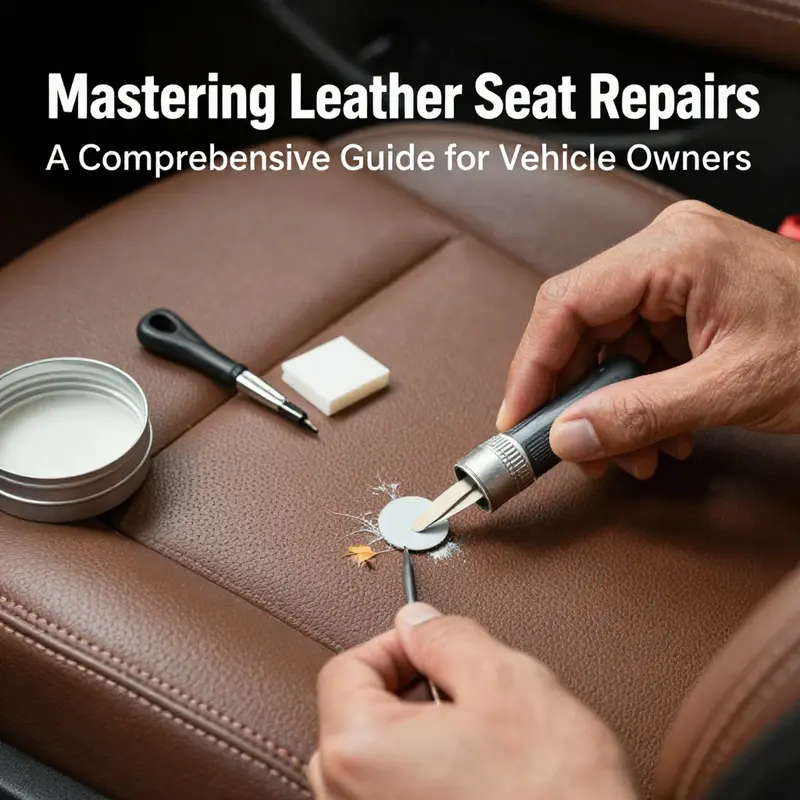
Once the filler has set, the next step is to gently smooth the area so that it sits at the same plane as the rest of the seat. Wet sanding with a fine grit paper is often the gentlest approach. A 2000 to 3000 grit sandpaper, used lightly and with plenty of water, can bring the repaired patch flush with the surrounding leather. The aim is a micro-smoothing rather than a heavy abrading, because the grain texture lives just under the surface. Sand in the direction of the grain to avoid creating new micro-scratches that stand out when you later apply color. A key detail here is to inspect the surface under oblique light, which helps reveal any remaining unevenness. If the fill sits high or feels a touch stiff, repeat the light sanding once more, taking care to maintain a uniform level across the repaired zone. A careful touch with the sandpaper often makes the difference between a repair that reads as a temporary fix and one that disappears into the seat’s texture.
Color matching follows smoothing. The repair will look best if you tint it with a matching dye or colorant in several very thin coats. Before you begin, test the dye on an inconspicuous area of the seat or on a color test card if you have one. The goal is to blend rather than mask. Apply the dye in gentle, even layers, letting each coat dry before applying the next. This layering not only builds depth but also helps the dye react with the leather’s natural oils to produce a consistent hue. If you notice any slight variation after the first couple of layers, you can rework that area with additional thin coats. It is better to apply many light layers than a single heavy layer that can pool and create a patchy look. As you progress, check the match under the same lighting conditions you used during cleaning. The lighting in your garage or driveway can differ from your home, and the human eye is sensitive to small hue undertones when you are trying to achieve a seamless look. A gradual approach to tinting is always more forgiving than a rushed, single-pass application.
After color alignment, a final protective step helps the repair age more gracefully and resist future wear. A light sealant or conditioner applied over the repaired area helps restore suppleness, protect the dye from fading, and reduce the risk of new cracks forming. This step is especially important because the heat of the car cabin and the friction of daily use can stress newly repaired leather. Allow the dye to cure thoroughly between coats, and then permit the sealant to set as directed by the product instructions. In most cases, a full cure of at least 48 hours is advisable before exposing the repaired seat to heavy use. During this time, resist the urge to sit with heavy pressure on the area or to lean against it with anything that might indent the surface. A gentle hand and a patient schedule will yield a better end result. It is worth noting that you can refresh the color slightly after the initial cure if the match appears slightly off in certain light. The texture and shading can be fine-tuned with small adjustments in dye density or by lightly adjusting the amount of liquid applied with each pass.
For holes up to about five square centimeters, the patch method is a natural extension of the small tear technique. The packer approach requires a little more planning because you are adding a backing material to fill the void behind the seat surface. Start by preparing the hole edges with a light sanding to remove any frayed fibers and to create a rough edge that fosters adhesion. Then insert a backing material behind the hole. This can be a small piece of leather or a compatible fabric that will not collapse under pressure. The patch itself should be cut slightly larger than the hole so that the edges are supported once glued. Apply a durable adhesive that is appropriate for leather and the backing material to both the back of the patch and the seat surface. Press firmly and hold for a moment to ensure a strong initial bond, then place a weight on the patch to maintain contact during curing. A full cure of 24 hours is typical for this arrangement. After curing, trim any excess material and use a leather repair kit to fill in any gaps and to reestablish the grain texture as much as possible. Finally, reapply color and seal as described earlier. It is important to note that the patch method, while effective, may produce a slightly different texture in the repaired area because the grain will reflect the patch differently than the surrounding surface. If the tear is near a high-stress area, such as the side bolster or a seat seam that undergoes constant flexing, the durability of a patch may be compromised over time. In those cases, a professional assessment is prudent to ensure the repair can handle ongoing use without compromising safety or comfort.
The decision to DIY or to seek professional help should consider several factors. DIY repairs are a practical option for minor damage, typically costing less than a typical service, and they can restore a majority of the seat’s original appearance. The practical numbers from recent consumer reporting suggest that professional repair for small to medium holes can cost several hundred dollars but yields results that many drivers consider close to factory appearance. The value lies in durability and precision—professionals have access to color matching with spectrophotometers, controlled environment spraying for seamless color gradients, and advanced grain restoration techniques. In the context of safety and comfort, it is reasonable to reserve professional help for larger tears, tears near critical points like side bolsters, or tests where the repair demands exact grain replication or long-lasting durability. The broader takeaway is clear: for small, well-contained damage, a careful DIY approach is often sufficient, while for anything deeper or located in a high-stress zone, professional repair offers a higher probability of long-term satisfaction. The aim is to preserve the interior’s look and feel while maintaining the seat’s flexibility and comfort. The jusqua, or final check, lies in how the surface responds to daily use after the repair has cured. A week after completing the process, touch the repaired area with your fingers, check for any residual stiffness, and confirm there is no binding sensation when you flex the seat. A properly executed repair should disappear into the texture of the seat and feel like a natural extension of the leather, not a separate pad or patch. If you notice any recurring stiffness or color mismatch under bright light, revisit the steps with a conservative touch—another light layer of dye and a careful blend can often reconcile the texture and shade without requiring a complete redo.
In closing, small tears and holes in leather car seats are not an irreversible accident but a condition that responds well to methodical care. The repair path outlined here emphasizes patience, precision, and a respect for the leather’s natural behavior. It introduces a practical workflow that begins with a clean surface and ends with a flexible, color-matched finish that stands up to the next season of driving. For many, the process is empowering: a way to extend the life of a beloved vehicle interior and to preserve the confidence of stepping into a cabin that feels well cared for. If you are considering expanding your knowledge beyond the basics, there is a broader set of resources that can guide you through more complex repairs, including professional-grade color matching and texture replication. Additionally, remember that ongoing care is essential. Regularly applying a dedicated leather conditioner helps retain moisture and keep the surface supple, reducing the likelihood of future cracks and spalling. Park in shade when possible and use sun shades to minimize UV exposure. The combination of smart maintenance and well-executed repairs can keep your leather seats looking harmonious with the rest of the vehicle for many miles to come. For more detailed guidance and a deeper dive into the science behind color matching and grain restoration, you can explore the broader repair resources available online, which complement the practical steps described here. If you want to see more examples and a broader discussion of the repair process, you can consult the linked internal resource for readers who want a more comprehensive, step-by-step treatment of the topic: Repairing Auto Leather Seats. And for deeper reading on professional scale techniques and their outcomes, the external resource at Pacific Auto provides extended context and comparisons to DIY outcomes.
External resource: https://www.pcauto.com.cn/auto/repair/leather-seats-repair/
From Large Tears to Lasting Comfort: Navigating Leather Seat Repairs and When to Seek Professional Help
Repair work on leather auto seats often sits at the crossroads of practicality and patience. When damage stretches beyond tiny scratches or small punctures, the decisions you make can determine not only how the seat looks but how it holds up under daily use. Large tears, burns, or areas where the leather has split through to underlying foam or backing material demand a different mindset from the start. DIY optimism is valuable, but it must be tempered by a clear assessment of risk—both aesthetic and structural. The goal is not simply to cover a hole but to restore comfort, texture, and resilience so the seat feels like the original rather than a patched patchwork. In this chapter we walk through the terrain of substantial damage, the methods that work best for different circumstances, and the practical reasons to lean on professional restoration when the damage crosses a certain threshold. The aim is to provide a narrative that helps you recognize when you can attempt a repair, what you should expect if you do, and when to step back and entrust the job to specialists who bring years of experience, specialized gear, and a guarantee that a seat will endure a few more years of daily use without betraying its original feel and appearance.
First, a realistic appraisal is essential. Large tears differ from smaller flaws not only in size but in their impact on the seat’s structure and appearance. A tear greater than a few square centimeters often involves frayed edges, a loss of leather’s natural grain and consistency, and sometimes a breach in the backing materials. The location matters almost as much as the size. A repair in the center of the seat, where the most weight and movement occur, is more demanding than a tear tucked against a side bolster. Similarly, tears that sit near seams or stress points may be compounded by stretching and compression during everyday use. Cigarette burns, scorch marks, or deep gouges add another layer of complexity. The repair has to blend not only color but texture and translucence, because leather grain responds to light and wear in subtle, dynamic ways that are hard to replicate with a patch or filler. In short, when you face a large tear or a burn of notable size, you are entering a space where the outcome hinges on careful technique, appropriate materials, and a willingness to consider professional help as a prudent option rather than a last resort.
The decision to DIY or bring in a professional hinges on several interrelated factors. The first is the extent of the damage. Small tears or burn marks under a couple of centimeters, where the edges can be coaxed to lie flush with careful sanding and adhesive, can be addressed with a methodical fill, color matching, and a protective topcoat. Once the damage exceeds about 5 square centimeters, or if multiple tears radiate outward from a single spot, the DIY approach begins to lose its reliability. The second factor is the seat’s location and intended visibility. A repair in a rarely seen rear seat, though not ideal, has more leeway than a repair in the driver’s seat or a front passenger chair that faces the cabin every day. The third factor is safety and structural integrity. If you suspect that the tear has affected the foam backing or the stitching around a seat’s frame, the repair is not just cosmetic. In such cases, the risk of future seam failure increases, and the most dependable outcome often requires a professional restoration that can re-anchor the leather to its backing or even replace damaged patches with correctly matched patches that align with the seat’s original grain and tension.
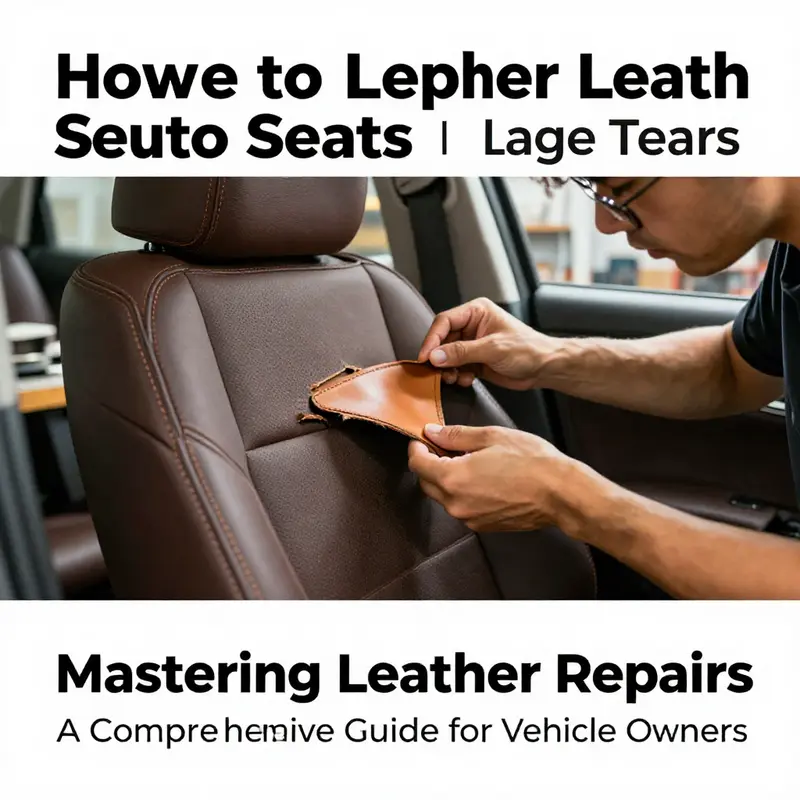
For large tears or burn damage, the practical path often begins with a patching strategy. In a controlled repair, you might prepare the area by trimming away the loose fibers, smoothing the edges, and lightly scuffing the surrounding surface to improve adhesion. A matching leather patch, cut slightly larger than the hole, is then bonded to the seat using a strong, flexible adhesive. The patch should be clamped or weighed down for a full 24 hours to ensure a bond that can withstand the pull and movement generated by regular sitting and shifting. After the adhesive cures, the edges are often feathered with a thin layer of high-quality filler designed for leather to fill in the seam between patch and original surface. The goal is to produce a surface that sits flush with the surrounding leather while remaining flexible enough to move with the seat and resist cracking. The texture, however, remains the most challenging element. Filler alone tends to stiffen, and the grain pattern of the original leather is difficult to reproduce by hand. Some technicians use a micro-sanding technique to micro-abrade the repaired surface so the grain’s texture can be mimicked with a specialized micro-stamping tool or a careful pigment-matching spray that creates a near-identical grain impression. This is not elementary work; it requires a delicate touch and a spare portion of the grain pattern already present on the seat material to guide the texture replication.
Color matching adds another layer of complexity. Leather does not exist in a single flat color; it is a living surface that exhibits depth, translucence, and micro-shading that are influenced by sun exposure and wear. A successful large-tears repair must integrate color across layers—base color, midtones, and the final protective sealant—so that the repaired area becomes virtually indistinguishable from the surrounding leather. The process often begins with a thorough cleaning and conditioning of the area to ensure the surface is hydrated enough to accept color evenly. The colorant itself is applied in very thin layers, with each pass allowed to dry before the next. The grain pattern may be re-created with a grain sponge or by airbrushing a fine, stippled texture to mimic the natural variation found in untouched leather. In large repairs, the finished appearance should not only match color but also reflect light in the same way as the rest of the seat. A mismatch in sheen can betray a repair even if the color is perfect.
Another critical consideration is texture and feel. Leather surfaces don’t just look different when damaged; they feel different too. A patch can be conspicuous if it sits too rigidly against adjacent leather because it lacks the same pliability as the original. To address this, professionals may incorporate a multi-layer approach, where a thin layer of texture gel or permeable conditioner is applied to the repaired area to restore suppleness and encourage micro-movements of the leather. In some cases, technicians will use a small embossing tool or a micro-embossed patch to reproduce the natural grain direction and density of the seat. This level of texture fidelity is what separates a repair that lasts from one that cracks or peels with use.
The decision to pursue professional repair often follows a straightforward cost-to-benefit appraisal. Large tears and burns typically push repair costs into a broader range that reflects the materials and labor involved. While a DIY solution for smaller damage might stay under a modest budget, professional restoration for significant harm can range from several hundred dollars to near a thousand—depending on the damage’s size, the seat’s location, and the shop’s approach. The value of professional service, however, is not limited to the aesthetic result. A trusted shop offers a warranty on workmanship, a critical safeguard when a repaired area remains a high-wear zone. When a professional undertakes the job, you’re paying not only for the visible patch but for the long-term durability of the entire seating area, including dyeing, sealing, and sometimes even re-skinning or grafting to maintain color stability and texture continuity across the entire seat.
That is not to say DIY should be dismissed entirely. There are situations where a well-considered DIY repair can yield durable, satisfactory results, especially if the damage is isolated to a small area and the surrounding leather remains in excellent condition. If you choose to tackle a large tear with a DIY mindset, proceed with humility and a carefully staged plan. Start with a clean, dry surface using a neutral leather cleaner and a soft cloth. Plan your color strategy by testing the dye or tinted finish on a discreet area, ensuring that you have enough pigment to cover the repair in multiple light coats. If you attempt a patch, select a patch that matches both color and grain density as closely as possible, and ensure the backing is stable and free from moisture that could compromise adhesion. A slow, patient approach often yields a better result than rushing a patch into service. And even in DIY scenarios, the final steps—conditioning and protection—are essential. A protective coating or conditioner applied after the repair helps restore suppleness, and it also adds a barrier against future cracking and UV-induced fading that can hasten the repair’s visibility.
For those facing repairs that extend beyond the realm of DIY, the professional option carries certain advantages that align with the needs of most drivers. Technicians who specialize in automotive interiors bring a suite of tools that are simply unavailable to the casual at-home fixer. They use heat-assisted methods to fuse leather patches with greater precision and to manage the micro-wiber of the leather so that the color, texture, and sheen align with the rest of the seat. They also have access to OEM-matched patches and high-grade color-matching systems that analyze the original leather’s undertones and shading with an accuracy that is very difficult to replicate in a home project. In many shops, the process begins with a precise assessment, including photos and a hands-on test of the surrounding leather to determine the best course of action. If the damage is too extensive or located near a high-stress zone, a professional may propose re-skinning as a definitive solution. Re-skinning involves removing the damaged section and replacing it with a fresh panel of leather that is matched to the seat’s overall tone, texture, and grain movement. In some cases, the repair may progress to a full patch, where multiple patches are blended to form a seamless surface that feels continuous under touch. It’s an approach that requires careful engineering and an eye for texture continuity, something that separates a repair that lasts from one that looks repaired.
The professional approach also accounts for the seat’s ultimate use and the car’s overall value. For classic or high-mileage vehicles, a high-fidelity restoration can preserve resale value and maintain the cabin’s overall feel. A reputable shop will discuss the options openly, including re-dyeing the entire seat or entire section to ensure uniform color evolution over time. They may suggest a protective topcoat that provides UV resistance and stain protection, a step that becomes especially valuable in cars that live in sunny climates or that see heavy exposure to daily sun through windows. The aim is not merely to hide a hole but to restore a seat that looks and performs as well as, or better than, it did when new. That is why professional restoration often yields a lavish result that can withstand years of daily use, weather swings, and the inevitable sun exposure that ages leather differently in different panels of the same vehicle.
If you decide to engage a professional, there are practical questions to guide the conversation. Ask about the methods they use for color matching, whether they offer grain duplication or embossing to reproduce texture, and what kind of warranty accompanies their work. Inquire about the materials they plan to use, including the type of leather patches, the adhesives, and any fillers or sealants. A thorough technician will explain the limitations of their approach, set realistic expectations for color and texture matching, and provide a clear schedule for repair and curing. They may also advise on whether any seat components need temporary removal or disassembly, which can influence turnaround time and cost. It is reasonable to request a written estimate that itemizes materials, labor, and warranty terms so there are no surprises when the bill arrives.
Beyond the immediate repair, consider long-term maintenance that supports the repaired area and the rest of the seat. Large-tears repairs demand more vigilant conditioning to guard against drying and cracking in the repaired skin. Regular conditioning helps maintain suppleness and reduces the chance that the patch or grafts become rigid over time. Sun exposure remains a critical enemy; use sunshades or park in shaded areas whenever possible to minimize UV damage to both repaired and unrepaired leather. A monthly conditioning routine, using products compatible with your vehicle’s leather type, can dramatically extend the life of the repair and preserve color consistency. The life cycle of a repaired seat is not measured in days or weeks but in years, and the best outcomes come from a sustained, proactive care plan rather than a single, dramatic repair.
In the end, the choice between a DIY repair for a large tear and a professional restoration is not a binary proposition but a spectrum. If the damage is contained, unobtrusive, and the surrounding leather is in excellent condition, a carefully executed at-home repair can serve as a valid and durable solution. If, however, the tear touches the backing, spans to the foam, or sits in a highly visible area where light, wear, and moisture can reveal differences in color and texture, a professional restoration is the prudent path. It ensures proper grain replication, proper adhesive bonding, and a color-match that respects the seat’s original beauty. It also offers the reassurance of a warranty and the accountability that a skilled technician brings to a project where the margin for error is small and the stakes are high—the visual integrity and long-term durability of a seat you rely on every day.
For readers seeking a practical starting point that aligns closely with professional standards, a reliable reference offers a bridge between home projects and professional methods. See Repair Auto Leather Seats for a detailed guide focused on ensuring durability and a seamless finish in more demanding repairs. This resource provides insight into how the repair surfaces are prepared, how color matching is approached, and how the final sealant protects the repaired area over time. It can help readers calibrate expectations and understand the careful steps that separate a sturdy, long-lasting repair from a temporary fix. Repair Auto Leather Seats
As you weigh your options, keep in mind that the decision will influence your vehicle’s comfort, value, and daily enjoyment. Large tears and burns present a unique challenge that tests both technique and patience. The right choice—whether DIY with meticulous planning or professional restoration with a guaranteed outcome—aims to restore the seat to a state that feels, breathes, and wears like the original. The best repairs do more than hide damage; they restore confidence when you slide into the seat, knowing the material supports you as you drive, commute, and travel. The path you choose shapes not only the appearance of the interior but the long-term health of the leather and the overall cabin experience that defines how you relate to your vehicle every day.
External resource: https://www.leathercraftsfactory.org/leather-repair-tips
Final thoughts
Repairing leather auto seats doesn’t have to be daunting. With the right techniques and supplies, you can effectively manage minor scratches, tears, and even larger damages. Whether you’re a motorcycle owner or someone who takes pride in maintaining your vehicle, understanding these repair methods not only saves you money but also enhances the aesthetics of your ride. Keep your leather seats well-maintained and preserve that luxurious feel and look by applying the advice and techniques outlined in this guide. Remember, caring for your leather is an investment in the longevity and comfort of your vehicle.