
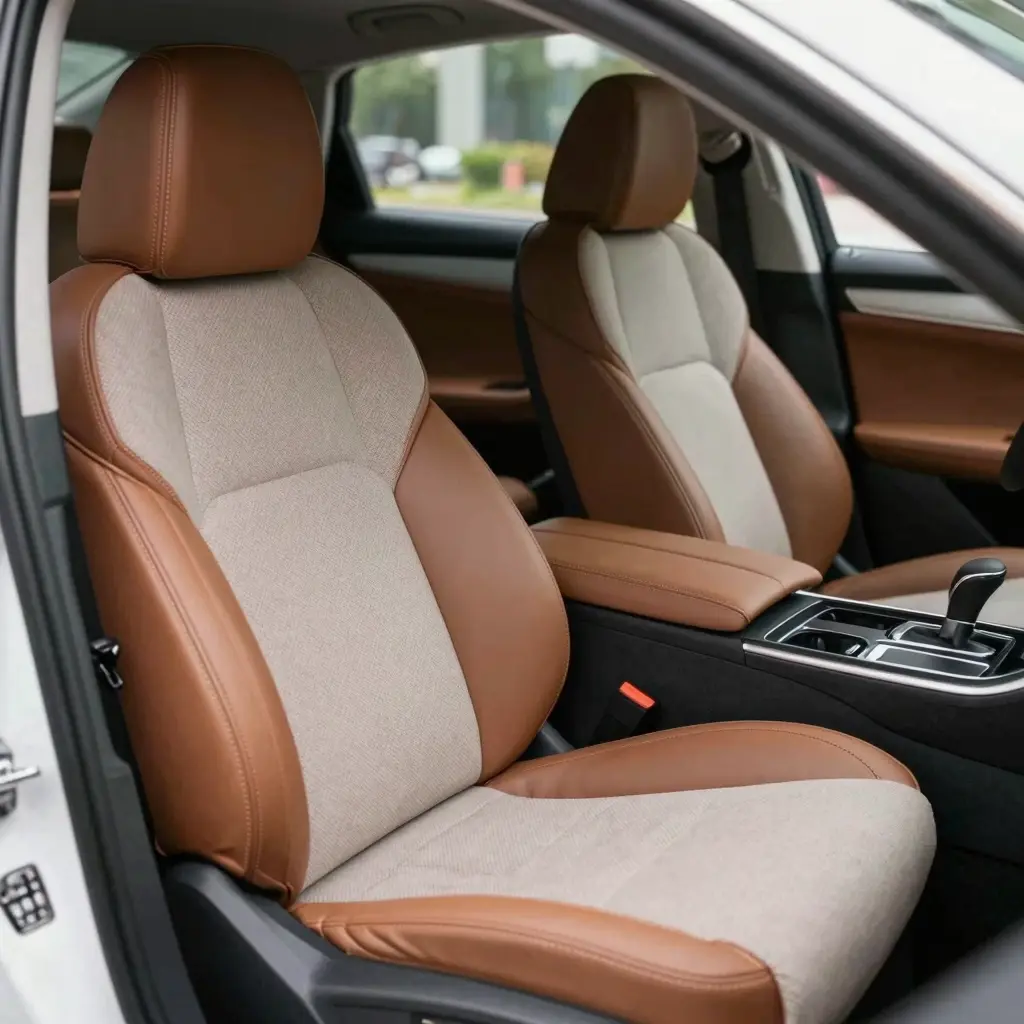
In the realm of automotive care, maintaining the integrity of your vehicle’s upholstery is often overlooked, yet it’s a crucial element of both aesthetics and comfort. Have you ever stepped into a car only to be greeted by worn-out, stained seats that detract from your driving experience? Common issues like fabric fraying, leather cracking, or stubborn stains can significantly impact not just how your vehicle looks but also how comfortable it feels during those long drives. Fortunately, addressing these problems through the right techniques to repair auto upholstery can restore the beauty and functionality of your car’s interior. Whether you drive a motorcycle or a passenger vehicle, understanding how to properly maintain and repair your upholstery can enhance your ride while prolonging the life of your investment. Let’s dive deeper into the methods and importance of auto upholstery repair, ensuring you ride in both style and comfort.
Common Types of Auto Upholstery Materials
When it comes to auto upholstery, choosing the right material is crucial for comfort, aesthetic appeal, and durability. Here’s a detailed list of common auto upholstery materials along with their pros and cons:
1. Leather
-
Pros:
-
Luxurious appearance and feel
-
Durable and long-lasting
-
Easy to clean and maintain
-
Provides comfort as it breathes
-
Cons:
-
Often more expensive than other materials
-
Can be prone to cracking and fading if not properly maintained
-
Requires conditioning to keep it supple
Learn more about maintaining leather here
2. Vinyl
-
Pros:
-
Affordable and cost-effective
-
Easy to clean and resistant to stains
-
Available in a variety of colors and textures
-
Good for repairs and replacement
-
Cons:
-
Can wear out faster than leather
-
Less breathable, which may lead to discomfort in extreme temperatures
-
Usually doesn’t have the same luxurious feel as leather
3. Fabric
-
Pros:
-
Comfortable and breathable, ideal for hot climates
-
Generally less expensive than leather or vinyl
-
Available in a wide variety of patterns and colors
-
Cons:
-
More difficult to clean and can stain easily
-
Not as durable as leather or vinyl, may wear down more quickly
-
Prone to fading under direct sunlight
4. Faux Leather (PU Leather)
-
Pros:
-
Eco-friendly and cruelty-free alternative to genuine leather
-
Easy to clean and maintain
-
More affordable than real leather
-
Cons:
-
May wear down quicker than genuine leather
-
Lacks the luxe feel of real leather
-
Can tear under stress
Choosing the right upholstery material is vital in enhancing your vehicle’s comfort and aesthetics. Each material has its unique attributes, so consider your needs and preferences before making a choice!

Tools for Auto Upholstery Repair
When it comes to repairing auto upholstery, having the right tools on hand is vital for a successful DIY project. Here’s a comprehensive list of necessary tools and materials for effective auto upholstery repair, along with their purposes and importance.
Essential Tools
-
Sewing Machine
A heavy-duty sewing machine is crucial for stitching upholstery materials together. Consider machines that allow for heavy threads as they provide strength and stability for your seams. -
Trim Removal Tools
These tools help you safely disassemble interior panels without damaging them. Trim removal tools are essential for getting under clips and releasing upholstery from frames. -
Hog Ring Pliers
Use hog ring pliers to secure upholstery materials to frames or padding. These pliers make it easy to attach the fabric snugly without slippage. -
Upholstery Needles
Heavy-duty needles are necessary for sewing through thick upholstery fabric or leather. Using the right needle size can greatly improve the quality of your stitching. -
Fabric Glue
Fabric glue can hold pieces temporarily in place before sewing or be used for bond repairs where stitching isn’t feasible. This is particularly handy for vinyl and thin materials. -
Scissors
Invest in sharp, curved scissors designed for cutting fabric and upholstery. A good pair of scissors will help you achieve clean edges and precise cuts. -
Staple Gun
A staple gun is indispensable for attaching fabric to frames or backing. Look for electric options to make the job easier, especially for large areas. -
Measuring Tape
Accurate measurements are vital in upholstery work, making a measuring tape a must-have for ensuring proper fit and alignment of the materials. -
Steam Iron or Fabric Steamer
A steamer can help remove wrinkles from fabric before applying it, giving your finished work a professional look. -
Awl
An awl can be a handy tool for punching holes for stitches, especially when working with thick or layered materials.
Importance
Equipping yourself with these tools for auto upholstery repair not only enhances the quality of your work but also increases your efficiency. Each tool serves a critical role in ensuring your repairs are durable, aesthetically pleasing, and performed safely. For those looking to dive deeper into the intricacies of auto maintenance, check out our guide on common engine maintenance mistakes to ensure your vehicle remains in top shape.
| Damage Type | DIY Cost Estimate | Professional Cost Estimate |
|---|---|---|
| Minor Tears | $10 – $50 | $75 – $150 |
| Major Rips | $50 – $100 | $200 – $400 |
| Fabric Replacement | $50 – $100 (Material) | $300 – $700 (Labor & Material) |
Sources:
- DIY vs. Professional Upholstery Repair: When to Call the Experts – Gomez Upholstery
- Real Upholstery Repair Costs: What You’ll Actually Pay in 2024 – VT Furniture Works
- How Much Does Upholstery Repair Cost? – FSN Pro
How to Perform DIY Auto Upholstery Repair: A Step-by-Step Guide
Maintaining and repairing your vehicle’s upholstery not only extends the life of your interior but also enhances your driving comfort and car resale value. This comprehensive guide provides clear and user-friendly steps to master DIY auto upholstery repair, focused on stitching, gluing, and upholstery maintenance.
Step 1: Assess the Damage
Before starting the repair, inspect the upholstery to determine the type and extent of damage. Look for tears, holes, loose seams, or worn areas. If the fabric is cloth, it typically repairs more easily, while leather or vinyl might require specialized products.
Step 2: Gather the Right Materials
You’ll need:
- Upholstery fabric patch (matching color/texture)
- Heavy-duty thread and upholstery needle
- Fabric or vinyl adhesive/glue (high-temperature resistant for headliners)
- Scissors
- Seam ripper
- Upholstery cleaner and conditioner
- Optional: foam padding if the cushioning beneath needs repair
For affordable and quality fabric options, you can explore specialized automotive upholstery fabric vendors.
Step 3: Clean the Area
Use an upholstery cleaner suitable for your material to thoroughly clean the damaged area. This ensures the adhesive bonds well and the patch adheres securely. Allow it to dry completely before proceeding.
Step 4: Stitching Repairs
When repairing tears or splits:
- Use a seam ripper to gently open any stubborn or ragged edges.
- Cut a fabric patch slightly larger than the damaged area.
- Thread your upholstery needle with heavy-duty thread matching your upholstery color.
- Use a strong stitch like the whip stitch or ladder stitch to sew the patch onto the upholstery, ensuring tight and even stitches for durability.
Tip: Keep stitches small and consistent for a professional finish.
Step 5: Gluing Repairs
For holes or when stitching isn’t feasible:
- Apply a thin layer of fabric or vinyl adhesive to the backside of the patch.
- Press the patch firmly over the damaged area, smoothing out wrinkles and bubbles.
- Use clamps or heavy books to apply pressure while the glue cures (follow product instructions for curing time).
This technique is also ideal for repairing headliners and other large flat surfaces.
Step 6: Maintain Your Upholstery
Regular maintenance helps prolong upholstery life:
- Clean spills immediately to prevent stains.
- Use appropriate cleaners and conditioners depending on your upholstery type (e.g., leather conditioner).
- Avoid prolonged exposure to direct sunlight, which can cause fading and cracking.
- Consider seat covers for added protection, especially in older vehicles.
Final Thoughts
DIY auto upholstery repair might seem daunting, but with the right approach and materials, it’s an achievable project that can save you significant repair costs. Start with small repairs, and build confidence over time to tackle more extensive damage.
For more insights on vehicle care, including engine maintenance and repair tips, you may want to check out this detailed guide on DIY auto repair basics that complements your upholstery work.
By investing a little time and care into your vehicle’s interior, you maintain its value and comfort. Whether you own a car or motorcycle, following this guide on DIY auto upholstery repair makes restoring those worn or damaged interiors much more approachable.
References:
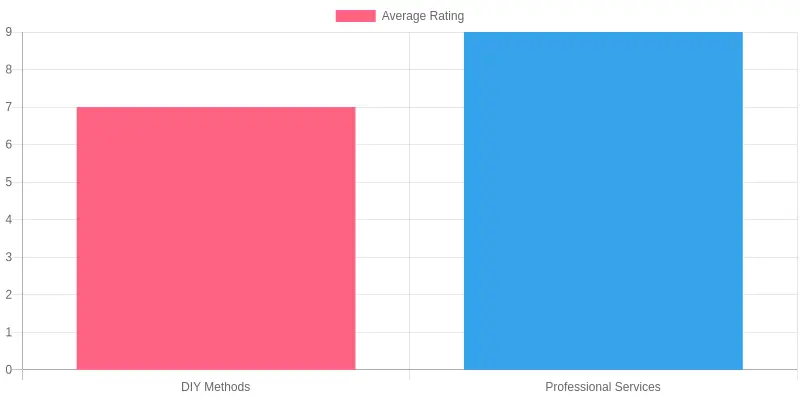
In the pursuit of upholstery repair, understanding user satisfaction can guide you toward the best method. The chart above illustrates the satisfaction ratings for different upholstery repair methods:
| Method | Average Rating (1-10) | Source |
|---|---|---|
| DIY Methods | 7 | Family Handyman |
| Professional Services | 9 | ShearComfort |
From the data, it’s clear that while DIY methods score a 7, indicating general satisfaction among users, professional services are rated higher at 9, reflecting their perceived quality and expertise. This information is beneficial for motorcycle owners and auto enthusiasts intending to make informed decisions about upholstery repairs.
Common Mistakes to Avoid During Upholstery Repair
Repairing auto upholstery can be a rewarding project, but it’s essential to be aware of common pitfalls. Below are mistakes you might encounter along with tips on how to avoid them:
-
Neglecting Preparation: Before diving into repairs, ensure you clean and prepare the surfaces properly. Stains or dirt can lead to poor adhesion and unsatisfactory results.
-
Using Inappropriate Material: Always select upholstery materials that are suitable for automotive use. Fabrics designed for home upholstery may not withstand sunlight and wear as well, which can lead to untimely degradation. For insights on material selection, you might find this guide on common upholstery mistakes helpful.
-
Incorrect Stapling Technique: Many DIYers err by stapling from one side to another rather than starting from the center outwards. This method ensures even tension across the material, which prevents wrinkles.
-
Ignoring Minor Repairs: Small rips or tears can expand over time if not addressed promptly. Always inspect your upholstery carefully and fix minor issues before they escalate into major repairs.
-
Skipping the Test Fit: Before final installation, ensure all pieces fit together properly. A test fit allows you to make adjustments and avoid unnecessary rework.
-
Overlooking Professional Help: Sometimes, avoiding a professional service can lead to more significant problems. While DIY projects are great, recognizing when to seek expert assistance can save both time and money. If you’re considering a professional service, check out insights on common reasons for needing upholstery repair for better understanding.
-
Failing to Follow Manufacturer Instructions: Always adhere to any product guidelines provided by manufacturers for adhesives and materials used. Ignoring these can lead to subpar results.
By steering clear of these common mistakes, you will pave the way for a successful upholstery repair project. Good preparation, material selection, and attention to detail can make a significant difference in the outcome!
“I couldn’t believe the transformation!”
“Highly recommend for excellent craftsmanship!”
“Very happy with the results. Amazing customer service!”
“Expert craftsmanship in auto upholstery repair.”
“Fast and reliable service, skillful technicians.”
As customers share their experiences, the quality of auto upholstery repairs stands out prominently in their feedback. Here’s a visual representation of testimonials from various customers satisfied with their auto upholstery repairs. 
Sources:
Conclusion: The Importance of Upholstery Care
In summary, maintaining your auto upholstery is not just about aesthetics; it’s crucial for ensuring comfort and longevity. A well-maintained interior enhances your driving experience, adds value to your vehicle, and can even extend the lifespan of your upholstery materials. Neglecting upholstery can lead to cracks, fading, and accelerated wear, resulting in costly repairs and replacements in the long run. Regular cleaning and care are vital for preserving the integrity of your vehicle’s interior, and as highlighted by experts, proper maintenance can significantly impact both comfort and style (learn more about the benefits of upholstery care).
Whether you’re a motorcycle enthusiast or a proud car owner, investing time and effort into upholstery care will pay off in numerous ways. Not only will your vehicle look better, but you’ll also enjoy a more pleasant driving experience.
If you’re ready to elevate your vehicle’s interior, we invite you to explore the comprehensive offerings at Summit Fairings. Our solutions are designed to meet your upholstery needs while ensuring durability and style. Don’t wait any longer; take the next steps to enhance your vehicle’s comfort and aesthetics today!