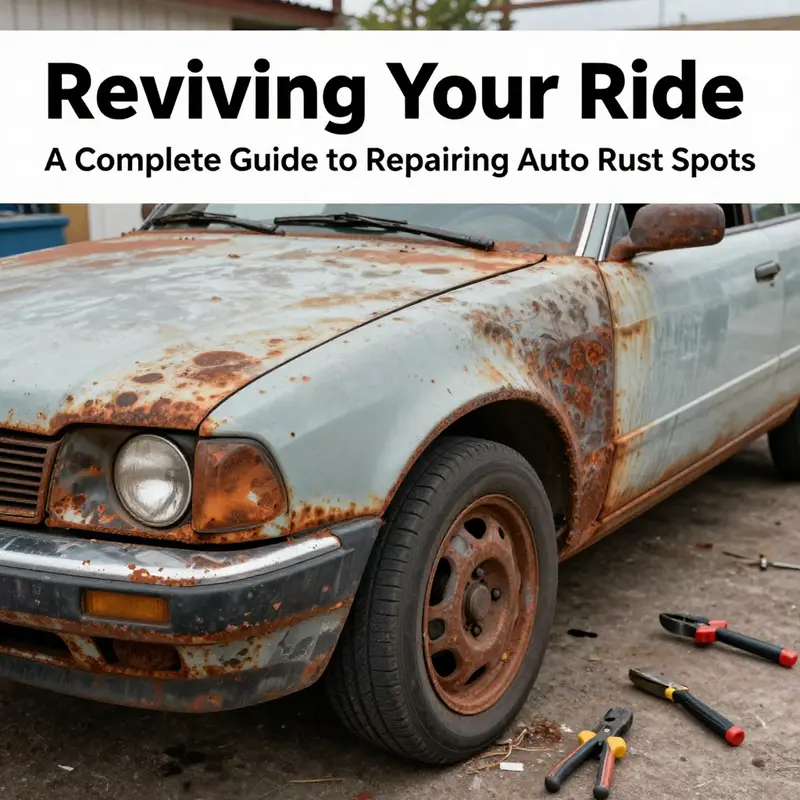
Rust can stealthily compromise the integrity of your vehicle, whether it’s a motorcycle or an automobile. Understanding how to assess rust severity, repair it effectively, and most importantly, prevent it from ever appearing is crucial for every vehicle owner. With the right knowledge, you can maintain your vehicle’s aesthetics and longevity. This guide will first explore how to determine the severity of rust, followed by detailed repair methods to combat it, and finally, we will cover effective preventive measures that can help you avoid such issues in the future.
Reading the Rust: How to Assess Severity Before You Repair Auto Rust Spots
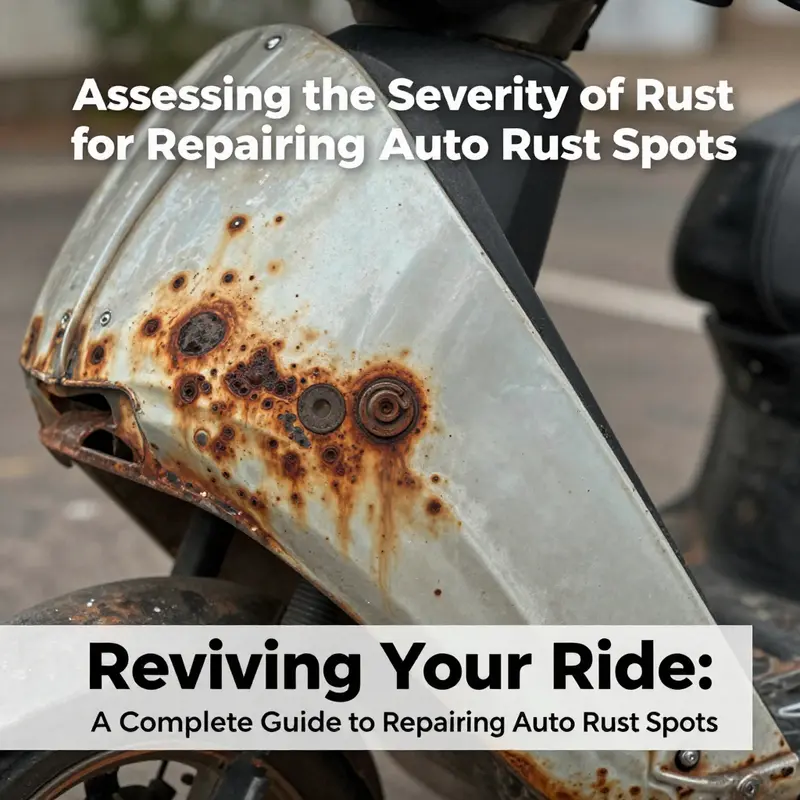
Begin with a careful visual scan using bright light to reveal rust halos around seams, edges, and joints. Look for discoloration that ranges from faint orange to deeper brown, and distinguish surface rust from pits, flaking, or corrosion that penetrates the coating. If you find holes, deep pits, or a soft, spongy feel when pressed, treat the area as structural or near-structural rust. A tactile test with a fingernail or plastic scraper can help you tell surface oxidation from deeper damage; if rust flakes away with light pressure, it is likely surface rust, whereas an indentation or soft patch signals progression inward. A gentle fingertip press can reveal softness or hollow sensations that indicate deeper trouble.
Beyond hands-on cues, use simple tools to map extent. A moisture meter can indicate hidden moisture beneath paint and undercoats, and a heat test with a hairdryer can reveal damp layers near the surface. Location matters: rust on visible panels may be managed cosmetically if the metal remains sound, but rust in hidden zones such as frame rails, sills, or near mounting points demands closer scrutiny and often professional evaluation. Classify rust into three bands—surface rust, deeper rust with flaking or pits, and structural rust with thinning or holes—and tailor your repair plan accordingly. For surface rust, cleaning, rust remover or conversion coating, primer, and paint may be enough. For deeper rust, consider more involved steps like patching or corrosion inhibitors; for structural rust, removal of damaged metal and replacement with new metal (often including welding) is typically necessary. The assessment guides the decision: whether a DIY approach suffices or whether to commission a body shop for cutting, welding, and refinishing.
Environmental factors accelerate rust: coastal climates, winter road salting, and persistent moisture increase risk. Regular washing, drying, and attention to undercarriage drains help reduce future exposure. After you repair, protective coatings like primers and sealants extend the life of the work. The goal of the assessment is to inform action, prevent rework, and choose the path that preserves safety and value. If you want deeper context, consider resources on how to repair auto rust and more technical guides that describe long-term repair sequences.
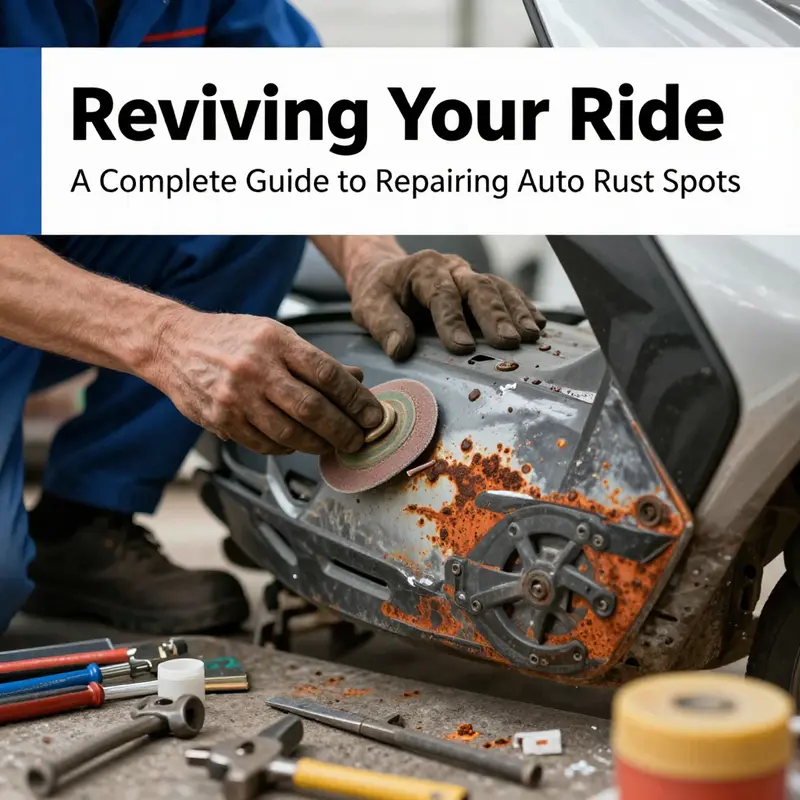
Restoring the Shiny Armor: A Practical, Step-by-Step Guide to Repair Auto Rust Spots
Rust on a car is more than a cosmetic flaw; it’s a signal of possible structural wear if left unaddressed. The approach to repairing rust spots should flow from a clear assessment of how far the damage has progressed, and then proceed through a sequence of preparation, treatment, and finishing that emphasizes adhesion, protection, and long-term resilience. When you look at a rusty patch, you’re not just looking at color changes or flaky edges. You are evaluating whether the metal beneath is intact, whether the surrounding paint still offers a barrier against moisture, and whether the repair will hold up to the stresses of road grime, temperature changes, and salt. This chapter walks you through a coherent, cohesive process that begins with judgment and ends with maintenance, with the aim of returning the panel to a uniform, protective, and aesthetically pleasing state. For readers seeking a concise, detailed, step-by-step reference, a dedicated guide is available through the internal resource linked here how-to-repair-auto-rust. It complements and expands on the insights offered in this chapter by providing practical checklists, tool lists, and exact dwell times tailored to different rust scenarios.
Rust repair begins with a practical, honest appraisal. Surface rust, the kind that sits on top of painted metal and presents as small, rough, reddish-brown pocks, is a different challenge than rust that has invaded through the paint to the metal itself, or worse, created holes. The first step is to determine whether the rust is superficial or penetrating. This distinction matters, because it guides the rest of the process. If you catch surface rust early, you can often restore the look and function with simple cleaning, careful removal of the oxidized layer, and a fresh seal of primer and paint. If the metal underneath has been eaten away, however, your repair plan must shift toward removing all compromised material and rebuilding the section, sometimes with reinforcement and patching. In that case, you may need to consider professional help, because the work can involve welding and panel replacement.
Preparation begins the moment you step into the repair area with the right mindset. A clean work surface reduces the risk of reintroducing rust once you close the repair. Start by washing the area with mild car soap and water to remove dirt, grease, and road grime. Rinse thoroughly and dry completely. Any moisture left behind will undermine adhesion and can cause rust to reappear later. The next step is to remove loose rust and flaking paint. A wire brush or abrasive paper is essential here. Begin with a coarser grit to knock away loose material, then move to a finer grit to create a smooth, clean edge around the defect. The goal is to expose bright, bare metal in the affected zone without gouging adjacent, healthy paint. A uniform, matte metal surface is the best canvas for primer to bond securely.
After you’ve cleared the loose material, you face a decision: treat the rust chemically or mechanically, and how aggressively to proceed. For light and moderate rust, chemical rust removers or rust converters can be effective. A rust converter chemically neutralizes iron oxide and creates a stable, paintable surface. If you choose this route, apply the converter according to the product’s instructions, usually letting it dwell for a prescribed period before wiping away any residue. The beauty of this approach is that it minimizes grinding and reduces the risk of thinning the surrounding metal. If you prefer mechanical removal, a light sanding with very fine grit can complete the job, exposing fresh metal that is ready for primer. In either case, the important point is that you must reach sound metal and ensure it is dry before moving on to priming.
For deeper rust or corrosion that has penetrated through the paint, the path becomes more demanding. You must remove all rust down to solid metal. A power tool, such as a die grinder with a sanding disc or a rotary tool, can be used to strip away the oxidized material until you see clean, unpitted metal. This step cannot be rushed; any remaining rust will continue to propagate under the paint and compromise the repair. If holes have formed, you may need to cut out the damaged section and weld in new metal, a process often referred to as patch paneling. This is the point at which many DIY enthusiasts pause, because welding involves heat, proper grounding, and a steady hand. If you sense that the job is beyond your comfort zone, seeking professional assistance is wise. A well-executed patch is stronger and more durable than a hastily welded temporary fix, especially in areas subjected to flexing, vibration, and road salt.
Once the surface is clean and rust-free, you’ll apply anti-rust primer to the bare metal. This primer is not merely a color coat; it is a barrier designed to inhibit future corrosion at the most vulnerable interface between metal and paint. Allow the primer to dry according to the manufacturer’s guidelines. If you used filler to address rust-through holes or depressions, your next step is to apply the body filler. Epoxy-based fillers are common in metal repair because they adhere well to primed surfaces and have good gap-filling properties. Mix the filler as directed, then apply it with a spreader, building it up in thin layers to avoid trapping air. After it cures fully, you’ll sand it smooth with progressively finer grits. The aim is to achieve a seamless transition from repaired area to the surrounding panel, so when the paint is applied, the repaired patch sits visually and physically flush with the rest of the surface.
Sanding becomes the bridge between the repair and the finish. Start with a medium grit to contour the filler or primer, then move to finer grits to refine the surface. Wipe away all dust with a tack cloth before priming again if the surface feels gritty. The primed surface should be uniformly smooth and free of pinholes or gaps, as any imperfection will telegraph through the final paint job. When the surface is pristine and dry, you can proceed to the base coat. The color match is part science and part artistry; the goal is to achieve a seamless blend with the adjacent area. Apply the base coat in light, even passes, allowing each coat to flash-dry before applying the next. Multiple thin coats deliver a deeper, more even color and reduce the risk of runs or sags. If you notice a slight shade mismatch, a very light third coat can tune the color, but patience is essential to avoid layering too thickly.
After the base coat has dried, the clear coat seals the color and adds durability. The clear coat protects the pigment from ultraviolet light and environmental exposure. Apply one or two thin layers, allowing each to dry before applying the next. If you want the final result to look factory-like, you can perform a light, controlled wet sanding after the clear coat has cured, then finish with a polishing compound to restore gloss. This step should be undertaken with care to avoid cutting through the clear layer. The finishing touch is a protective layer that helps lock the repair in against moisture and UV damage. In many cases, a final wax or sealant after full cure can extend the life of the repair and give the area an extra shield against the elements.
The discussion of rust repair does not stop with the immediate fix. Prevention remains the most effective strategy. Regular washing helps remove salt, dirt, and moisture that accelerate corrosion. This is especially important in winter or in coastal climates where salt residues linger on panels and wheel wells. Pay careful attention to door sills, wheel wells, and the undercarriage, which can trap moisture and debris. Proper drainage is crucial; ensure that drainage holes and channels around doors, trunks, and under the car’s panels are clear and free of mud or leaves that can trap water. Protective coatings offer an extra barrier: ceramic coatings, paint protection films, and undercoatings all have their value. They not only enhance gloss and color depth but also form a physical barrier against moisture and road debris. The decision to use these coatings depends on climate, driving conditions, and budget. And if you park in damp or salted environments for extended periods, seek out opportunities to dry out undercarriage areas and avoid prolonged exposure to corrosive conditions.
The practical takeaway is that successful rust repair hinges on three pillars: meticulous cleaning, complete rust removal or neutralization, and a well-sealed, protected finish. Skipping primer or sealing steps invites a return of rust, often sooner than expected. In moderate to severe cases, where holes exist or the structural integrity feels compromised, professional expertise can save you money in the long run by preventing more extensive damage and ensuring that the repair holds up under the stress of normal use. The goal is not merely to cover rust with paint; it is to restore the panel’s integrity and protect the vehicle’s structure from future degradation. The process described here is designed to be cohesive from start to finish, minimizing back-and-forth work and enabling you to gauge progress with confidence.
For those who want a consolidated, step-by-step reference that mirrors the approach described above, the linked internal guide provides a structured flow and practical checklists that complement this narrative. It is a useful companion for readers who prefer a tightly sequenced procedure with recommended dwell times, relative to the rust severity discussed here. Embracing a disciplined, patient sequence—assess, prepare, treat, seal, sand, paint, and protect—keeps rust at bay and extends the life of panels that otherwise might require more invasive repair.
In the end, rust repair is as much about patience as technique. The best results come from taking the time to do the job right, not just fast. If the damage is contained and the surrounding metal is solid, a well-executed repair can be nearly indistinguishable from factory work to the casual observer. If you encounter rust that has corroded deeply or approached structural weakness, don’t hesitate to consult a professional. A trained body shop brings tools, experience, and a controlled environment that ensure the repair is not only visually seamless but also mechanically sound. Keeping this chapter in mind as you inspect your vehicle’s body will help you detect issues early, treat them effectively, and preserve your car’s appearance and value for years to come.
External reading can broaden your understanding of rust behavior and prevention strategies. For a broader overview of rust, see this external resource: https://en.wikipedia.org/wiki/Rust
Guarding the Surface: Proactive Armor Against Auto Rust Spots
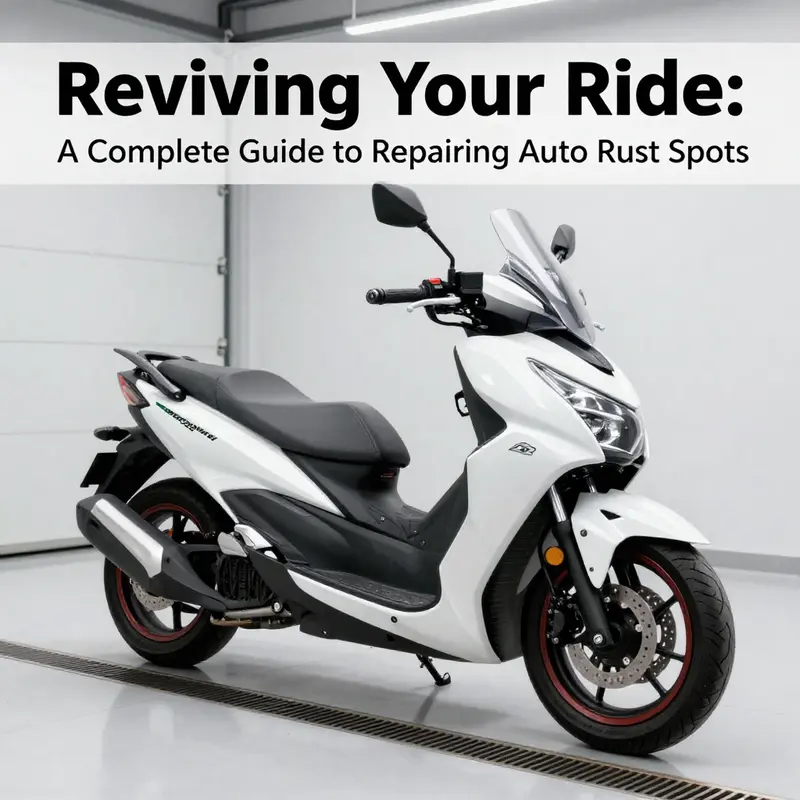
Rust is not fate written in metal; it is a predictable consequence that can be softened, slowed, or even halted with a steady routine. When we talk about preventing auto rust spots, we are talking about a philosophy as much as a set of steps: treat the vehicle as a fragile asset, respect the environments that invite corrosion, and practice a cadence of care that keeps moisture, salts, and airborne contaminants at bay. In this light, prevention becomes a continuous practice rather than an intermittent fix. The car’s skin is constantly at risk where paint meets metal and where moisture lingers in crevices. Yet with disciplined habits, a few targeted interventions, and a mindful eye for early signs, rust can be kept at bay for years, preserving both the appearance and the value of the vehicle without turning maintenance into a recurring burden.
The foundation of rust prevention rests on cleanliness and dryness. Dirt, dust, road grime, salt, and acid rain are not merely cosmetic problems; each particle can hold moisture against the metal. When water and grime cohabit with tiny scratches or chips in the paint, a small seed of corrosion can take root. So the most effective preventive practice starts with a reliable washing routine. Cleaning your car every one to two weeks, especially after rain, snow, or muddy road conditions, creates a proactive barrier. Use a gentle, pH-balanced car wash soap and rinse thoroughly, taking care to reach behind door edges, wheel wells, and the undercarriage where salt and grime can harbor. After washing, dry the surface completely with a microfiber cloth. A thorough drying step prevents water spots and, more importantly, stops residual moisture from seeping into hidden corners where it can linger unnoticed.
But washing alone is not enough. The next crucial habit is promptly repairing paint damage, no matter how small. Scratches, chips, or dents that expose bare metal create direct pathways for oxygen and moisture to interact with steel. It is the exposure point that invites rust to begin its quiet spread. Regular visual inspections become part of the routine, with particular attention to lower body panels, wheel wells, and door edges where road debris tends to strike first and where splash carryover can erode protective coatings over time. For minor chips, a touch-up paint pen might be suitable, but larger damaged areas deserve professional attention to ensure the metal beneath is sealed and protected. This is not just about cosmetics; it is about erecting a barrier again before corrosion can gain momentum.
In tandem with immediate paint repair is the undercarriage protection that many drivers overlook until trouble surfaces. The underside of a vehicle endures a continuous barrage from road spray, wet roads, snow, and salt. A robust undercoating or spray-on chassis protection can create a durable shield that shields frame rails, suspension components, and other vulnerable metal surfaces. The choice between a traditional undercoating and a modern spray-on barrier depends on climate, driving conditions, and the vehicle’s age, but the underlying logic is clear: a barrier on the undercarriage reduces water retention and makes it harder for salt to reach exposed metal. For prevention, this step should be considered early in a car’s life, especially in regions that regularly combat winter road salt. It is not a cure-all, but it is a practical preventive measure that complements regular washing and careful attention to paint integrity.
There is also a quiet, practical discipline related to vehicle covers. Covers can protect against sun and dust, but they can become a double-edged sword if used carelessly. A cover that is added when the car surface is damp can trap moisture against the paint, and the fabric can rub against the finish in windy conditions, creating micro-scratches that become entry points for moisture. The most reliable approach is to use a cover only when the car is clean and completely dry, and in a dry, sheltered location. This nuance—cover only when conditions are favorable—reflects a larger truth: prevention is situational as well as procedural. Adjusting habits to local climate, parking options, and daily routines makes rust prevention a living practice rather than a rigid checklist.
Moisture finds other quiet routes into a car’s interior and body cavities as well. Interior dryness may seem less urgent because rust is a exterior concern, but moisture inside the cabin can migrate to metal components such as floor pans, seat frames, and door sills. After rain or a thorough wash, opening doors and windows briefly to circulate air helps to dry the interior. In damp climates or in homes with higher humidity, desiccants placed in strategic spots—such as the trunk or footwells—can absorb moisture that otherwise would drift toward metal surfaces not immediately visible from the outside. It is a small, almost invisible step, but it reinforces the broader goal: keep water from lingering anywhere in the system where it could find a way to corrode steel.
The rhythm of prevention also benefits from a regular, shield-like maintenance practice: periodic waxing or coating of the exterior. A good wax or a hydrophobic synthetic coating adds a sacrificial layer that repels water and traps contaminants on the surface, allowing them to be wiped away more easily before they can bite into the paint. This isn’t about chasing an unblemished shine alone; it’s about maintaining a protective barrier that slows or deters the progression of micro-damage. The update cycle—every two to three months, depending on climate and washing frequency—keeps the paintwork and its protective layer in a state of renewal. When the wax or coating wears thin, moisture can attack the paint’s protective chemistry and begin to lift coatings, which, in turn, exposes the metal beneath to oxygen and moisture.
A crucial, practical detail often overlooked involves drainage pathways. Many vehicle bodies include small drainage holes designed to let water escape from the door jambs, fenders, and rear panels. If debris such as dirt, leaves, or mud blocks these tiny channels, water can accumulate in places that are hard to inspect. Stagnant moisture becomes a breeding ground for rust, especially in regional climates that cycle through wet seasons. Regularly inspecting and clearing these drainage holes is a simple, repeatable habit that can prevent hidden rust from gaining a foothold. It is a case where a small action yields outsized protection because it stops moisture from lingering where it should have escaped.
The sum of these preventive measures forms a coherent approach to rust that extends beyond the car’s appearance. When you commit to regular washing, timely repair of paint damage, undercarriage protection, thoughtful use of covers, interior dryness, periodic protective coatings, and attentive drainage maintenance, you craft an environment that discourages rust in every possible avenue. This is not a single miracle solution but a system of habits that, over time, reduces the likelihood of rust spots appearing and, when they do appear, makes them easier to treat before they become structural problems.
In the broader arc of prevention, there is also a mental shift about maintenance. It is easy to see rust prevention as a chore for the rare winter storm or the coastal coastal drive, but effective rust prevention is a bank of small deposits made consistently. Each wash, each inspection, each patch of touch-up paint, each check of the undercarriage protection, and each reminder to clear a drainage hole adds to a robust defense. The science behind this approach rests on two simple facts: water plus oxygen plus an exposed metal surface equals rust; and anything that reduces one of these factors or increases the barrier between them reduces the rate at which rust forms. The goal is not to eliminate all moisture but to prevent it from lingering, pooling, or contacting compromised metal. The car’s life is a long sequence of environmental exposures; prevention makes those exposures survivable rather than ruinous.
To translate this philosophy into a practical routine, imagine pairing rust prevention with your other car-care rituals. Combine a thorough wash with a quick inspection of the lower panels and wheel wells, then wipe the vehicle dry and inspect for chips. If you encounter any bare metal, address it promptly with the appropriate primer and paint repair. While your undercarriage protection may require a professional assessment or professional application, you can schedule a simple preventive check after the wash to gauge the coating’s condition and reapply if the coating shows wear. The habit forms a loop: wash, inspect, protect, and monitor. The more you practice it, the more you learn the particular vulnerabilities of your vehicle in your climate, and the more agile you become at intercepting rust before it takes hold.
This approach also translates into smarter decisions about where you park and how you drive. If you live in a salt-prone winter region, you might adjust your routine to wash the undercarriage more frequently, using extra attention after thaw cycles or road-salt events. If you drive on country roads with heavy mud during the rainy season, you might prioritize undercarriage protection and more frequent inspections of wheel wells and fender liners. The preventive system is not a one-size-fits-all script; it is a framework that can adapt to your environment, your climate, and your daily rhythms. That adaptability is a strength because it keeps you from treating rust prevention as a rigid set of instructions and instead as a dynamic practice that scales with your car’s exposure.
As the seasons turn, the need for vigilance does not diminish. The exterior is your first line of defense, but rust can hide just as easily in seams, door sills, and trunk joints as it does on flat panels. Observant owners learn to notice subtle changes: paint that no longer sits smoothly, a small orange bloom on a seam, or a slight bubbling under the finish. These are signals to revisit the preventive playbook, not reasons to panic. The aim is steady maintenance with a calm response when anomalies appear. By staying curious about the surface and its protection, by treating potential issues as opportunities to reinforce your barrier, you keep rust at a respectful distance rather than letting it become a chronic, expensive problem.
Importantly, prevention does not require expensive gear or specialized laboratory conditions. The core tools are simple: good soap, clean towels, a dependable wax or coating, a way to dry the surface completely, a reliable paint pen or access to a professional for chips, and a plan to inspect drainage points. These tools become accessible to most drivers and can be integrated into a routine without dramatically altering daily schedules. The related discipline is patience: coatings need time to cure, primers need proper dry conditions, and the undercarriage layers require careful application. Rushing a protective layer or skipping steps to save time often short-circuits the entire purpose of prevention. In car care, as in most crafts, quality compounds the longer you use them well, and consistency compounds the benefit.
For readers seeking a concise anchor to these ideas, the practical takeaway is to build a habit of proactive defense: wash, inspect for paint damage, apply protective coatings where needed, protect the undercarriage where climate demands, and ensure drainage pathways stay clear. This habit becomes a reflex that reduces risk and extends the vehicle’s life. The goal is not to fear rust but to manage exposure with a method that respects the car’s metal and your budget. A well-maintained exterior and a dry undercarriage are not merely aesthetic choices; they are lasting investments in performance, safety, and resale value. When rust spots do appear despite best efforts, they are more likely to be isolated and easier to manage, which makes the next preventive cycle quicker and more effective.
To connect this preventive mindset with practical resources, a broader primer on reliable repair practices can be helpful. For readers who want a broader lens on auto care principles, consider exploring additional guidance such as the A to Z Auto Repair framework, which offers a wide view of routine maintenance and repair etiquette. You can visit that resource here: A to Z Auto Repair.
In sum, rust prevention is a layered, adaptive discipline built from regular cleansing, early paint-damage intervention, protective barriers for vulnerable surfaces, thoughtful use of protective covers, interior dryness strategies, periodic waxes, and attention to the vehicle’s drainage architecture. When embraced as a continuous practice rather than a one-off fix, prevention can dramatically reduce the frequency and cost of rust-related woes. It preserves not only the vehicle’s surface but its character and integrity over time. And while no plan is flawless, a consistent, informed approach minimizes rust’s foothold and keeps your car looking and performing at its best for years to come.
For readers who want to dive deeper into the prevention literature and cross-check tips with a broad, authoritative perspective, additional resources are available. An external guide from Car and Driver synthesizes current best practices for rust prevention and timing of protective measures across climates and vehicle types. Read more here: https://www.caranddriver.com/ownership/a48970053/how-to-prevent-car-rust/
Final thoughts
Rust repair and prevention is not just about maintaining appearances; it’s esencial to your vehicle’s overall health. By accurately assessing rust severity, employing the right repair techniques, and following preventive measures, you ensure your vehicle remains in optimal condition. Remember that regular inspection and proactive care can save you time and costly repairs in the long run. Embrace these practices for a longer-lasting and better-looking ride.