
Rust damage can threaten not only the appearance of your vehicle but its structural integrity as well. Whether you’re a motorcycle enthusiast or a car owner, addressing rust holes promptly is essential for longevity and safety. This guide presents a structured approach to assessing damage, preparing for repairs, and completing the finishing touches to ensure your vehicle stands the test of time. By following the systematic steps laid out in this article, you’ll learn how to effectively manage rust, using techniques suitable for DIY repairs or knowing when to seek professional help.
Reading the Rust Map: A Thorough Assessment Before Repairing Auto Body Holes
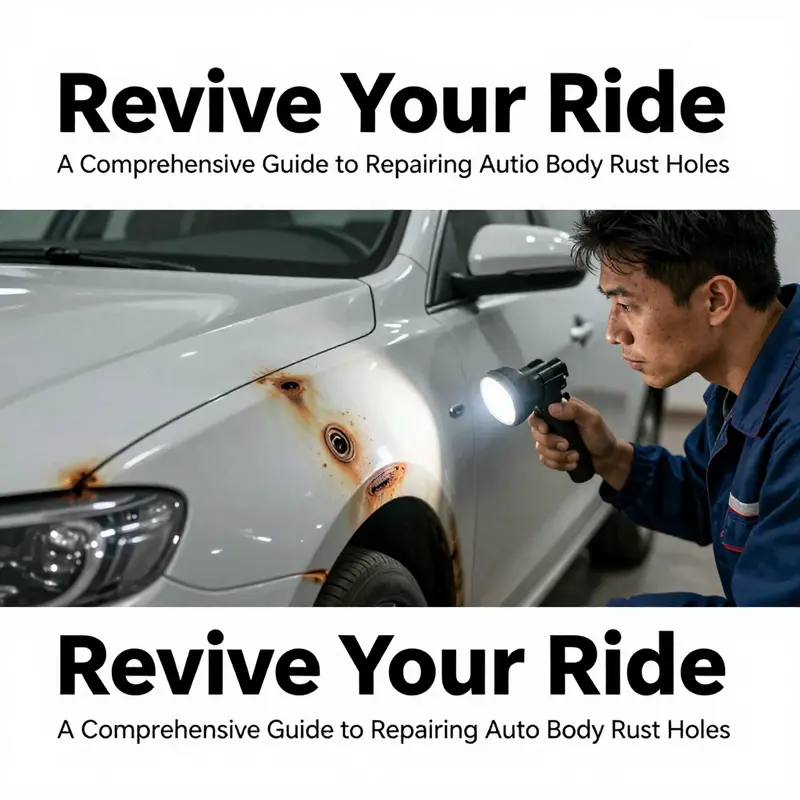
A careful rust assessment starts before any patch or paint. The goal is to understand how deep and how broad the damage is, not just how big the hole looks. By cleaning away dirt and loose rust, you reveal the true edges and thickness of the metal. Observe from multiple angles, check for hidden rust behind seams, and consider how the surrounding area carries load. If the hole has spread behind the surface, the repair plan may require more than a simple patch. The assessment guides the path to patching, welding, or panel replacement and reduces the risk of recurrence. Document the location and size of the hole, and note any signs of warping or internal rust. A well documented assessment helps a technician diagnose swiftly and plan a durable repair. In short, know what the rust is doing before you decide how to fix it.
Rust Holes Repaired, Steel Restored: A Thorough, Integrated Guide to Auto Body Rust Hole Repair
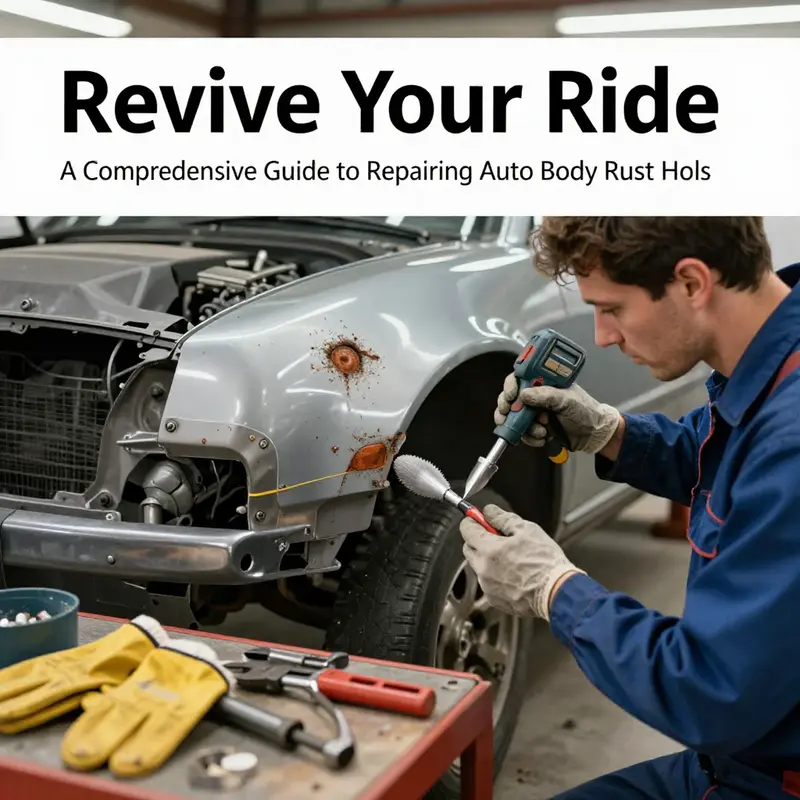
Rust in a car’s body is more than a cosmetic nuisance; it is a battle between moisture, metal, and time that, if left unchecked, quietly erodes strength and value. When a rust hole appears, it is a signal to engage with the metal at its most vulnerable point and to respect the material’s history. The repair of rust holes is a process that rewards patience, precision, and a clear plan. It requires moving from assessment to preparation, choosing the appropriate repair method, and then finishing with a finish that will endure through the years. The approach varies with the size and location of the hole, the thickness of the surrounding skin, and whether the rust has compromised structure. A calm, methodical sequence protects both the vehicle’s integrity and its appearance, ensuring that the repair does not become a cosmetic quick fix that ends up cracking, bubbling, or allowing moisture to creep back in. The overarching aim is straightforward: return the panel to a state where it behaves as if the rust had never begun, or at least as if the metal had always been part of a sound, undamaged body. This chapter walks through that journey in a cohesive, practical way, weaving together the essential steps with the insights that help you avoid common missteps. The core idea is to treat rust not as a single blemish but as a symptom of how the panel carries stress, moisture, and heat. When you see a hole, you are looking at a symptom of cumulative wear, and you must address both the hole and what lies around it. A thoughtful repair respects the original contour, resists the impulse to hide the problem with filler alone, and reestablishes a barrier to moisture that can last years in a harsh climate or a humid environment. The path from a small pinhole to a structurally sound panel is not linear, but it follows a reliable logic built on three pillars: clean assessment, sound material preparation, and robust finishing that seals and matches. The first step is to evaluate what you are dealing with. Tiny, pinpoint rust spots may seem trivial, but they often serve as the first warning signs of deeper corrosion. The assessment should establish whether the rust has merely breached the paint and top layer of metal or whether it has penetrated to the point of creating a through-and-through hole. It should also consider whether the damage sits on a panel that carries a structural load, such as a door skin near the hinge line, a rocker panel, a floor pan, or a frame member. If the rust involves load-bearing sections or areas where water can pool and obstruction is likely, the decision-making becomes more conservative and more likely to call for professional involvement. Early intervention matters because rust has a habit of spreading once it cracks the protective finish. The moment you identify a rust hole, the clock starts counting down: the longer you wait, the more metal fatigue and structural risk you invite. With that in mind, the repair mindset shifts from damage control to restoration, treating metal as the living skin of the car that must be returned to its original form as closely as possible. The next phase—preparation—lays the groundwork for every downstream step. Preparation is the critical hinge where proper adhesion, durability, and paint longevity are set in place. It begins with removing all rusted paint and loose material until clean, bare metal is revealed. A meticulous approach here prevents a weak bond between filler, patch material, and the metal itself. In the shop or driveway, a wire brush, a sanding disc on an angle grinder, or a rotary tool with a flap wheel can be used to scour away the corrosion, while a heat gun can help soften stubborn paint layers that have baked onto the metal and perfume the surface with the smell of aged automotive finishes. The surrounding area should be feathered with soft transitions so that the repaired patch does not stand out as a ridge or a square in the paint. After the surface is clean, a wipe-down with rubbing alcohol or a degreaser removes oils, wax, and particulate that could prevent a solid bond. The aim is a surface that breathes nothing but raw metal under the repair. In severe cases, a metal brush attachment on a drill can reach tight corners and crevices that standard tools miss. The preparation stage also includes a careful inspection of the metal’s soundness. If the metal around the rust has thinned or become perforated, a patch panel or even a larger replacement may be necessary to restore strength and to prevent future leaks. The decision between patching and replacing hinges on how much metal is left as a reliable substrate. When the area has been brought to bare metal, the next question emerges: what is the most appropriate repair method for the hole’s size and location? This is not a one-size-fits-all scenario. It is a careful reading of the metal’s condition, the geometry of the panel, and the expected stresses in that location. For small holes, the instinct is to fill and seal, but it is crucial to understand that filler is not a substitute for good metal. A thin patch of steel can be adhered or spot-welded over a hole, then filled and feathered into the surrounding panel, but the patch must be correctly sized and firmly secured so that it shares the load with the base metal rather than creating a new seam where moisture can creep in. For holes under about an inch in diameter, a high-quality auto body metal filler can provide a smooth, even surface once cured, then sanded to a feathered edge. The filler should never be used to compensate for metal that has become weak; if the metal around the hole is paper-thin or its integrity is compromised, patching with a welded plate becomes the safer, longer-lasting option. The process for small holes typically involves cleaning, applying primer to bare edges, filling with metal filler in thin coats, letting each layer cure, and then sanding with progressively finer grits to achieve a transition that disappears under paint. The finishing approach matters as much as the repair itself. A thin primer layer, followed by a dedicated filler primer where needed, helps to create a uniform base for paint. This is then sealed with a color-matched topcoat and a clear protective layer. In all cases, the goal is to establish a robust moisture barrier and a paint surface that will endure repeated exposure to sun, moisture, road salt, and the mechanical stresses of everyday use. When holes exceed the comfort zone of patching—say they exceed an inch in diameter or appear in areas carrying structural loads—the repair path shifts toward welding and replacement. The steps here are simpler to describe than to perform: cut away the damaged metal, ensure clean edges, and weld in a new piece of galvanized steel or zinc-coated steel for corrosion resistance. The welded seam must be ground flush, and the joint should be coated with a zinc-rich primer to thwart any creeping rust at the seam. The process requires precise control of heat input to prevent warping. Overheating the surrounding metal can lead to distortion that spoils alignment and smoothness. Welding strengthens the repair and ensures the patch will hold up under future strain, but it calls for expertise and equipment that many DIY enthusiasts either lack or would prefer not to risk on a structurally important area. In such cases, seeking a professional welder with experience in automotive metalwork is prudent. For larger or more critical areas, the option exists to replace an entire panel. This approach is often necessary when metal has thinned beyond the point of safe repair or when the rust has compromised the panel’s structural role. Replacing a panel requires careful attention to fit, line, and alignment with adjacent surfaces. It is essential to re-prime and repaint the entire panel to avoid any visible mismatch that can betray the repair and invite moisture intrusion at the edges. The finishing touches must then marry with the original color and gloss, maintaining the vehicle’s aesthetic integrity while preserving its durability. Priming and painting are not mere final steps; they are the core of long-term protection. After the repair, a rust-inhibiting primer—typically zinc-rich or epoxy-based—is applied to all repaired surfaces to create a barrier that resists moisture and salts. If necessary, a self-etching primer is used on bare metal for improved adhesion, followed by a body filler primer to smooth out any residual irregularities before color is applied. Smoothing the surface is a dance of patience and precision. The process typically involves masking surrounding areas to protect against overspray, sanding with progressively finer grits, and using light, even passes to keep the surface flat. The color matching step is where the repair must disappear into the rest of the vehicle. Modern color matching relies on computer-match technology available at most automotive supply outlets. The paint is applied in thin, controlled coats, allowing drying time between passes. A typical sequence starts with a base color in light sprays, builds through several passes, and ends with a clear coat that seals in the color and adds depth and gloss. The painting process benefits from a controlled environment, such as a ventilated space with stable temperature and humidity. If a dedicated paint booth is not available, a well-protected, dust-free area with clean masking and a careful technique can still produce a durable finish. The aftercare is as important as the application. The surface should be allowed to cure fully, sometimes requiring 24 to 48 hours or more in a dust-free environment before the vehicle is exposed to the elements. In some climates or with certain clear coats, baking the paint in a controlled booth accelerates curing, resulting in a harder, more durable finish. A practical DIY tip is to mask and protect adjacent panels with plastic sheeting and tape to prevent accidental overspray that would otherwise complicate the repair or require a second rework. The repair does not end with the paint alone. The lower edges, wheel wells, door sills, and trunk floors are the usual suspects for future rust if moisture can remain trapped. A proactive approach to rust prevention—such as undercoating or applying a rustproofing spray every couple of years—helps maintain the repair’s longevity. Regular washing, careful drying, and a quick inspection to catch new rust spots early are simple habits that pay dividends. The preventative stage is not only about delaying the next corrosion event but also about preserving the vehicle’s value and appearance. A critical reality is that even well-executed repairs can fail if rust is allowed to take hold in areas that are hard to see or reach. That is why a robust assessment continues after the initial fix; it includes monthly checks of door sills, trunk floors, and rocker panels—the areas where rust tends to start and spread. The best practice is to treat minor scratches and chips promptly to prevent moisture ingress, especially in areas where road debris can ablate protective coatings. The reality is that rust may still begin again in the future if the environmental conditions around the vehicle remain hostile. A thoughtful strategy combines effective repair with ongoing vigilance. It recognizes that rust is not a one-and-done problem but a condition that requires periodic attention and maintenance. The decision to pursue professional help is not a sign of defeat but a sensible acknowledgment of risk and scale. If the rust affects structural components, if the damage is extensive, or if you lack access to welding equipment, a professional approach provides both safety and assurance. The professional path offers refined techniques, sharper welds, and expert color matching that can often preserve value and ensure safety in ways that DIY methods cannot—especially for large or structurally significant repairs. The human element matters here as much as the technical one. A skilled auto body technician brings years of experience in reading metal fatigue, assessing the integrity of seams, and judging when an area is beyond the scope of at-home repair. A master technician can also advise when to replace a panel rather than patch, ensuring the repair remains durable and inconspicuous. The philosophy that guides this work is simple and durable. Metal should be restored to its original form whenever possible, not merely covered up with filler. The idea that “metal is not glue” echoes across the trade: fillers can smooth a surface, but they cannot replace the structural backbone of the panel. This mindset shapes every choice from the tools used to the processes chosen and the finish that will endure. The anecdotal experiences of practitioners—though they vary—converge on a shared conclusion: preparation is the defining factor in success. Thorough rust removal, careful surface preparation, and a disciplined finishing sequence yield repairs that stand the test of time. The integration of patching, welding, or panel replacement with proper priming and painting creates a repair that is not only invisible to the eye but also sound to the hands and body of the vehicle. The final artistry lies in matching color, texture, and gloss so that the repair disappears in the reflection and the vehicle continues to look as if it has weathered the elements with grace rather than hiding a wound. This holistic approach—assessing, preparing, repairing, finishing, and maintaining—offers a reliable pathway for anyone tackling the stubborn problem of rust holes in an auto body. It keeps the vehicle safer, preserves its value, and protects the interior from interior moisture. It also reduces the likelihood that a small hole will become a large one, a single patch becoming a cascade of structural concerns that can escalate quickly if moisture is allowed back in. The practical takeaway is that rust repair is an investment in the vehicle’s life. Short-term savings achieved by quick filler work often translate into long-term costs, including repainting, structural concerns, and accelerated corrosion elsewhere. A thoughtful, methodical repair—rooted in the fundamentals of metal preparation, careful material selection, and disciplined finishing—delivers results that can last for years and maintain the vehicle’s integrity and appearance. For readers who want a deeper dive into the repair process with visual guidance, a detailed step-by-step guide with diagrams and photos is available in a trusted DIY resource linked here. How-to-repair-auto-rust The recommended path, though, remains to assess and prepare with a disciplined hand, choose the correct method for the hole, and finish with a durable, moisture-resistant skin that aligns with the rest of the body. If a reader senses reluctance about welding or patching in a crucial area, it is wise to seek professional help. The risk of warp, misalignment, or insufficient corrosion protection is real, and the efficiencies gained by professional tooling, climate-controlled painting, and long-lasting primers can be well worth the investment. In the end, the goal is straightforward: restore the panel’s function, restore its appearance, and extend the life of the vehicle. The repair should feel integrated, as if the rust never existed, and it should protect the vehicle against future moisture exposure while preserving the owner’s confidence in the car’s safety and reliability. The careful reader will appreciate that this is not a single technique but a disciplined sequence that respects the integrity of metal, the demands of paint systems, and the inevitability of environmental exposure. It is a craftsman’s approach to a common automotive challenge—one that blends science, skill, and patience to deliver durable results. For those who wish to explore more on the visual and technical aspects of rust repair, a well-regarded external resource offers step-by-step demonstrations and diagrams that complement the practical guidance provided here: https://www.popularmechanics.com/cars/how-to/a34298254/how-to-repair-a-rust-hole-in-a-car/
From Patch to Permanence: Finishing Touches and Preventive Measures After Auto Body Rust Holes
Repairing rust holes is only part of the battle. The real test comes after the patch is in place, when the surface must be sealed, primed, and painted in a way that stands up to moisture, road salt, and the daily wear of driving. Finishing and prevention are not afterthoughts; they are integral to restoring both the look and the longevity of the panel. The finishing stage integrates chemistry, technique, and a forward-looking mindset that treats rust as a signal rather than a stubborn inevitability. When you understand how each step supports durability, the repair stops being a temporary fix and becomes a lasting restoration. The core idea is simple: expose clean metal, establish a barrier against moisture, and then build a matching, resilient cosmetic layer on top that can endure real-world conditions. The details matter because rust spreads quietly and aggressively; if any link in the chain—primer, paint, sealant, or protection—is weak, a small repair can fail in a season or two, especially in climates that see winter road salt or high humidity. With that understanding, the finishing process becomes a disciplined sequence rather than a rushed touch-up, and the preventive measures that follow turn a repair into a durable defense against future corrosion. The goal is not to create a showroom surface alone, but a surface that behaves like the rest of the metal, aging gracefully yet resisting new corrosion wherever it tends to attack: wheel wells, door sills, rocker panels, and undercarriage nooks where water collects and salt lingers.
Once the structural patch has been shaped and blended to the surrounding line, the next act is to establish a robust, corrosion-suppressing foundation. The primer you choose is not just a color-base; it is the first chemical barrier that locks the exposed metal from moisture and salts. Automotive primers designed for repair work are formulated to adhere strongly to bare metal and to provide a uniform surface for the subsequent layers. A zinc-rich or epoxy-based primer is commonly recommended because these chemistries actively inhibit rust when moisture finds its way into tiny pores or pinholes that even the best filler might miss. The application should be done in light, even coats, with the goal of leaving no pinprick or roughness behind. For the first coat, a thin, tack-free film is ideal; a second coat, if needed, should be shielded from dust and allowed to cure according to the primer’s instructions. The curing time is not a mere suggestion but a critical window in which the primer forms a tight seal with the bare metal, creating a surface that will hold sanded filler, color coats, and finally the clear layer without allowing moisture to seep through.
The sanding that follows primer application is more than cosmetic refinement. It is the last chance to ensure a perfectly flat, invisible repair that won’t telegraph through the paint. Light, progressive sanding with grits in the 320 to 600 range is typical, moving up through finer grits as the surface becomes smoother. The objective is twofold: remove imperfections that would cause pebbled texture or visible ridges and create a micro-roughness that gives the next layer—color coat or filler primer—something to grab onto. The sanded surface should feel smooth to the touch, but not so slick that adhesion is compromised. Any dust, oils, or residues must be cleared away after sanding. Wiping with a clean lint-free cloth and a degreaser or isopropyl alcohol ensures that the surface is pristine before the next step. The idea here is not merely to look good in bright shop lights, but to behave well under environmental stress: heat, cold, humidity, and the chemical assault of road salts. If any oils remain, they can create micro-lakes on the surface that trap moisture and undermine adhesion, which is a fast path to premature peeling.
Color matching stands as a cornerstone of the finish. The repaired panel must blend with the rest of the vehicle so that the repair remains discreet over the life of the car. The most reliable approach relies on your vehicle’s color code and the skill of the shop or the DIY painter to recreate the exact shade and metallic flake in as many as three layers: base color, mid-coat or sparkle, and a clear protective layer. If you are working at home, you’ll want to verify your color code, then request a careful mix in a well-ventilated space. The match should be checked under various lighting conditions and against adjacent panels to ensure no subtle hue difference reveals the repair. In some cases, a color adjustment may be necessary, which can be more easily achieved with a pro color-matching system or a professional paint shop that can quickly dial in the exact shade. This is where the risk of a mismatch rises if you rush or skip steps. The goal is a seamless transition that makes the repair appear as if the rust had never been there.
When it comes to applying the topcoat, technique governs the final appearance and the surface’s resistance to environmental damage. The base coat should be laid down in thin, even layers, allowing each coat to dry before applying the next. A typical sequence is two to three light coats with adequate flash time in between to permit solvent evaporation and film formation. A heavy coat invites runs, sags, or an uneven appearance that will need more sanding and corrective work later. After the color coats, a clear coat is applied to provide UV protection, depth, and abrasion resistance. The clear should be sprayed in multiple light coats to avoid clouding and to build a resilient, glossy finish. Each layer needs a controlled drying period; rushing can trap moisture or solvents under the film, which may lead to hazing or whitening effects later. If a heated or ventilated paint booth is available, using it can significantly improve the final finish by creating consistent temperature and humidity, which helps pigments settle evenly and reduces micro-blemishes that would otherwise call attention to the repair.
Masking plays a surprisingly large role in achieving a flawless finish. Adjacent panels must be shielded from overspray that would compromise the overall look. The masking process should be planned to leave only the repaired area exposed, with ample coverage over trim, edges, and any nearby components. A clean edge is more important than a perfect line in the heat of a DIY project, because a jagged boundary can catch the eye and undermine the perceived quality of the repair. Modern finishes forgive a lot of human error, but they demand precise preparation and careful technique to maintain depth and gloss across the panel. The finished surface, once cured, should feel smooth and uniform to the touch, with no rough patches or pinholes that would betray the repair. In practice, achieving this level of polish is a blend of patience and attention to detail—extra time spent in masking, primer, color matching, and the final clear coat can pay dividends in the long run by reducing the likelihood of corrosion pockets forming under a misapplied film.
Beyond cosmetics, the preventive layer is what keeps rust from returning. The finishing stage is the moment to introduce a protective barrier that remains active long after the paint has dried. A rust-inhibiting treatment or undercoating forms a shield against moisture, salts, and road debris. These products penetrate tiny pores and create a barrier that slows or stops the onset of new corrosion, especially in areas where water pooling or splash from the tires is common. The goal is not to create a brittle, heavy coating but to establish a flexible moisture barrier that can expand and contract with the metal as temperatures swing. When applying such a product, follow the manufacturer’s guidance for curing times and re-coat windows. In many cases, a thin, even application is enough to protect the area without compromising the paint or the seal around the repair. The preventive step is equally important for the surrounding metal, not just the patch itself. Rust respects no boundaries; if the adjacent areas remain unprotected, moisture can creep along the edge and creep again under the paint where it’s hardest to detect until it’s too late.
The long view becomes especially clear when you consider the regular maintenance routine that supports the repair’s longevity. A fixed rust hole does not guarantee ongoing protection; it requires a disciplined maintenance schedule. Regular washing, especially in winter months, helps remove salt, grime, and moisture that can accelerate corrosion. A thorough rinse of wheel wells, the undercarriage, and lower panels ensures that trapped salts do not linger where they can aggressively attack metal. A wax or sealant applied after the paint is fully cured adds another layer of defense by reducing moisture adhesion and making it harder for salts to cling. The maintenance plan should also include routine inspections for chips, scratches, or micro-damage that could become rust pathways if left unattended. Small repairs, addressed early, prevent larger problems later on. The overall approach is proactive: catch and address the smaller issues before they become structural liabilities, and treat the repaired area as part of a fleet-wide strategy to preserve the vehicle’s body integrity over time.
Another practical, less glamorous but highly effective preventive measure is the use of protective films or coatings on vulnerable edges and creases. A clear protective film can shield the paint and metal from road debris and moisture in high-wear areas such as rocker panels, door sills, and lower fenders. While this adds an extra step to the finishing process, it pays dividends in the first few years after repair by reducing the frequency of chips that expose bare metal. The film also helps maintain a smooth, glossy appearance, which supports the seamless aesthetic of the repair. If you choose to employ such a film, plan for a clean surface and careful edge sealing during installation. Without proper preparation, edges can peel, and moisture can still find its way under the film. When done correctly, protective film becomes a silent but effective guardian that extends the life of the repair and the vehicle’s body as a whole.
The decision to seek professional help often centers on the scale and significance of the rust damage. Small patches that do not involve structural components can frequently be managed by a skilled DIYer who adheres to meticulous preparation, correct material selection, and cautious application techniques. For more complex scenarios—where the hole is near structural elements, where the panel is distorted, or where color matching is critical—the cost and risk of error rise sharply. In such cases, a professional shop with the right tools, including controlled heat sources for welding and an appropriate paint booth, can save time and money by ensuring that the finish is durable and that the warping or misalignment does not compromise the vehicle’s chassis or safety. The literature from industry sources consistently notes that improper preparation or mismatched materials are common culprits when DIY rust repairs fail within a couple of years. This reality underscores why finishing and preventive measures are not optional extras but essential components of a successful repair. If you want a deeper, step-by-step reference that aligns with practical, real-world guidance, you can consult our detailed guide on how to repair auto rust as a companion resource.
For readers who want a direct, hands-on continuation of the repair journey, you can explore the more granular, step-by-step walkthrough here: How to Repair Auto Rust. This linked guide reinforces the finishing approach described here, emphasizing the importance of clean preparation, proper material selection, and careful layering as the foundation for a durable repair. It also echoes the idea that the finishing stage is not a cosmetic flourish but a functional requirement that determines how well the patch withstands the test of time. By connecting the two threads—the precise finishing sequence and the preventive maintenance program—you gain a holistic view of how to restore not only appearance but also structural resilience to the body panel that bore the rust.
In closing, the finishing and preventive steps after repairing auto body rust holes transform a clinical patch into a resilient part of the vehicle. The process is a choreography of substrates, coatings, and timing, where each layer plays a vital role in an enduring finish. The primer’s bite, the filler’s concealment, the color’s fidelity, and the clear coat’s shield—all of these elements join with preventive undercoatings and regular maintenance to produce a surface that looks right and lasts. The goal is not to chase a perfect, flawless copy of the original panel but to create a durable, aesthetically coherent, and long-lasting repair that ages with the car without revealing the repair beneath. When done thoughtfully, finishing and prevention convert rust repair from a momentary repair into a lasting commitment to the vehicle’s body integrity, safety, and appearance. And when in doubt, remember that a well-executed finish represents a final investment in the car’s future, one that pays dividends in reduced repair costs, improved resale value, and the confidence that comes with knowing you’ve treated your vehicle with care and foresight. For those seeking broader context on this finish and prevention approach, the Autoblog guide offers additional perspectives and practical tips to complement the steps outlined here: https://www.autoblog.com/2024/09/15/car-rust-repair-finish-prevention/.
Final thoughts
Repairing auto body rust holes requires careful attention to detail, from assessing the damage to executing repairs and applying protective finishes. By understanding each stage of the restoration process, vehicle owners can extend the life of their rides and maintain both aesthetic appeal and safety. Regular inspections and preventative measures are essential to avoid future rust issues. Embrace these techniques, and your vehicle will remain in top shape for years to come.