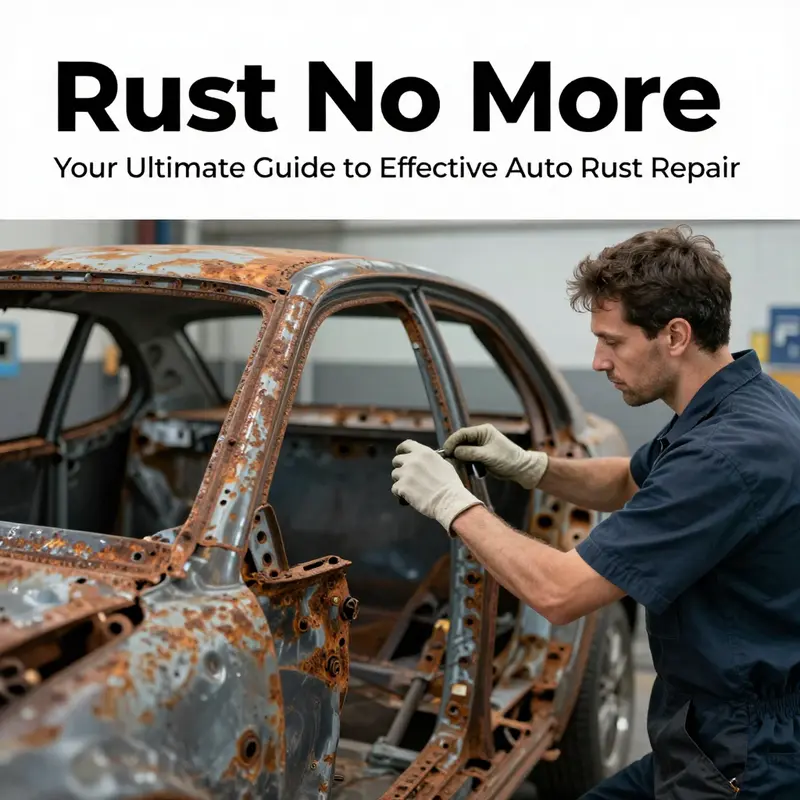
Rust can be a vehicle owner’s worst enemy, leading not only to cosmetic issues, but also compromising safety and structural integrity. Understanding how to address auto rust is key for motorcycle owners, car enthusiasts, and automotive professionals alike. In this comprehensive guide, we delve into assessing rust severity, provide step-by-step repair techniques for minor and moderate rust, discuss when to seek professional help for severe rust issues, and share essential maintenance strategies to prevent future rust damage. By the end of this article, you will have the knowledge you need to tackle rust effectively and ensure your vehicle remains in top condition.
Reading the Rust: Assessing Severity as the Compass for Auto Repair
Rust is not a single defect but a weathered signal that tells you how deep the damage runs and what kind of repair path you can safely take. In repairing auto rust, the first move is always to read the evidence rather than rush to a finish. Severity determines whether you should sand and seal at the driveway edge, replace a panel, or bring the car into a shop with welders and frame jigs. The logic is simple, but the stakes are high. If you misread it, you may end up paying more later or, worse, compromising safety on the road. The goal here is to sharpen your ability to judge rust with clarity, using a mix of eyes, feel, and a few practical tests that separate superficial blemishes from structural threats. This is the compass that guides every repair decision and ultimately preserves both value and safety.
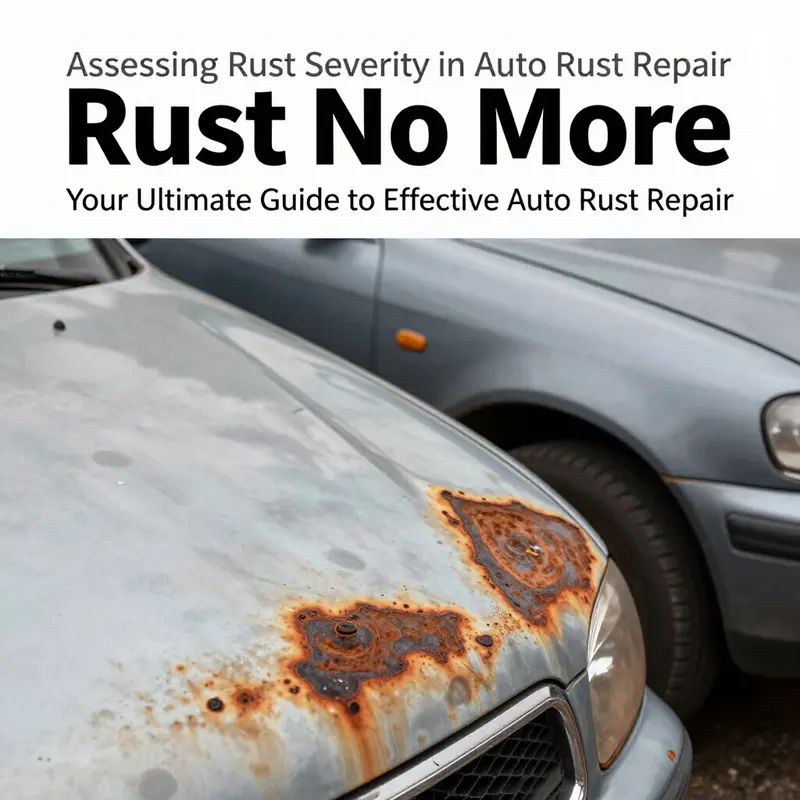
At its core, rust in a vehicle falls into a few broad categories, each with its own implications for repair. Light surface rust rests on the paint and the very outer edge of the metal. It often looks like reddish-brown specks or a fine powder that can be blown away with a brush. The damage is cosmetic if caught early, and the remedy is straightforward: clean, scuff, prime, and repaint with careful feathering to blend with the surrounding finish. When surface rust begins to creep beyond the gloss, yet the metal beneath still feels solid, you face what the literature terms moderate rust. This stage often features small pits or shallow holes, indicating that the corrosion has found a foothold beneath the surface. Repair here typically involves removing the rust completely, applying an anti-rust treatment to stabilize the metal, sometimes filling small pits with body filler, and then priming and repainting to restore the panel’s integrity and appearance. Finally, there is structural rust. This is the portion of rust that threatens the vehicle’s frame, floor pans, or critical mounting points. The metal may thin dramatically, or you may encounter holes that compromise stiffness and safety. Structural rust is not a DIY-friendly problem in most cases; it requires professional assessment. A professional will determine whether the damaged component can be repaired or must be replaced, and they will follow strict procedures to weld, seal, prime, and finish to restore the vehicle’s strength. The difference among these categories is not simply surface appearance; it’s the line between a fixable blemish and a risk to the vehicle’s structural integrity.
The most practical way to separate these categories in real life is to combine careful inspection with a few reliable tests. Visual inspection is the starting point, but it must be paired with tactile feedback. Run your fingers over the area to feel for softness or crumbling edges; if the metal yields under pressure, the rust has penetrated deeper than it looks. A rust probe or a magnet can help you gauge how deeply the corrosion has invaded the metal. Where a magnet clings only to the surface and the edge remains stiff, you’re likely dealing with surface rust or shallow pitting. If, however, the metal is soft, flaky, or powdery, the corrosion has likely breached the protective surface and is undermining the substrate. This tactile sense is especially important in spots that hide within wheel wells, door bottoms, or under seals where moisture tends to pool. In some shops, technicians use a simple rule of thumb: if the metal has thinned by more than a quarter, that’s a serious flag. While rules vary by maker and method, the idea is to escalate your concern when metal loss becomes structurally meaningful rather than merely cosmetic.
The assessment must also consider context. A small patch of surface rust in a hidden crease can be far less alarming than a few square inches of rust in a door pillar or floor pan. Likewise, rust around mounting points for suspension components, seat belts, or the frame rails demands extra caution. The goal is not to be alarmist but to recognize when the rust is a signal of an ongoing process that could undermine performance and safety. In practice, this means looking for signs of moisture intrusion, such as trapped water behind seals or inside hollow channels, and examining drainage points. If the rust has progressed to soft edges or has been left untreated for a season or more, you should plan for more intensive intervention or a professional opinion.
Industrial guidance aligns with what you’ll see in the field: a clear distinction between minor and advanced corrosion. Light surface rust is commonly handled at home with careful prep and paint work, provided you treat it early. Moderate rust, with pits or small holes, often requires more intensive surface preparation, rust converters or primers, and sometimes filler to restore a smooth surface before refinishing. Severe structural rust, especially when it involves frame components or critical braces, is a red line for most DIY repair plans. It is here that the reliability of the repair—and, more importantly, safety—depends on professional assessment. The interpretive logic is clear: assess first, decide second, and act in accordance with the severity.
Once you’ve established the severity, the repair pathway follows a logical sequence that begins with containment and preparation and ends with finish and protection. For surface rust, you begin with a gentle clean of the affected area to remove dirt, oil, and salt residues. A wash with soapy water, thorough rinsing, and complete drying is essential to avoid trapping moisture under new coatings. Then you abrade the rust with fine-grit sandpaper—typically in the 600–800 range—or use a non-aggressive automotive rubbing compound to expose clean metal without scratching the surrounding paint. The goal is to reach stable metal and to leave a uniform, slightly textured surface that will readily accept primer. After that, you apply a high-quality automotive primer designed for rust repair, letting it cure per the product directions. The next steps are paint-matching and layering. Thin, multiple coats of color-matched paint generally yield better results than a single heavy coat. Allowing proper curing time between coats reduces the risk of peeling. Finally, a clear coat can be added for enhanced protection and a seamless finish if the area is in a location that will be exposed to road wear. These steps do not merely cover the stain; they reestablish a protective barrier that stalls moisture intrusion and slows future rust progression.
When the rust is deeper but not structural, the repair is similar in philosophy but more aggressive in execution. This is the domain of moderate rust. The rust must be removed more aggressively—progressively finer sandpaper starting from 400 grit and moving toward finer grits until you have clean, shiny metal. A wire brush or a Dremel can help with stubborn spots. After cleaning, you wipe the area with a degreaser or isopropyl alcohol to remove any residue. A dedicated anti-rust treatment, such as a rust converter or a zinc-rich primer, is applied to the exposed metal to chemically halt any further spread of corrosion. If there are small holes, a body filler like the classic putty is used to fill the depression, then smoothed with a putty knife and allowed to cure. Once cured, you sand again to achieve a smooth surface and apply primer, followed by matching paint and a clear coat. This pathway requires patience and precision because the goal is to restore both the smoothness of the surface and the barrier that prevents moisture from re-entering the metal.
Severe structural rust is the inflection point where the calculus changes entirely. The repair strategy shifts from refinishing a patch to evaluating the structural integrity of the entire component. Do not attempt to improvise a repair here. The professional assessment will determine whether the damaged part—whether a floor panel, a frame rail, or a major brace—can be repaired or must be replaced. If replacement is possible, the process typically involves cutting away the compromised section, fabricating or sourcing a replacement panel, and performing careful welding, sealing, priming, and finishing to reestablish structural strength and moisture resistance. Even when a repair is technically feasible, the costs and potential outcomes must be weighed against the safety and longevity of the vehicle. In this domain, professional intervention protects you, your passengers, and your investment.
This approach to reading rust—distinguishing surface from deep from structural, and validating with tactile and measurement cues—transforms a potentially overwhelming problem into a manageable workflow. It also dovetails with practical prevention, which is the steady line of defense against future rust. Regular washing, particularly in winter when road salt is used, helps remove corrosive residues before they start. Inspecting drain holes in doors, trunk lids, and wheel wells prevents water from pooling and accelerating corrosion. Protecting vulnerable areas with wax, undercoating, or other rust-preventive treatments forms a lasting shield, while promptly addressing scratches that expose bare metal avoids the all-too-common path from a tiny spot to a spreading patch. The philosophy is straightforward: catch early, repair cleanly, and defend aggressively.
In practice, the path you choose after assessing rust severity should also reflect the broader repair strategy you’re pursuing for the car. For readers who want a comprehensive framework that extends beyond rust alone, a broad resource on auto repair can be a helpful reference point, such as a general guide like A-to-Z Auto Repair. This kind of guide reinforces the idea that rust repair is one part of a broader skill set, from prep and protection to finishing and maintenance. For readers seeking to anchor this chapter in a broader repair mindset, it is helpful to link the rust assessment to the wider body of repair knowledge and practice that covers surfaces, joints, and finishes with the same care you apply to a rust spot.
Ultimately, the key takeaway is not the exact technique you apply to every spot but the discipline you bring to reading rust before you act. The difference between a minor touch-up and a major overhaul rests on your ability to detect depth, measure thinning, and recognize when steel has been compromised beyond cosmetic repair. Pair that discipline with methodical preparation and appropriate finishing, and you give your car the best chance to resist rust long into its later years. The craft of repair hinges on this early, clear-eyed assessment, and the responsibility it carries extends beyond a single fix to the ongoing health of the vehicle.
Internal link: For a broader repair perspective, explore A-to-Z Auto Repair.
External resource: https://www.napaonline.com/en/blog/automotive-repair/how-to-assess-and-repair-rust-on-your-car
From Surface Rough to Seamless: A Practical Path for Minor Rust Repair in Autos
Rust on a car’s skin is rarely a single moment of bad luck; it is a process that starts with a speckle of exposed metal and ends with a stubborn patch of color that betrays neglect or harsh elements. When the corrosion is still on the surface, repair can be a straightforward, satisfying DIY task that preserves the vehicle’s appearance and structural integrity without the drama or cost of bigger fixes. The aim is not just to hide the problem but to restore a protective seal between bare metal and the world—moisture, salt, and road grime—so rust does not stage a longer, more inconvenient performance elsewhere. In this chapter, the focus is the practical art of handling minor rust with care, patience, and materials that honor the vehicle as a whole. It is a rhythm of clean surfaces, careful abrasion, sealing, and a patient layering of paint that finally wears the patina of a factory finish instead of the memory of a corroded edge. The approach that follows treats repair as part of ongoing maintenance, not as a one-off spectacle that guarantees another decade of rust-free driving but rather as a disciplined act that buys time and preserves value. And because every car’s sheet metal, paint system, and environment are a little different, the best repair respects those differences while sticking to a disciplined sequence of steps that has proven reliable across many makes and models. The technique outlined here emphasizes three core ideas: remove what’s actively rusting, seal what you expose, and layer color and protection in thin, controllable coats so you can watch the finish behave rather than hope it does. If you want a broader primer on repair principles beyond rust, consider a general guide to auto repair that frames how surface restoration fits into a larger maintenance mindset. A comprehensive overview can be found in the A to Z Auto Repair guide. https://motorworksautorepair.com/blog/a-to-z-auto-repair/ This reference helps readers connect rust work to broader repair practices, reinforcing that careful prep, sealing, and finishing are universal to bodywork. For more visual instruction on minor rust repair, you can consult external resources that walk through the same sequence with step-by-step photos. External reference: https://www.wikihow.com/Repair-Minor-Rust-on-a-Car.
Begin with a clean slate. The rust spot should be approached like a small surgical repair rather than a cosmetic touch-up. Start by washing the area thoroughly with soap and water to remove dirt, grease, and any film that could contaminate the repair. Rinse well and dry completely. Any lingering moisture will compromise adhesion, and distressed edges will tend to lift later if moisture is trapped under the new coating. After cleaning, inspect the extent of the rust: is it surface rust that flaked away under clean handling, or have you found tiny pits starting to form? This assessment will guide the level of abrasion and the choice of primer, but in all cases the goal remains the same—zero tolerance for rust that can continue to eat at the area beneath your fresh paint.
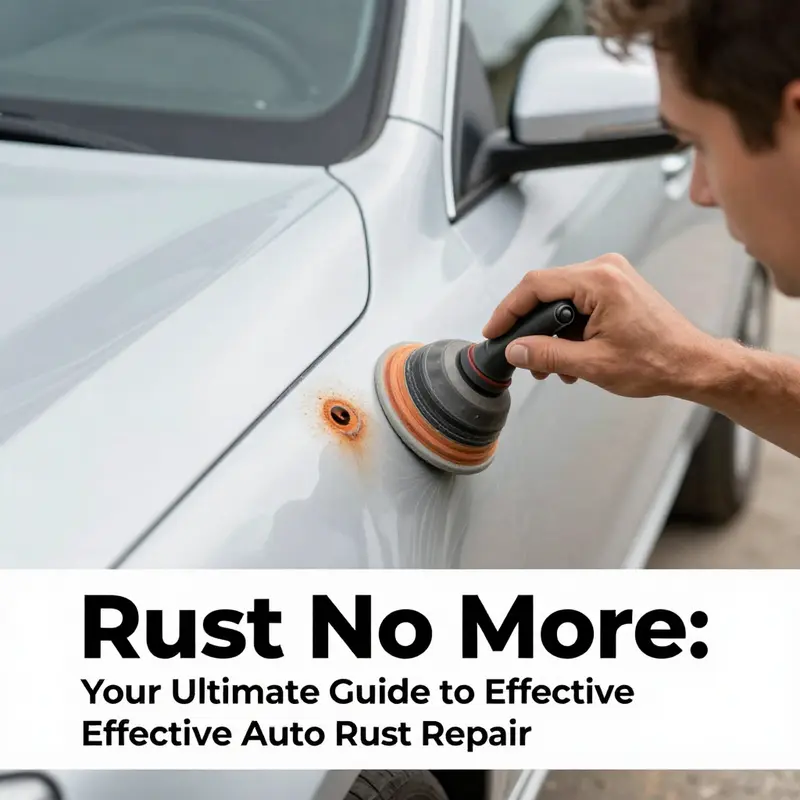
Next comes abrasion, the moment of truth where you decide how far to go. With a sanding block or a low-speed sander, gently remove the rusted particles and any flaking paint until you reach bare metal that’s uniform in tone and texture. Begin with a coarser grade to eliminate the obvious corrosion, then switch to progressively finer grits for a smooth, even surface. The process should remove all visible rust and leave a small margin of clean metal around the repaired zone to promote even paint adhesion. Take care not to gouge the surrounding paint, which could create new cracks or indicate to the eye a patchwork repair rather than a seamless fix. After the metal is prepared, wipe the area down with a degreaser or a quick wipe of isopropyl alcohol to remove any dust, oils, or polishing residues. The surface should feel dull and clean, not slippery, and it should look uniformly matte—the sign that the metal is ready for sealing.
With the metal prepared, apply a primer designed for rust repair. Primer serves as both a barrier and an adhesive bridge between bare metal and the final coats of color. It helps prevent new rust from seeping through and gives paint something to cling to across the repaired edge. Apply the primer in a thin, even layer, following the manufacturer’s drying times. This typically means a short wait—long enough for the primer to become tack-free but not so long that it begins to cure in place and trap dust. A quick, light pass with a tack cloth can remove any microscopic dust specks before the paint is laid down. The primer’s role is simple but essential: it locks the repaired area in place, creating a uniform canvas that mimics the surrounding metal while providing a robust foundation for color.
Color matching is the ritual that makes the repair disappear into the car’s surface. Use a color-matched base coat that matches the vehicle’s original hue, then apply it in several light layers rather than one thick coat. Each layer should dry before the next is laid down to prevent runs and sags that betray the repair. This step rewards patience; the eye perceives depth and consistency when the color builds gradually and evenly. The goal is not a perfect textbook match but a finish that reads as one continuous plane, with the repaired area indistinguishable from the surrounding surface under normal daylight. If your preparation was thorough, the base coat will take hold smoothly and dry with minimal texture; any minor texture can be wet-sanded and re-coated as needed after the first pass has cured. Allow the base coats to cure fully before moving on to the protective topcoat.
A clear coat often crowns the process, sealing the paint and adding resilience against moisture, UV exposure, and minor abrasions. Apply the clear in thin, even layers, allowing each pass to dry before the next. Two or three coats typically balance gloss and durability without creating a heavy, plastic-like finish. The clear coat also helps blend the repaired area with the rest of the panel, smoothing out any residual micro-mist or subtle color differences that can reveal a repair if left unchecked. When the layers are complete, give the finish time to cure in a dust-free environment. A full cure might require 24 hours for the color to harden and several more days for the coating to reach its maximum hardness, during which time you should minimize exposure to harsh weather and garage doors that could rustle fine dust back into the area.
Patience remains a central virtue after the coats have cured. The final stage is a careful cure and cure-management routine. Refrain from washing the car with a high-pressure washer during the initial curing period, and avoid automatic car washes that could strip or abrade the delicate new finish. Hand washing with gentle products becomes the rule for the first couple of weeks. Once the area has fully cured, you can resume normal cleaning, but continue a routine that emphasizes regular washing, especially after winter exposure or road-salt conditions. A routine wax or sealant applied after the repair can provide an extra layer of protection, helping to maintain the barrier between metal and moisture in that vulnerable spot.
Beyond the immediate repair, vigilance is essential. Surface rust can recur if the underlying causes—the presence of moisture, salt, scratched paint, or compromised seals—are not addressed. Regular inspection of the repaired area and the surrounding panels is prudent. If you notice new rust forming or existing spots resurfacing, treat them promptly before they progress. This means returning to the same disciplined sequence: clean, abrade, seal, paint, and protect, with the understanding that rust repair is a maintenance habit as much as a one-time fix. The result, when done with care, is a repaired panel that not only looks consistent with the rest of the car but also stands up to the elements for another season or two or more, depending on climate and care.
In the end, minor rust repair is about translating a small defect into a longer-lasting, visually cohesive finish. It’s a practical exercise in surface discipline—control the rust, protect the metal, and layer the appearance with thin, well-adhered coatings. By treating the process with patience and precision, you respect the vehicle’s original design and extend its life without alarm or excessive expense. If you seek additional guidance or visual references, the external resource mentioned earlier can provide helpful step-by-step illustrations that parallel this approach. External resource: https://www.wikihow.com/Repair-Minor-Rust-on-a-Car.
From Pitting to Perfection: Practical Moderate Rust Repair with Fill, Seal, and Finish
Moderate rust sits at a crossroads between surface blemishes and structural failure. It gnaws into metal enough to create pits, small holes, and weakened patches, yet rarely should you mistake it for a frame-wide problem. The goal here is not cosmetic trickery alone but a durable, long-lasting repair that preserves the panel’s integrity and keeps moisture from returning to the problem zones. The approach is methodical rather than dramatic: remove the corrosion, seal the metal to halt further decay, and rebuild the surface so the final paint coat sits and lasts as it should. When performed with care, moderate rust repair can restore appearance and extend the life of a panel without the expense and downtime of a full replacement. This chapter walks through a cohesive sequence that blends physical removal, chemical protection, and controlled finishing, all in a way that emphasizes safety, accuracy, and durability over quick fixes.
Begin with a clear assessment of the area. If any sign of active rust is still spreading after you’ve loosened the loose material, or if the metal feels unusually soft to the touch, pause and re-evaluate. The line between a fixable patch and a replacement becomes thin here. You want solid, sound metal beneath every coating. With that in mind, start by removing the visible rust and any compromised paint. Use a wire brush or a power tool with a brush attachment, followed by progressively finer sandpaper starting at around 400 grit. The objective is to remove all loose oxide and surface rust while exposing clean, bare metal. If you encounter small pits or tiny holes, don’t rush to fill them before you’re certain every trace of rust is gone. The metal must be stable and free of contaminants for the subsequent coats to adhere properly. A careful pass here not only improves the cosmetic result but also reduces the likelihood of rust reappearing under new paint.
After the bulk of the rust is gone, clean the area thoroughly. Degreasing with a solvent or rubbing alcohol eliminates oil and dust that can trap undercoats. Residue is your enemy at this stage because it disrupts adhesion and creates dull, uneven patches later. Wipe the surface until it feels dry and clean to the touch. Any lingering film can undermine the next layers, so take this step seriously. Once the surface is dry, apply a rust-inhibiting coating. A rust converter or a zinc-rich primer serves as a critical barrier that stymies any residual corrosion and provides a primer for the next layers. The primer should be applied evenly and allowed to dry completely per the manufacturer’s instructions. Don’t skip this step in the name of saving time; a well-applied anti-rust barrier is the backbone of a durable repair and a quiet evening spent admiring a smooth, long-lived finish.
With the metal now protected, you’re ready to address surface irregularities. Moderate rust often leaves micro-imperfections that will show through a final paint layer if left unaddressed. A guide coat can be employed to reveal high and low spots during bodywork preparation. This temporary layer—applied thinly and allowed to dry—helps you identify where you need to fill or sand further. Use a light hand when evaluating the surface; the goal is a uniform plane that will accept paint evenly. Sand the area with progressively finer grits, moving first from about 120 to 240 and then toward 320 or 400 as you refine. The idea is to minimize scratches while ensuring the area is perfectly level with the surrounding skin. After this step, wipe again with a clean solvent to remove all dust before moving to the next phase. A smooth, even surface is essential for both adhesion and the final appearance, so patience here pays dividends later.
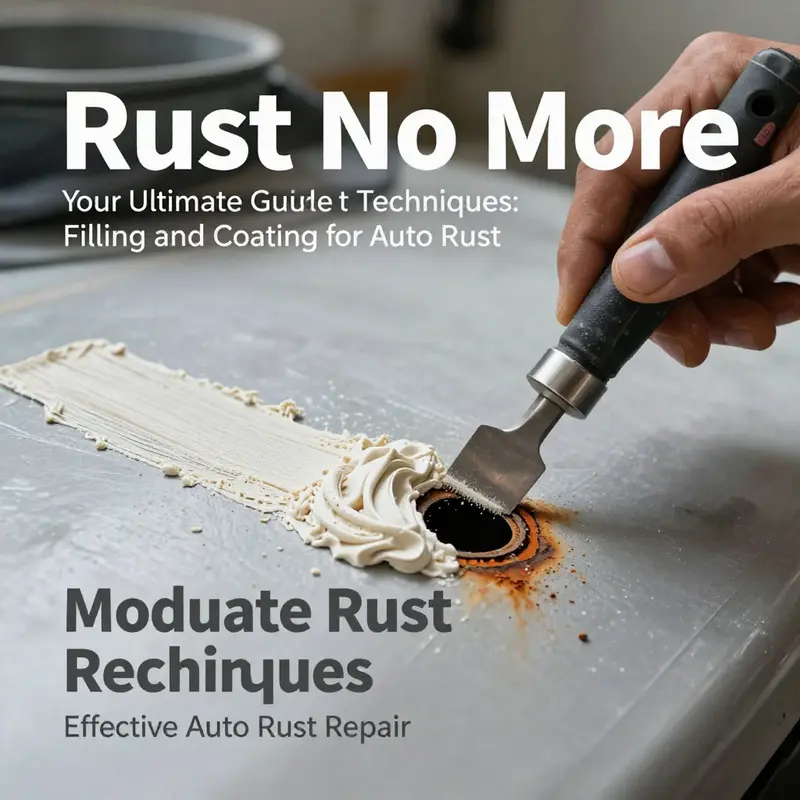
Filling holes and depressions is the next practical hurdle. For small pits that don’t breach the structural integrity of the panel, a body filler can restore a seamless contour. Mix and apply according to the product directions, then use a putty knife to smooth the surface. Let the filler cure completely, then re-sand with fine-grit paper until the repaired area blends with the adjacent metal. If the steel has developed holes, the repair may require a slightly larger patch or a more robust filler. The overarching rule is to avoid leaving any voids that could later trap moisture. When the filler reaches a smooth, level finish, apply a final coat of primer to seal the repaired zone. This keeps moisture out and ensures a uniform base for the topcoats. The moment you see a uniform, slightly glossy primer surface, you know you’ve set the stage for a durable paint layer.
Now the surface is ready for color and protection. Paint flow and color matching are often the most visible aspects of rust repair, yet they depend entirely on the quality of the prep work that preceded them. Apply the color-matched topcoat in several thin, even coats rather than one heavy layer. Thin coats cure more evenly and reduce the risk of runs, sags, and shade mismatches. Between each coat, allow ample drying time as dictated by the product guidelines. After the color has cured, a clear coat can be added for enhanced gloss and additional protection against moisture and UV exposure. The clear coat acts as a sacrificial shield that helps maintain the repair’s appearance over years of hot sun, rain, and road grime. The combined effect of proper adhesion, gradual color application, and a protective top layer is a finish that looks integrated with the rest of the car rather than a patched section.
Throughout this process, balance meticulous technique with practical judgment. If the rust has left the metal vulnerable in critical areas or if you begin to see gaps that widen after sanding, reconsider DIY steps. Moderate rust repair should be approached with patience and a clear understanding of the boundary between a patch and a replacement. If, during any phase, you detect rust that has progressed toward structural components or the floor pan, a professional assessment becomes the prudent choice. It’s better to invest in a professional diagnosis than to risk compromising the vehicle’s safety or the repair’s longevity. The aim is not only a visually pleasing result but also enduring protection that keeps future rust at bay.
As you work, you’ll notice that preparation underpins every success. The steps you take to remove, seal, fill, and finish are what determine whether the repair lasts or quickly returns to rust. A well-prepared surface accepts paint more evenly, adheres more reliably, and resists chipping and moisture intrusion. The strategy is straightforward: remove corrosion, apply a protective barrier, rebuild the surface with accuracy, and finish with controlled painting and protection. A cohesive, well-executed sequence like this provides both functional durability and a finish that makes the repair nearly invisible to the casual observer. For related surface-prep techniques that complement these steps, you can explore practical guidance on auto paint preparation in this related article: How to Repair Auto Paint Scratches.
Finally, a note on where moderate rust ends and professional intervention begins. If you encounter rust that has compromised the structural integrity—such as holes in the floor pan, frame rails, or other load-bearing components—the DIY approach should pause. In those cases, a qualified auto body shop with welding, panel replacement, and structural repair capabilities is the safest route. DIY repair can save time and money for non-structural patches, but safety and structural reliability must come first. When executed with discipline and respect for the limits of the materials, moderate rust repair becomes a robust, cost-effective way to restore a car’s appearance and resilience. The methods described here are designed to deliver a durable patch that stands up to the elements and the wear of daily driving, while preserving the vehicle’s value and safety over the long haul.
External resource for broader understanding of rust repair steps: https://www.popularmechanics.com/cars/how-to/a35693878/how-to-repair-basic-rust-8-steps/
Beyond DIY Limits: Why Severe Auto Rust Demands Professional Intervention and How Experts Restore Structural Integrity
Rust is not a single problem but a family of failures that can creep from the surface into the very structure that keeps a car safe on the road. When rust remains superficial, the path to repair is straightforward and manageable. But when the corrosion penetrates the metal and invades critical components, the situation shifts from a cosmetic fix to a matter of safety and structural reliability. In this chapter, we follow the trajectory of severe rust—how it is properly diagnosed, how professionals approach the repair, and why entrusting the work to skilled technicians is the prudent course. The narrative is not a litany of do’s and don’ts, but a seamless account of why the line between effective DIY and professional intervention matters, especially when the frame, floor, or load-bearing members are at stake.
The starting point is an honest appraisal of how far the rust has progressed. Unlike surface spotting, severe rust often hides within the hollow spaces of panels, under carpeting, or along the seams where moisture collects and road salt lingers. A trained technician will assess not only what is visible but what lies beneath. They will probe with diagnostic tools, illuminate blocked cavities, and, when necessary, remove interior panels or floor mats to inspect the more secluded areas. The goal is to map the full extent of the decay—the parts that can be seen from the outside and the hidden pockets where rust quietly undermines strength. This comprehensive assessment is essential because an apparent patch on a small surface area can mask broader damage that compromises stiffness, ride quality, and crash safety.
Once the true scope is known, the professional’s next move is to determine the feasibility of repair versus replacement. If the rust has eaten through the metal and weakened load-bearing components, or if holes have formed in critical panels like floor pans or frame rails, replacement often becomes the safer option. In such cases, the shop will outline the procedures for removing the compromised section and installing a new panel that restores the vehicle’s original geometry and strength. This step is not mere brazing or splicing; it involves precise cutting, controlled welding, and meticulous sealing to ensure that rust cannot reassert itself at the seams. The integrity of the repair hinges on sound metalwork, correct welds, and compatibility with the surrounding structure. A professional will also verify alignment with factory specifications to ensure that doors close properly, trim fits, and the vehicle preserves its designed crash performance.
Where repair is feasible, the work shifts to restoring the metal from the inside out. The metal repair sequence begins with removing as much rust as possible from the affected areas. Coarse grinding is followed by progressively finer abrasive steps to reach clean, sound metal. If pits and small holes remain, a body filler may be used to level the surface, but only after the metal is sound and dry. The filler itself must be cured, sanded smooth, and primed to create a uniform base for the paint system. Importantly, the treatment does not end with cosmetic concealment. A high-quality anti-corrosion strategy is applied to exposed metal, using long-lasting coatings that can withstand moisture, salt spray, and temperature fluctuations. Zinc-rich primers, specialized rust converters, or other durable sealants are chosen for their ability to bond to metal and resist future corrosion.
The finishing phase in severe rust repair is a careful layering process designed to restore not just appearance but enduring protection. After priming, the technician applies a base coat that matches the vehicle’s color while tolerating the inevitable expansion and contraction of metal with temperature changes. The base layer is followed by multiple thin coats for depth and even color saturation. A clear coat, where appropriate, adds UV protection and a final gloss that helps shield the repaired area from the elements. The finishing touches—masking, blending with adjacent panels, and ensuring an invisible seam—are what separate a repair that lasts from one that merely looks good for a season. Each step is performed with attention to moisture control, curing conditions, and the shop’s environmental standards, because even small lapses in temperature or humidity can compromise adhesion and longevity.
Beyond the technical steps, the decision to undertake professional intervention rests on a careful risk-benefit analysis. A structural repair or replacement is not just about passing an inspection. It is about ensuring that the vehicle retains its designed stiffness, rollover resistance, and crash energy management. For drivers who commute daily or rely on their cars for safety-critical errands, the calculus strongly favors expertise. The experience a seasoned technician brings is not merely about fixing metal; it is about preserving a framework that keeps occupants protected in the event of a collision. The professional environment also provides access to tools and procedures that are beyond the reach of typical DIY setups. Welders with certified training, frame machines that measure and correct geometry, and controlled atmospheres for paint and coatings all contribute to a repair that stands the test of time.
Choosing the right shop becomes part of the repair itself. An informed consumer looks for evidence of competence: proper welding credentials, a written assessment of the damage, a clearly itemized estimate, and warranties on workmanship and corrosion protection. The shop should be able to explain, in plain terms, which panels will be replaced, how the old metal is removed, what primers and coatings will be used, and how the finished product will be protected against future rust. A transparent process reduces risk, aligns expectations, and creates a road map from tear-out to final finish. When you speak with a shop, ask about their approach to ventilation and containment, their track record with structural repairs, and whether they will document the repair with photos or a written report for your records. A practical test of confidence is whether they invite you to observe key steps or provide a post-repair walkthrough that explains what was done and why.
The role of prevention remains crucial, even after a comprehensive professional repair. Rust does not magically disappear because the surface appears clean again. The best outcomes come from a plan that treats the car as a sealed system: moisture access points are identified and sealed, drainage pathways are cleaned and maintained, and vulnerable areas are coated with durable undercoatings or rust-inhibiting paints designed to last under winter conditions and road-salt exposure. The aim is not merely to stop present rust but to deter new corrosion from taking hold. In practical terms, this means regular inspections for hidden corrosion, prompt attention to scratches or chips that expose bare metal, and periodic reapplication of protective coatings as the car ages. Owners should also be mindful of the environments in which they operate their vehicles. Short trips in damp conditions can allow moisture to linger in cavities where heat and condensation fail to evaporate it completely. In such cases, a professional rust prevention treatment may be warranted as part of a broader maintenance plan.
The conversation about severe rust also invites a balanced view of timing. If you notice rust that appears to creep beyond a single panel, or if there are signs of dampness in the cabin or the undercarriage after a wash, a professional assessment sooner rather than later reduces the risk that corrosion will advance to an unrecoverable state. The decision to involve a professional is often a decision to protect value, safety, and long-term reliability. It isn’t merely about erasing unsightly blemishes; it is about restoring the structural framework that keeps occupants protected in the event of a collision. The professional environment also provides access to tools and procedures that are beyond the reach of typical DIY setups. Welders with certified training, frame machines that measure and correct geometry, and controlled atmospheres for paint and coatings all contribute to a repair that stands the test of time.
For readers seeking a broader context on reliable repair practices and the path from assessment through replacement to prevention, a practical internal resource offers guidance on foundational repair concepts and long-term protection strategies. See the related discussion under the guidance of A to Z Auto Repair. This reference provides continuity with the overarching topic of auto rust repair and helps connect the process described here with a more expansive view of what good, safety-focused repair entails.
As the chapter moves forward, the emphasis remains clear: severe rust is not a DIY challenge where a quick fix will suffice. The safety, performance, and longevity of a vehicle hinge on precise assessment, careful metalwork, and robust protective coatings performed by skilled professionals. The next chapter will turn attention to prevention strategies that help extend the life of repaired surfaces and reduce the likelihood of corrosion returning, ensuring the conversation about rust remains not only diagnostic but preventive.
External resources for deeper reading reinforce the message that safety and prevention are inseparable from repair. For additional guidance on how to approach rust and best prevention practices, consult an external resource such as the detailed article from a reputable consumer-focused source on car rust and prevention: https://www.autocare.com.au/what-to-do-about-car-rust-and-how-to-prevent-it
Guarding the Metal: How Proactive Maintenance Prevents Auto Rust and Supports Smarter Repairs
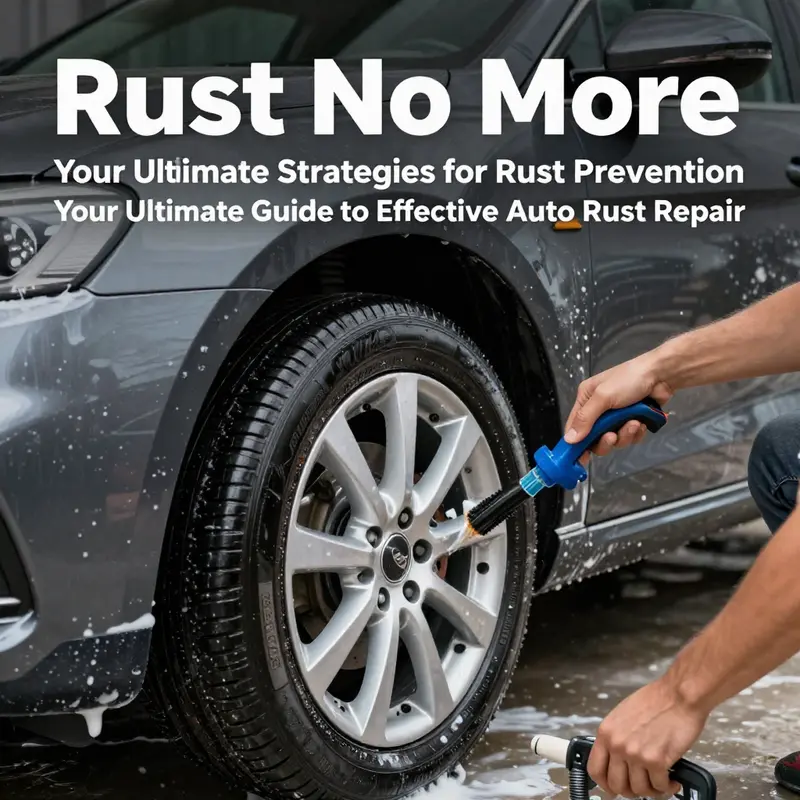
Rust is rarely a dramatic, one-shot event. It often begins with a small chip, a scratch that breaches the clear coat, or a stray splash of salt-laden water that lingers in a wheel well. From there, moisture and oxygen do their quiet work, and what started as a minor annoyance can slowly undermine the metal beneath the paint. The most practical defense is a steady habit of prevention that makes rust less likely to take hold and, when it does appear, keeps it manageable enough to repair without compromising safety or cost. This approach sits at the center of a broader philosophy: a well-maintained car lasts longer, costs less over time, and avoids the stress of major repairs that can interrupt daily life. Prevention is not glamorous, but it is powerful, because it changes the math of rust from an escalating threat into a controllable risk you monitor and mitigate through regular care.
A good rust prevention routine begins with the simplest, most effective act: regular washing and thorough drying. Dirt, road salt, bird droppings, tree sap, and environmental pollutants cling to the paint and undercarriage, creating tiny niches where moisture can accumulate. In regions with winter road treatment, the combination of salt and slush accelerates corrosion, especially at seams, door sills, and the undersides of the hood and trunk. Washing the car every one to two weeks, and more often after winter drives or off-road excursions, is a practical baseline. It is not enough to rinse; you must also dry. Water trapped in crevices, around hinges, and along the edges of panels can form a continual presence that invites rust. A careful drying routine, paying particular attention to seams, weather-stripped areas, and the wheel wells, makes a meaningful difference.
Final thoughts
By understanding the severity of rust and employing the right techniques for repair, vehicle owners can extend the life and safety of their machines. Whether it’s addressing minor surface rust or seeking professional help for severe corrosion, staying informed and proactive is essential. And with regular maintenance, you can prevent rust from becoming a recurring issue. Make these strategies part of your routine vehicle care to not only protect your investment but also ensure a safe and enjoyable driving experience.