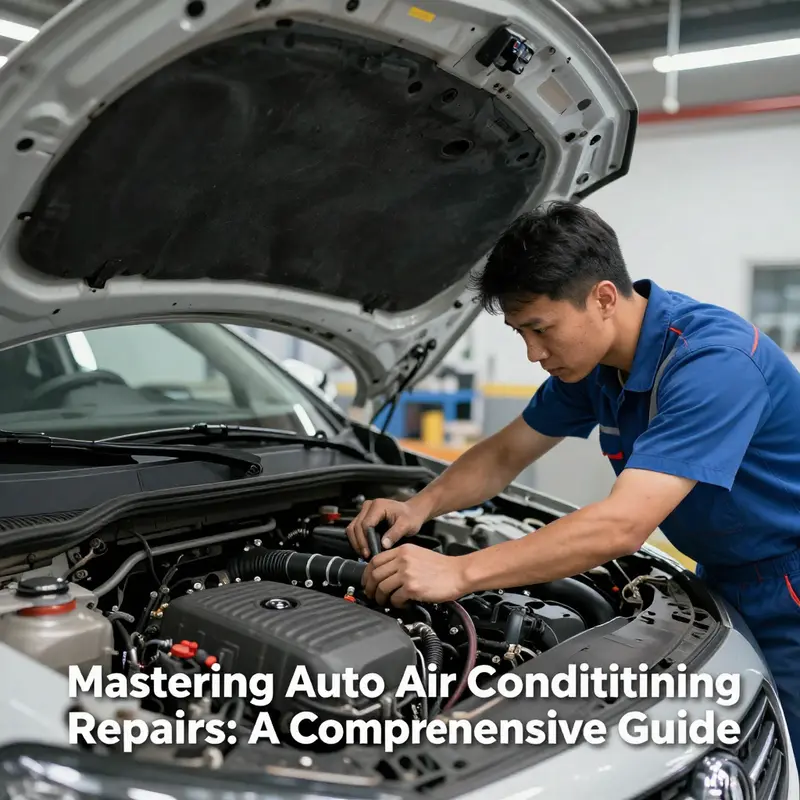
Keeping your vehicle’s air conditioning system in tip-top shape is crucial for comfort and performance, whether you’re riding on two wheels or driving a car. From diagnosing complex issues to performing regular maintenance, understanding the intricacies of air conditioning systems empowers motorcycle owners, auto enthusiasts, and repair shops alike. This guide delves into diagnosing problems accurately, addressing specific faults, adhering to safety and best practices, utilizing necessary tools, and maintaining the system to avoid future complications. Each chapter builds upon the last, providing a structured and holistic understanding of auto air conditioning repairs.
Diagnosing Auto Air Conditioning Problems: A Structured Path to Reliable Repair

Pinpointing the root cause of an auto air conditioning problem is not a guesswork exercise. It is a disciplined, multi-layer process that begins with careful observation, proceeds through targeted measurements, and ends with informed judgment that separates symptoms from the underlying fault. A single symptom can map to a family of potential faults, so the goal is to identify the true cause without unnecessary part replacements. The diagnostic process rests on three pillars: intuitive inspection, instrument-based testing, and experience-informed judgment. When they work in sequence, one pillar validates or clarifies the others, reducing guesswork and guiding repairs toward reliability and long-term performance.
The first step, intuitive inspection, uses sight, hearing, and touch to build a mental map of the system. Visually inspect for signs of leaks, such as oil residue around hoses and fittings, a damp evaporator case, or a stained compressor. Look for damaged belts or noisy components that hint at mechanical wear. Listen for belt squeal, clutch engagement noises, or rattles from the blower. A musty odor emanating from the vents can signal moisture and possible mold in the evaporator. This stage is diagnostic, not corrective; it establishes the likely area of concern before tools are brought into play.
The second pillar, instrument-based testing, relies on measurements to confirm or refute suspected faults. Refrigerant service gauges let you compare high-side and low-side pressures to manufacturer specs under the current ambient conditions. Low low-side pressure with normal or high high-side pressure points toward a leak or undercharge; unusually high high-side pressure can indicate a restriction or overcharge. An electronic leak detector, UV dye, or UV flashlight helps locate leaks without dismantling components. A multimeter tests electrical health: wiring, fuses, relays, clutch control circuits, and fan motors. Temperature measurement across the evaporator is another key clue: a substantial temperature drop indicates good refrigerant flow, while a small delta suggests a restriction or undercharge. Diagnostic scanners can read codes from sensors and control modules that govern pressure switches and the clutch, narrowing potential causes without invasive work.
The third pillar is experience-based judgment. A single symptom can arise from multiple causes, and the same fault can present differently across vehicles, climates, and usage. Patterns matter: for example, a failing compressor clutch may coincide with electrical faults, while a blocked condenser can raise high-side pressure and reduce cooling. The diagnostic loop is iterative: observe, measure, compare to known patterns, and adjust hypotheses as needed. The goal is a concise, evidence-based repair plan rather than a hasty substitution of parts.
Once a root cause is identified, the repair plan follows a logical sequence: fix the leak if present and evacuate the system to remove moisture and air, then recharge with the correct refrigerant type and charge per the manufacturer. If a component such as the condenser, evaporator, or compressor is beyond simple repair, assess whether replacement is required. Throughout, safety comes first: disconnect the battery before electrical work, wear protective gear, and use the correct refrigerant for the vehicle. With a thorough diagnostic process, the customer receives a durable fix that restores cooling and reliability rather than a temporary band-aid.
Diagnosing and Fixing Auto Air Conditioning: A Calm, Methodical Path to Cool Comfort
Repairing auto air conditioning is less a sprint and more a careful, methodical journey. In a modern vehicle, the A/C system is a complex loop of refrigerant, metal, electronics, and air paths that must work in harmony. The goal is not merely to push more refrigerant into a leaking system or to guess at a faulty part. It is to diagnose accurately, fix the root cause, evacuate moisture and air, and then recharge with the correct refrigerant to the exact spec. This chapter follows a steady, integrated approach that ties comfort to reliability, drawing on the most common faults and practical remedies described in professional guidance while keeping the work within the bounds of safe, do-it-yourself practice when possible. As you read, keep in mind that some tasks—especially those involving refrigerant leaks, system evacuation, or compressor work—are best handled by a trained technician with the right equipment. Yet much of the everyday maintenance and many straightforward fixes can be understood and appreciated by any handy driver who wants better cooling and fewer headaches on hot days. A helpful starting point is the toolkit you’ll already need: a refrigerant pressure gauge set to read high- and low-side pressures, a leak detector (UV dye or electronic sniffer), a multimeter to verify electrical components, and a basic set of hand tools. With these, you can confirm or rule out the most common culprits and set the stage for the right repair path. The diagnostic mindset matters as much as the repair itself, and a disciplined approach pays off in time saved and fewer unnecessary charges from guesswork.
Not cooling at all is a startling clue, but it rarely points to a single magic fix. You’ll first want to verify whether the system truly lacks refrigerant or whether the compressor clutch is failing to engage. A reading on the low side that is markedly low often signals a leak or an undercharge; the high side pressure gives you the other half of the story. If the gauge hints at a leak, stop guessing and search for signs of dye residue or electronic sniffs at hose joints, compressor seals, and the evaporator connections. The moment you suspect a leak, the best practice is to address it directly—replace the damaged hose, seal, or O-ring, then prepare for evacuation. Evacuation is not merely blowing out air; it is pulling a deep vacuum to remove both air and moisture, which is the enemy of refrigerant systems. Moisture can corrode, freeze, and clog expansion devices, so never skip the vacuum stage after repairing a leak. After a thorough evac, you recharge with the correct refrigerant type and the precise quantity specified for your vehicle. Overcharging or undercharging both invite performance issues and potential component stress.
If the low side reading is low but there’s no visible leak, you may simply recharge after evacuation, but do not skip the diagnostic steps. A weak cooling performance can also stem from a failing compressor or an electrical fault in the clutch circuit. If the clutch does not engage when the AC is turned on, inspect the fuse, relay, and wiring leading to the compressor. A failed clutch coil, a seized compressor, or a degraded clutch bearing can all mimic simple electrical faults. If the electronics check out, the compressor itself may be at fault and require replacement. In many cases, replacement involves more complexity and is best performed with professional guidance or assistance. Before you condemn the compressor, ensure that the system is clean and free of restrictions that could starve the compressor of refrigerant or lead to overheating. A dirty condenser, located at the front of the vehicle, is a frequent but often overlooked bottleneck. Dirt, leaves, bugs, and road grime can accumulate on the fins and impede heat rejection. Gentle cleaning with a soft brush or light air flow is usually sufficient; avoid aggressive high-pressure water that could bend the delicate fins. In severe cases, especially on European designs with tightly packed front-end assemblies, you may need to remove the bumper to access and clean the condenser more thoroughly.
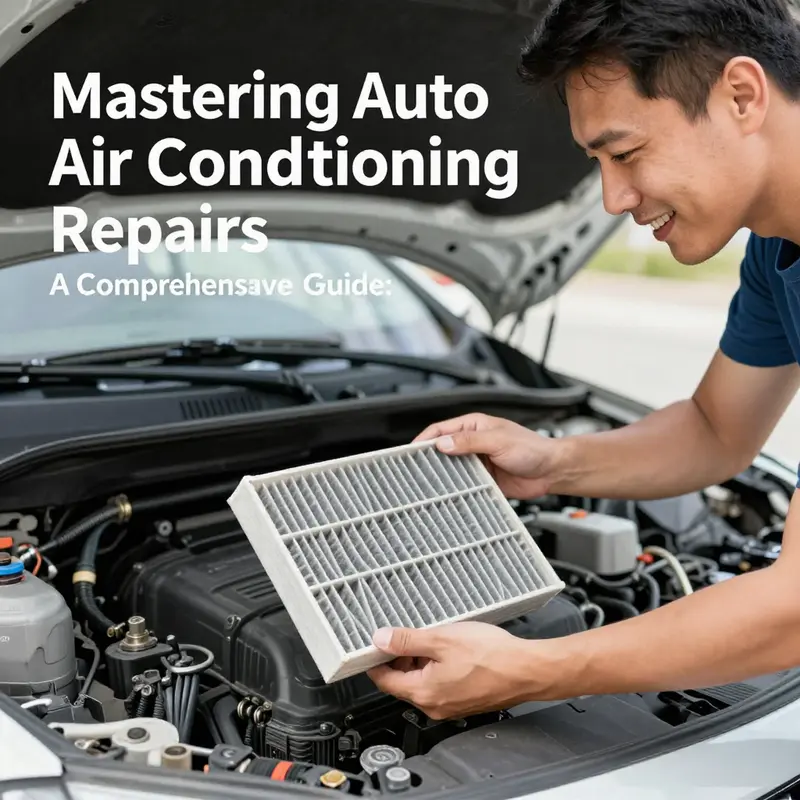
Another common cause of weak cooling is the cabin air path itself. The evaporator sits behind the dashboard, and if it becomes blocked with debris or develops a frost layer from sensor faults, airflow and cooling efficiency suffer. Cleaning the evaporator requires professional-grade equipment in many cases, so don’t force a DIY fix if you don’t have the right tools. In parallel, the cabin air filter—often tucked behind the glove box or under the hood—plays a surprisingly big role. A clogged filter reduces airflow, which makes the evaporator work harder and cools less effectively. Replacing the cabin filter on a regular schedule, typically every 12,000 to 24,000 miles or once a year, depending on driving conditions, can yield noticeable improvements in cooling and odor control. The filter is a small, inexpensive component that hides a big performance boost when kept fresh.
If the system does cool, but only weakly, examine the expansion device—the expansion valve or the orifice tube. A clogged or malfunctioning valve can throttle refrigerant flow, creating a bottleneck that robs the system of the cold air you expect. Replacement of the faulty valve is followed by another evacuation and a careful recharge to specification. Similarly, a dirty or partially blocked evaporator can produce similar symptoms, albeit with a more involved service. In most cases, professional access is required to remove and clean or replace the evaporator, and this step underscores why some repairs should be handled by technicians with the right tools and training.
Odors from the vents are a different kind of signal. A stale, musty smell usually points to a mold or bacterial buildup on a damp evaporator. The cabin air filter also contributes to odors when it becomes saturated with contaminants. Replacing the filter is a quick first step, and then a targeted evaporator cleaning with a product designed for evaporator sanitization can restore fresh air. Do not ignore odors, especially if you have allergies or respiratory issues in the household; ongoing odors often indicate ongoing moisture and microbial growth that can worsen if left untreated.
Excessive or unusual noises add another layer of clues. A squeal or grind from a belt-driven compressor belt can indicate wear or tension issues. The blower motor, if wobbly or damaged, can produce uneven airflow and rattling sounds. Diagnosing noises involves a close inspection of belts, pulleys, and blower assemblies, plus verifying that the condenser and condenser fan are free of obstruction and operating smoothly. If the noise is tied to the compressor itself, professional diagnosis is frequently required, as a failing compressor or clutch can cause more than noise alone and may require replacement.
Intermittent operation—an A/C that toggles on and off unexpectedly—often points to electrical faults. Check wiring harnesses, plug connections, and fuses. The system’s safety switches, which protect the compressor by monitoring pressure, can also cause cycling if a switch is faulty. In such cases, a careful electrical test will reveal whether the fault lies in a switch, a relay, or a control signal from the climate control head. Electrical issues can masquerade as mechanical faults, so a systematic check of fuses, relays, and connectors is essential.
Safety and best practices frame every step. Always disconnect the battery before working on electrical components or the compressor itself. Refrigerants can cause frostbite on contact, so protective gear—gloves and safety glasses—should be worn when handling hoses or lines. Use the correct refrigerant type for your vehicle. Modern cars mostly use R-1234yf or R-134a, and using the wrong type can damage the system. When in doubt, consult the manufacturer’s specifications and a professional technician. While some maintenance tasks, such as cabin air filter replacement, are DIY-friendly, handling refrigerant leaks, evacuating the system, and recharging demand specialized tools and training. These tasks carry environmental and safety implications, and errors can be costly to the system and to the environment.
Beyond diagnosing and fixing individual faults, regular maintenance helps prevent many of these issues from arising. A yearly or biannual inspection can catch a slow leak early, check the condition of hoses and fittings, evaluate condenser cleanliness, and confirm that the evaporator is functioning as intended. The goal is to keep the system clean, dry, and properly charged so it delivers reliable cooling when the heat cranks up. It is also wise to plan ahead for major repairs, such as compressor replacement, by understanding the typical cost ranges and the labor considerations involved. For a practical sense of the financial side, you can review a concise cost guide that accompanies this chapter as an internal resource: Auto A/C repair cost guide.
For the broader professional landscape and additional perspectives on repair techniques, tools, and best practices, see industry guidance from a specialized external resource. This guide provides complementary insights into how professionals approach refrigerant handling, system evacuations, and the complex decision tree around compressor and evaporator service. External reference: https://www.autocar.co.uk/car-advice/vehicle-maintenance/air-conditioning-repair-guide
In short, solving auto air conditioning problems is about disciplined diagnosis, addressing root causes such as leaks or dirty components, and validating that the system is clean, dry, and correctly charged. While the temptation to simply top off refrigerant is strong, it rarely solves the underlying issue and can even damage the compressor. When in doubt, treat the more demanding tasks as professional work. The reward is a cooler cabin, more efficient energy use, and a longer, healthier life for the system that keeps you comfortable through the seasons.
Safety First, Then Success: A Prudent, Patient Path Through Auto Air Conditioning Repairs
Repairing an auto air conditioning system is less about quick fixes and more about a disciplined conversation with a complex, pressured system. It demands precise safety practices, careful diagnosis, and a methodical repair sequence that protects people, preserves the environment, and preserves the long-term health of the vehicle. A practical repair starts with safety, moves through accurate diagnosis, and ends with a controlled recharge and thoughtful maintenance. When approached this way, what seems daunting becomes a predictable process that minimizes risk and maximizes the chance of restoring comfort inside the cabin without inviting repeat failures.\n\nSafety sits at the core of every step. Before you touch any electrical component or refrigerant line, turn off the engine and disconnect the negative battery cable. This simple precaution eliminates the risk of short circuits when the compressor clutch or blower motor is involved. Protective gear is non negotiable: safety goggles to shield eyes from refrigerant spray or debris, and chemical-resistant gloves to protect skin from frostbite and chemical exposure. Refrigerant handling isn’t a casual task; it’s tightly regulated because the substances used in modern systems are both potent greenhouse gases and potential health hazards. Never vent refrigerant to the atmosphere. Use certified recovery or recycling equipment to capture and store it safely. And when you’re cleaning or inspecting the condenser, avoid aggressive high-pressure water jets that can bend or warp the delicate aluminum fins. A soft brush or gentle compressed air is often plenty to clear the fins without damaging them, keeping heat transfer efficient.\n\nBeyond the immediate work area, the surrounding environment matters. Work in a well-ventilated space and follow local regulations for refrigerant handling. This isn’t just about compliance; it’s about preventing accidental exposure to the eye, skin, or lungs and about protecting the atmosphere from unnecessary emissions. The toolbox you use should be fit for the task: a refrigerant recovery machine, a high-quality manifold gauge set to read both high-side and low-side pressures, an electronic leak detector, and a multimeter to verify electrical continuity, fuses, and clutch circuits. These tools aren’t optional ornaments; they are essential to formulating a reliable plan rather than guessing at what’s wrong. In the same spirit, use only the refrigerants specified by the vehicle’s manufacturer. Modern systems rely on R-134a or R-1234yf depending on the model, and mixing or mischarging can cause performance issues or damage.\n\nAccurate diagnosis is the doorway to a lasting repair. A careful eyes-on approach, combined with the right diagnostic tools, translates symptoms into probable causes. A reading from the manifold gauges will reveal whether pressures are within expected ranges for ambient temperature and engine speed. Low pressures often point to a leak or a low charge, while high pressures suggest a restricted flow or a clogged condenser. The sight glass, if present on the receiver/drier or accumulator, can offer real-time clues; bubbles may indicate low refrigerant or moisture in the system, while a steady, clear reading after a steady run can suggest a charged, functioning circuit. Yet a lack of bubbles does not guarantee perfection; leaks can be small and battery-powered sensors can fail. That’s where a UV dye or electronic sniffer completes the picture by unveiling slow leaks at hose connections, O-rings, compressor seals, or the evaporator core. Electrical health is equally critical: a blown fuse, a failed relay, or a damaged clutch circuit can mimic a refrigerant problem, masking a fault that prevents the compressor from engaging. In all cases, diagnosis should be anchored by precise data rather than assumptions.\n\nWhen the fault is confirmed, the repair sequence must follow a disciplined order. Start with recovery of the existing refrigerant using a proper recovery machine. Do not skip this step; it protects the machine, the environment, and the technician. After recovery, evacuate the system to a deep vacuum, typically below 500 microns, for at least 30 minutes. The vacuum stage pulls out air, moisture, and non-condensables that can corrode components, form acids, or cause blockages. This step is non-negotiable because moisture in particular is the enemy of AC systems, capable of turning a simple leak into a creeping corrosion problem or causing oil degradation that compromises lubrication and sealing surfaces. If any component is suspected of contamination or damage—such as the condenser, receiver/drier, or evaporator—the prudent choice is to replace it along with its O-rings and gaskets. Use OEM-or-equivalent parts to ensure proper seals and fit. When it comes to charging, the “weigh-in” method is the gold standard. Add refrigerant by weight according to the manufacturer’s specification, then recheck the system pressures and the cooling performance. Overcharging is as problematic as undercharging; precise quantities are essential for optimal performance and to avoid stressing the compressor.\n\nIn some cases, flushing the system becomes necessary if debris or old oil has circulated and could damage new components or impede lubrication. Flushing is a specialized procedure and should be performed with equipment designed for that purpose. If a component such as the condenser or evaporator is deeply restricted or damaged, replacement is often the most reliable route. After recharging, a thorough leak check is mandatory to confirm the integrity of seals, hoses, and connections. Throughout this process, documenting the measurements and steps is valuable. A well-recorded service history helps future technicians diagnose recurrent issues and informs decisions about component life and preventative maintenance.\n\nPreventive maintenance remains a practical, cost-effective strategy for preserving AC performance. The cabin air filter, frequently overlooked, should be checked and replaced on a schedule aligned with driving conditions. A clogged cabin air filter reduces airflow across the evaporator, diminishing cooling efficiency and contributing to odors that travel into the cabin. The condenser, located at the front of the vehicle, can collect dirt, leaves, and road grime that choke heat transfer. Gentle cleaning with air or a soft brush, plus periodic inspection for bent fins, keeps the system efficient. If you notice persistent odor or diminished cooling, don’t ignore the evaporator access behind the dash; it may require professional cleaning or replacement if debris has taken up residence or if the coils are frozen due to a faulty sensor. For many drivers, professional service every few years provides a valuable check on seals, leaks, and overall refrigerant condition, catching issues before they become major repairs.\n\nThe practical path to a reliable AC system also demands a sober appreciation of limits and responsibilities. Refrigerant work, including evacuation and recharging, is a domain where expertise and certification matter. The risks of improper handling, environmental harm, and potential system damage are real, and many jurisdictions require licensed technicians for refrigerant recovery and recharging. When the fault lies with the compressor—whether clutch engagement is erratic, noises are present, or cooling is absent—consider the cost and complexity. A damaged compressor often necessitates a new clutch assembly or even a complete replacement, a task that blends mechanical skill with precise lubrication and alignment; this is typically beyond DIY reparability for most enthusiasts. The same careful judgment applies to a failing fan motor or a restricted condenser, where simple fixes may mask deeper issues that recur if the root cause isn’t addressed.\n\nFor readers weighing the economics of repair, a practical touchstone is to balance the cost of parts and labor with the vehicle’s value and expected remaining life. A transparent discussion with a qualified technician can illuminate whether a repair is worth pursuing or if a more comprehensive system replacement might be more economical in the long run. When you need a quick sense of scope, consider resources that compile typical repair costs, but remember that each car’s system has its own quirks and refrigerant type. For a realistic sense of expense, see the resource on Auto AC repair cost. The path to a restored cabin climate is not about rushing through steps; it’s about disciplined practice, precise data, and a patient, meticulous approach that respects both the machine and the environment.\n\nExternal reference aside, the practical framework remains consistent: safety first, accurate diagnosis, a controlled recovery and evacuation, correct component replacement when needed, precise charging by weight, and a steady emphasis on preventative maintenance. This approach yields reliable cooling, minimizes the risk of rework, and preserves the integrity of the whole vehicle system. It is a guide for the curious hobbyist who understands the limits of DIY work and favors a measured, responsible path toward restoration rather than a quick patch that may fail later. For the curious reader, further reading about the costs and scope of repairs can provide a helpful frame for planning, and the internal resource linked above offers a starting point for understanding where expenses tend to cluster in typical scenarios. \n\nInternal link: For a practical reference on cost considerations, see Auto AC repair cost.\n\nExternal resource: https://www.autorepairmanual.com/air-conditioning-system-repair-safety-and-best-practices
Quiet Precision: Building the Right Toolset for Restoring Auto Air Conditioning
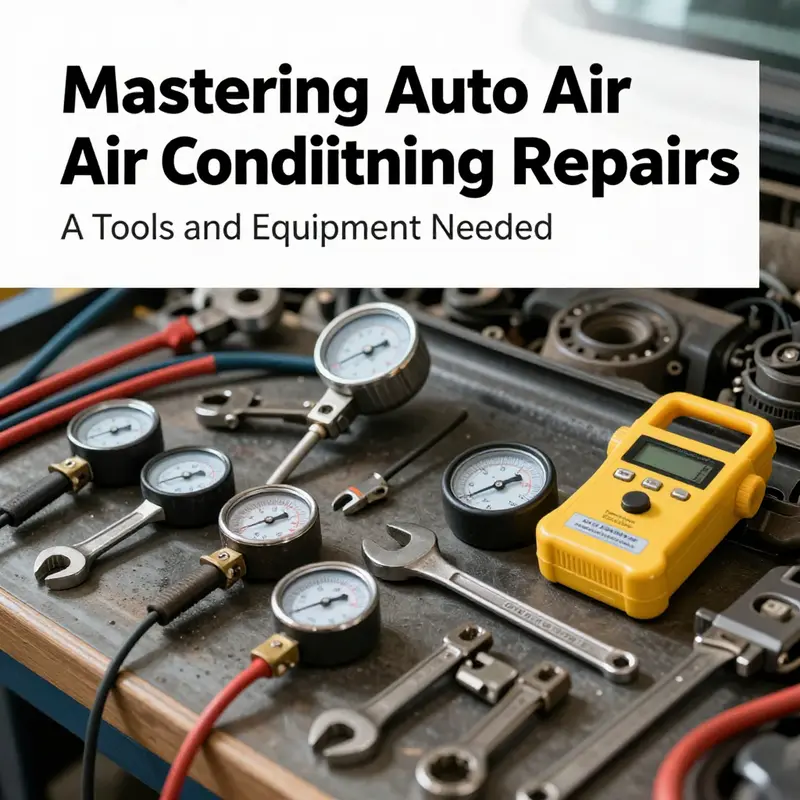
Repairing an automotive air conditioning system is as much about discipline as it is about parts. The tools you choose and how you use them become an invisible scaffold that lets a technician translate diagnosis into a durable fix. This chapter follows that thread, tracing how a complete, thoughtful toolkit supports accurate diagnosis, safe handling, and effective recharging, all while keeping the system’s integrity intact. The process begins with a mindset that treats the AC as a sealed, moisture-sensitive system that speaks through pressure, temperature, and flow. You do not coax it back to full function by guessing. You read its signals with purpose and respond with controlled technique. The core tools fall into a few broad categories, each serving a distinct phase of service, yet they all converge on the same principle: remove moisture, locate and seal leaks, restore proper pressure balance, and confirm that the system holds that balance under operating conditions.
A certified refrigerant recovery and recycling setup is the foundation of any professional approach. The air conditioning circuit is designed to be closed and environmentally responsible, and modern regulations require that refrigerant be recovered before any work begins and that it be recycled or disposed of correctly. A recovery machine functions as a safety valve for the atmosphere and a safeguard for the vehicle. It must be capable of pulling refrigerant from the system without releasing it, separating liquid from vapor, and preparing the refrigerant for safe storage or recharging. Without this step, work performed is not just temporary but also potentially harmful to the vehicle and the environment. The recovery process also protects the compressor by ensuring that you do not introduce air or moisture into the system when you open lines or components.
Following recovery, evacuation is the next critical act. A high quality vacuum pump is used to pull a deep vacuum, typically below 500 microns, to remove air and moisture from the system. This step is essential because moisture in the refrigerant circuit can cause corrosion, acid formation, and blockages that derail the charging stage and shorten component life. The vacuum is not a cosmetic flourish; it is a test of the system’s integrity. If a system cannot reach and hold a deep vacuum, it often signals a leak, a compromised evaporator, or a failing seal that demands attention before refrigerant is reintroduced. The vacuum also serves to purge residual air from newly repaired connections, so that the subsequent charge remains predictable and within the manufacturer’s specification.
No diagnosis is complete without a reliable way to observe what is happening inside the two pressure realms of the system—the high side and the low side. A robust manifold gauge set provides a window into how the system performs under load and how the refrigerant flows during a cycle. Reading both sides, along with ambient temperature, helps distinguish a leak from a restriction, or a weak charge from a failing component. The gauges themselves are simple in concept but crucial in practice: they convert invisible pressures into numbers you can act on. In tandem with the gauges, a precise thermometer can help account for the influence of outside conditions on readings. This combination of data points guides the technician toward the root cause, whether that is a leak, a blockage, or an improper charge.
Leaks are the most common enemy, and the tools to find them are varied because leaks can hide in hoses, fittings, O rings, seals, or even inside the evaporator and condenser. A leak detector—whether electronic or dye-based—lets you trace the system’s leaks with confidence. Dye is added and later illuminated under UV light, while electronic sniffers scan for refrigerant vapor at suspected joints and seals. The advantage of these tools is not just locating a leak but confirming its persistence after repairs. It is a reminder that a repair must address the source and not merely the symptom. In practice, the detection phase informs decisions about which components to replace and how to reassemble the circuit so that the repaired areas can tolerate pressure and temperature cycles without loss.
The path to a proper recharge is paved by accurate specification and execution. Service ports and adapters—properly matched to the vehicle’s refrigerant type—ensure a clean, safe connection during charging, evacuation, and pressure testing. Standardized ports are a quiet battleground in which precision prevents damage to fittings and avoids accidental venting. The charging process itself depends on a precise refrigerant charge and, in some cases, the right quantity of oil present to lubricate the compressor. When the system is completely evacuated and leak-free, the technician uses exact charging equipment and a scale to measure the refrigerant as it enters the system. The goal is not merely to fill to a number but to replicate the factory charge within the vehicle’s operating envelope, so the system can reach and sustain the intended pressures and temperatures.
Beyond charge and leak management, the health of the lubricant within the compressor must be assessed. A dedicated oil filler and analyzer help ensure the correct amount and quality of oil circulate through the system after any internal repair. Too little oil can starve the compressor and cause wear or seizure; too much oil can flood the suction and reduce efficiency. The oil’s condition matters as well—moisture and contaminants degrade lubrication and can accelerate corrosion. In practice, the oil assessment becomes a quiet, ongoing check during service, reinforcing that the system is not a one-time replacement but a living circuit that benefits from careful maintenance.
In the modern shop, digital tools and software augment physical instruments. Diagnostic apps provide quick references for refrigerant type, pressure expectations, and safe procedures, while databases store vehicle-specific charging charts. These tools do not replace hands-on skill; they extend it. They help the technician verify calculations and ensure that decisions align with current industry standards. For someone new to the trade or returning after a field gap, a primer on the broader practice of auto repair—covering the basics of safe troubleshooting, tool handling, and procedural discipline—can be a valuable starting point. If you want a concise overview, consider exploring resources that summarize DIY auto repair basics, which can help connect manual skills with the discipline of professional work.
As the toolkit expands to cover more advanced refrigerants and regulations, it is important to remain mindful of standards and compatibility. Modern systems increasingly use refrigerants that require specific handling, recovery, and charging practices. The practice hinges on choosing tools designed for the refrigerant type your vehicle uses and on adhering to the procedures specified by applicable standards. The field continues to evolve as new refrigerants with lower global warming potential enter the market and as ports and fittings are refined for safety and efficiency. In this climate, following established guidelines and staying current with updated standards is not optional but essential to professional reliability. For those who want to deepen their understanding of the broader standardization landscape, the SAE final report on automotive air conditioning service ports offers a comprehensive reference point that underscores recommended tooling and port design. https://www.sae.org/standards/content/J2847_202109
Incorporating the right tools is only part of the story. The workflow matters as much as the equipment. Begin with a careful diagnosis, using the manifold gauges and a leak detector to confirm the system’s state. If a leak is present, address it with appropriate replacement parts and seals, then evacuate thoroughly before recharging. Refill with the correct refrigerant and oil, monitor the pressures, and verify that the electrical components—such as the compressor clutch and fans—respond as expected under operating conditions. When done, perform a final run with the system loaded to ensure stable cooling, proper venting, and no residual odors from a compromised evaporator or cabin filter. The goal is sustainable performance, not a quick fix, and that requires patience, precision, and respect for the system’s sensitivity to moisture and air.
To reinforce the practical side of the approach, you can explore practical insights from a dedicated resource on DIY auto repair basics. It provides a grounded perspective on tool handling, safety, and workflow—without venturing into risky or unregulated territory. The deeper you go, the more you will appreciate how the subtle interplay between measurement, sealing, and control governs the viability of the repair. As you prepare for the next chapter, keep in mind that the tools are not just instruments but partners in restoring comfort and reliability to a vehicle. The correct combination of recovery, vacuum, measurement, detection, and charging tools—used with care and discipline—transforms a challenging AC fault into a recoverable, durable solution.
Inside the Cabin Climate: A Cohesive Guide to Repairing Auto Air Conditioning
The moment the cabin air turns tepid or a sour odor fills the vents, a driver’s sense of control can feel compromised. Auto air conditioning is not a single component but a tightly integrated system that relies on precise pressure, clean passages, and clean electrical signals to produce comfort. When it falters, the best path forward is a unified approach that starts with accurate diagnosis and ends with a properly executed recharge and preventive maintenance. This is not merely about cooling; it is about restoring balance to a system that manages heat, humidity, and air quality in the very living space of the car. A practical mindset toward repair centers the work on root causes rather than quick fixes, because refrigerant leaks, faulty components, and electrical problems tend to cascade if left unchecked. A calm, methodical workflow helps protect the entire system and, in turn, your comfort on the road.
To begin, imagine the AC as a closed loop that relies on a measured flow of refrigerant, regulated by the compressor, and cooled by the condenser. When anything disturbs that loop—an unseen leak, a clogged condenser, or a faulty clutch—cooling efficiency drops and the cabin becomes a pressure point for frustration. The diagnostic journey starts with listening to symptoms, mapping them to probable causes, and then validating those hypotheses with simple, repeatable checks. The goal is to confirm whether the weakness is refrigerant-related, a mechanical fault, or a flow restriction affecting the evaporator and ducts.
The tool kit for a careful diagnosis is not exotic. A dual- or multi-point refrigerant pressure gauge set is the cornerstone; it tells you where pressures lie on the high and low sides of the system and guides you toward charges or leaks. A leak detector—either UV dye that shines under a black light or an electronic sniffer—helps locate the path of refrigerant loss without guessing at every connection. A reliable multimeter is essential for powering through the electrical side: fuses, relays, and the compressor clutch are frequent culprits when electrical fault codes or intermittent operation arise. Collectively, these tools help you distinguish between a system that is simply low on charge and one that has an active leak or a faulty component that will fail again after a quick top-off.
In practice, the diagnostic arc begins with refrigerant pressure. You measure on the low side and high side, noting whether the readings align with the vehicle’s ambient temperature and engine state. A low-side reading that sits well below the typical range invites suspicion of a leak or an undercharged system, while a chronically high high-side pressure can point to a blocked condenser or excessive refrigerant. These readings are not universal numbers; they shift with climate and vehicle design, but they establish a baseline from which you can proceed. If the gauges reveal a discrepancy, the next step is to inspect potential leak points: hose connections, O-rings, seals around the compressor, and the evaporator housing. A UV dye injected into the system helps to reveal seepage paths that are not obvious to the naked eye, and a soap-bubble test around fittings and joints can quickly confirm a leak.
Here, a crucial principle emerges: never simply add refrigerant to a leaking system. The practice may provide temporary relief, but it obscures the problem and can lead to moisture-laden air entering the system. After a leak repair—whether it’s replacing a hose, an O-ring, or a faulty seal—an evacuation is essential. A vacuum pump pulls not just air but moisture from the system; moisture is the enemy of AC systems because it can cause corrosion, ice formation, and compressor damage over time. A proper vacuum pull, typically for at least 30 minutes, ensures the system is dry before refilling with the correct refrigerant type and charge per manufacturer specifications. Then comes a careful recharge, watching pressures closely as the system stabilizes. Overcharging is as detrimental as undercharging, so the process should be slow, controlled, and validated against the specific vehicle’s data.
Other stumbling blocks wait beyond the refrigerant circuit. The condenser, located at the front of the radiator, can become clogged with dirt, leaves, and road grime. When airflow across the condenser is impeded, heat rejection falls and the high-side pressure climbs, choking the system’s ability to cool. Cleaning the condenser should be done with care—gentle brushing or a low-pressure rinse that preserves the delicate fins, avoiding aggressive high-pressure jets. The evaporator—hidden behind the dash—presents a tougher challenge. It can accumulate debris or ice up because of sensor faults or airflow irregularities. In mild cases, a targeted cleaner sprayed into the intake vents can help, but in more stubborn conditions, professional cleaning or even replacement becomes the sane option.
Equally important is the flow of air from the cabin side. A clogged cabin air filter reduces airflow, which can masquerade as insufficient cooling even when the system is technically sound. Replacing the filter is a straightforward maintenance task and one of the few repairs within reach of many DIYers. It is worth doing not just for cooling efficiency but for interior air quality and odor control, especially in humid climates where mold can thrive on a damp evaporator.
Electrical health plays a continuing role. If the compressor clutch does not engage, the problem may sit in a fuse, a relay, or wiring harness, but it could also signal a failing compressor itself. A quick clutch test—carefully, with the engine off and safety in mind—can confirm whether the clutch engages when power is applied. If the clutch clicks but the system remains inert, the issue may be the compressor internals or a control circuit. Because the compressor is the heart of the system, many AC repairs involving the compressor are best left to professionals. They require not only the right tools but also the proper handling of refrigerants and refrigerant oils, as well as the safe management of pressurized components.
The troubleshooting journey also guides how we handle the question of maintenance. Before the heat of summer arrives, run the AC for 10 to 15 minutes to confirm it cycles and stabilizes, and after driving, let the fan run on high for several minutes to dry the evaporator and reduce the chance of mold growth. A disciplined maintenance schedule—replacing the cabin filter on a regular cadence, cleaning coils, and monitoring for signs of leaks—keeps the system healthier longer. And for those who want to understand costs and expectations, it helps to look at practical estimates and plan for future needs. For a quick reference to the economics of AC work, see the article on AC repair cost.
When the path leads to more complex repairs—such as diagnosing an elusive electrical fault, replacing a clogged evaporator, or dealing with a failing compressor—professional help becomes the wise course. A technician with access to up-to-date service information can diagnose with model-specific accuracy and perform evacuations, precise recharges, and component replacements that preserve the integrity of the system. DIY efforts can be rewarding for straightforward tasks like cabin filter replacement, but refrigerant handling and system-wide recharges demand specialized tools and training.
Throughout this process, safety remains paramount. Disconnecting the battery before touching electrical components, wearing protective gear to guard against refrigerant burns, and adhering to the correct refrigerant type—whether R134a for most post-1994 vehicles or newer formulations for newer designs—are essential practices. The goal is not to chase a quick fix but to restore reliability and comfort while respecting environmental safeguards and the complex engineering behind modern automotive air conditioning. The path from symptom to service is a measured journey, one that respects the system as a whole and treats each fault as a clue to the underlying condition.
In closing, repair is less about guessing and more about aligning symptoms with a disciplined diagnostic sequence: measure, inspect, confirm leaks, evacuate, recharge, and test. The reward is a climate-controlled cabin that returns to normal, with fewer surprises on hot days and longer system life. If you are curious about the cost implications of the work, explore the resource linked above for a grounded estimate, and consider how a targeted maintenance plan can reduce long-term expenses and downtime. For more technical context and real-world guidance, refer to available repair manuals and professional resources. External resource: https://www.epa.gov/ods
Final thoughts
By following the structured approach outlined in this guide, vehicle owners and repair shops can effectively tackle air conditioning issues with confidence. Understanding diagnostic procedures, specific repairs, safety protocols, essential tools, and maintenance routines forms the foundation for ensuring that your A/C systems operate efficiently and effectively. A well-maintained air conditioning system not only enhances comfort but also extends the lifespan of your vehicle’s components. So gear up, apply these insights, and ensure every ride remains cool and refreshing.