Introduction to Do-It-Yourself Auto Repair
In today’s world, do-it-yourself (DIY) auto repair has become an invaluable skill for motorcycle and auto owners alike. This hands-on approach not only empowers vehicle owners to take control of their car maintenance but also enhances their understanding of how their vehicles operate. With the rising costs of professional repair services, many enthusiasts are discovering that tackling small repairs and routine maintenance on their own can lead to significant savings. Engaging in DIY auto repair allows you to build confidence and competence in managing your vehicle’s needs, whether it’s changing the oil or troubleshooting a puzzling issue. Plus, learning these skills fosters a deeper appreciation for your motorcycle or car, transforming the way you interact with your ride. To get started, check out our guide on unlocking savings with DIY oil changes and avoid common mistakes with maintenance through this informative piece about common engine maintenance mistakes.
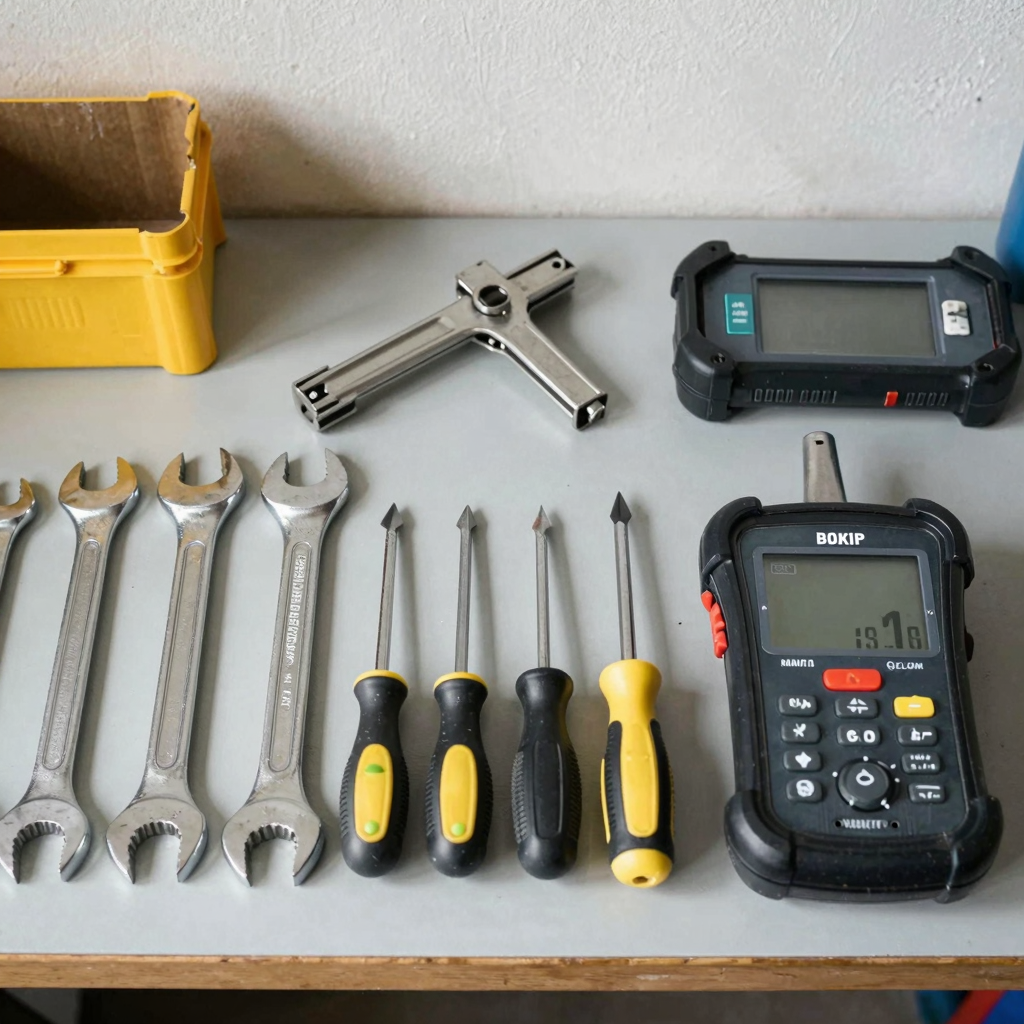
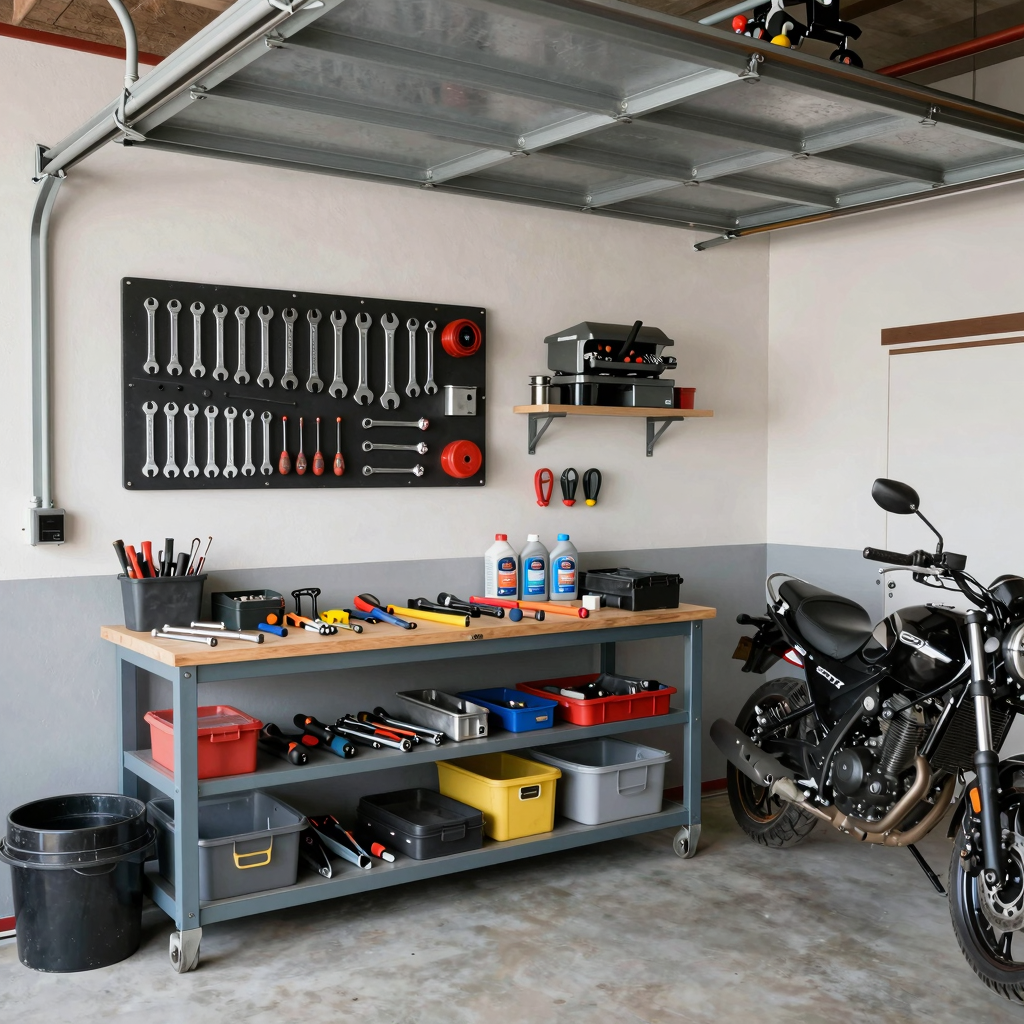
Essential Tools for DIY Auto Repair
Whether you’re a motorcycle aficionado or a car enthusiast, having the right tools is crucial for effective DIY auto repair. Below is a list of essential tools that every owner should have in their toolkit, along with their purposes:
-
Ratchet Wrench: A must-have for any DIY mechanic, it allows for quick tightening or loosening of bolts without having to reposition after each turn. The newer high-torque models can work in tight spaces efficiently.
-
Socket Set (8mm-22mm): This set includes various-sized sockets, which are essential for fitting over bolt heads or nuts. Covering 80% of maintenance needs for passenger cars, these sockets offer superior grip and reduce the risk of rounding off fasteners.
-
Extension Bar: Great for reaching deep or hard-to-access areas in the engine compartment or undercarriage, this tool extends the reach of your sockets, making maintenance more convenient.
-
Torque Wrench: Critical for ensuring fasteners are tightened to the manufacturer’s specifications, this tool helps prevent both over-tightening and under-tightening, maintaining vehicle integrity during repairs.
-
Safety Jack Stands: Vital for safely supporting a vehicle after lifting it with a jack. Never rely solely on the jack for safety during undercarriage work, as jack stands are essential for preventing accidents.
-
Breaker Bar: This long, heavy-duty wrench is used to apply greater force for loosening stubborn or rusted bolts, ideal for initial loosening before switching back to a ratchet wrench.
-
Oil Filter Wrench: Specifically designed to remove oil filters, it provides grip on smooth surfaces, ensuring clean removal and preventing damage to the filter housing.
-
OBD2 Scanner: A diagnostic tool that connects to the vehicle’s OBD2 port, useful for reading fault codes and monitoring engine data, making it vital for troubleshooting issues and maintaining vehicle health.
-
Wheel Chocks: These blocks prevent unwanted vehicle movement when jacked. A small yet critical safety measure during any repair work.
-
Gloves and Safety Glasses: Personal protective gear to safeguard yourself from grease, sharp edges, debris, and chemical splashes, making safety during repairs a priority.
For more tips on effective DIY auto repair, learn about the common maintenance mistakes to avoid and get detailed guidance on oil changes.
Summary Chart

Common DIY Repairs for Motorcycle and Auto Owners
Performing simple repairs on your vehicle doesn’t have to be daunting. With the right tools and a bit of guidance, motorcycle and auto owners can tackle common maintenance tasks themselves. Whether you’re an experienced mechanic or a beginner, these DIY repairs can save you money and keep your vehicle running smoothly. Here are three examples of easy and accessible DIY auto repairs:
1. Changing the Oil
Changing the oil is one of the most important maintenance tasks you can do for your vehicle. Here’s how:
- Gather Supplies: You need the appropriate oil, an oil filter, an oil filter wrench, a socket wrench, a drain pan, and a funnel.
- Prepare Your Vehicle: Start by parking on a level surface and letting the engine cool down. Raise the vehicle if necessary.
- Drain the Old Oil: Locate the oil drain plug, remove it with a socket wrench, and allow the old oil to flow into the drain pan.
- Replace the Oil Filter: Use the oil filter wrench to remove the old filter. Apply a little new oil to the rubber gasket of the new filter before installing it.
- Add New Oil: Replace the drain plug and pour in the new oil using a funnel. Check the dipstick to ensure you have added the correct amount.
- Dispose of Old Oil: Take the old oil and filter to a recycling center.
You can learn more about proper oil changing techniques in our DIY oil change guide.
2. Replacing Spark Plugs
New spark plugs can enhance engine performance and fuel efficiency. Here’s a simple guide:
- Gather Tools: You’ll need new spark plugs, a spark plug socket, a ratchet, and possibly a torque wrench.
- Locate the Spark Plugs: Open the hood and find the spark plugs (usually near the top of the engine).
- Remove Old Spark Plugs: Disconnect the wire attached to each spark plug before unscrewing them with the spark plug socket.
- Install New Spark Plugs: Carefully screw in the new spark plugs by hand and then tighten with the socket. Make sure to follow the manufacturer’s specifications on torque.
- Reconnect Wires: Reattach the wires to their respective plugs.
You can find a detailed guide on spark plug replacement here.
3. Replacing Brake Pads
Keeping your brakes in top condition is crucial for safety. Follow these steps to replace your brake pads:
- Gather Your Tools: You will need new brake pads, a wrench set, a jack, and a brake cleaning spray.
- Lift the Vehicle: Securely jack up the vehicle and remove the wheels.
- Remove the Caliper: Use the wrench to loosen and remove the caliper. Be sure to support it so you don’t strain the brake line.
- Replace Brake Pads: Remove the old brake pads and replace them with new ones. Make sure they are correctly positioned.
- Reattach the Caliper: Put the caliper back in place, ensuring it does not interfere with the pads.
- Reinstall Wheels and Lower Vehicle: Once done, reattach the wheels, lower the vehicle, and check your brakes by pressing the pedal before driving off.
For further insights, check out this step-by-step guide for changing your brake pads.
Benefits of DIY Repairs
Not only do these common DIY repairs save you money, but they also give you a sense of accomplishment and a deeper understanding of your vehicle. Statistics indicate that DIY car repairs can save drivers an average of $400 to $1,200 annually compared to relying entirely on professional services.
Here’s a visual chart illustrating the ease of these tasks and the average savings:

In summary, with these simple instructions, anyone can perform regular maintenance and minor repairs on their motorcycles and cars. Not only will it enhance your vehicle’s performance, but it will also help you save money in the long run.
Comparing Popular DIY Repair Resources for Motorcycle and Auto Owners
When it comes to do-it-yourself auto and motorcycle repair, there are various resources available to help you navigate repairs effectively. Here’s a comparison table of some popular DIY repair resources:
| Resource | Type | Ease of Use | Depth of Information | Accessibility |
|---|---|---|---|---|
| iFixit | Manuals | High | Comprehensive | Excellent (Free access) |
| AutoZone | Online Guides | High | Moderate | Excellent (Free access) |
| YouTube | Video Tutorials | Very High | High | Excellent (Free access) |
| Reddit Community | Forums | Moderate | Variable | Good (Depends on internet) |
| Motorcycle Repair Help | Manuals & Community | High | Comprehensive | Excellent (Free access) |
- iFixit provides free, step-by-step guides for motorcycle repairs, enhancing DIY skills.
- AutoZone offers online repair guides and troubleshooting tools tailored to specific vehicle makes and models.
- YouTube hosts numerous tutorials from both professionals and enthusiasts, covering a wide array of repair topics.
- Reddit features various forums for real-time discussions and support among motorcycle and auto enthusiasts.
Learn More
For more on common maintenance errors to avoid while performing auto repairs, check out this article on common engine maintenance mistakes or the ultimate guide to DIY oil changes.

Safety Tips for DIY Repairs on Your Vehicle
When diving into DIY auto repairs, safety should always be your top priority. Here are some essential safety tips to keep you protected while enhancing your vehicle:
1. Use the Right Tools
Before starting your project, ensure that you have the correct tools for the job. Using inappropriate tools can lead to accidents and injuries. Always inspect your tools to confirm they are in good condition. Invest in high-quality, properly sized tools that will make your repair tasks easier and safer.
2. Wear Protective Gear
Personal protective equipment (PPE) is crucial when working on vehicle repairs. Always wear:
- Safety glasses to protect your eyes
- Gloves to avoid skin irritations from automotive fluids
- Closed-toe shoes to prevent foot injuries if heavy tools or parts drop
- Long sleeves to protect against sharp edges and hot surfaces

3. Prepare Your Workspace
A well-organized and clutter-free workspace is vital for safety. Make sure you:
- Work in a well-lit and ventilated area to avoid inhaling harmful fumes.
- Keep tools and equipment neatly arranged, reducing the risk of accidents.
- Ensure that your vehicle is parked on a flat, dry surface with the parking brake engaged. Consider using wheel chocks for additional stability.
- Never work in confined or poorly ventilated spaces, especially when handling volatile fluids.
4. Disconnect the Battery
Before working on your vehicle’s electrical systems, always disconnect the negative battery terminal. This practice can prevent electrical shorts and other hazards.
5. Use Jack Stands
If you’re lifting your vehicle, never rely solely on the jack. Always use jack stands to secure it in place. This prevents the risk of the vehicle slipping or falling while you’re working underneath it.
6. Follow Manufacturer Guidelines
Refer to the vehicle’s service manual for specific safety instructions and guidance on performing repairs. Familiarity with your car’s components and mechanics can significantly reduce risks.
7. Be Cautious with Fluids
Automotive fluids can be dangerous:
- Handle them with care and store them properly to avoid leaks.
- Dispose of any used fluids responsibly to protect the environment, following local regulations.
8. Know Your Limits
If you encounter a repair involving critical safety systems like brakes or airbags, it’s best to consult a professional. Attempting these repairs without proper knowledge can result in faulty installations and jeopardize your safety.
By adhering to these essential safety tips, you’ll not only protect yourself but also ensure a much smoother and more successful DIY repair experience. For more in-depth guidelines, check out this comprehensive guide on DIY auto repair safety.
Stay safe and happy repairing!
Conclusion: Embrace DIY Auto Repair with Confidence
As we wrap up our discussion on the empowering world of DIY auto repairs, it’s essential to reinforce the numerous benefits this skill can offer. From significant cost savings associated with performing simple tasks such as oil changes and brake replacements-tasks that can save you hundreds in professional labor fees-to the invaluable knowledge gained about your vehicle’s inner workings, embracing DIY repairs enhances both your ability and confidence as a car or motorcycle owner.
Moreover, taking the DIY route allows you to personalize your vehicle maintenance, accommodating your driving habits rather than adhering strictly to generic manufacturer guidelines. This adaptability not only builds a deeper understanding of your vehicle but also fosters greater self-reliance-a critical skill in today’s economy where professional repair costs can be daunting.
By learning essential skills for car or motorcycle maintenance, you amplify your capability to handle various repairs and alterations, empowering yourself against unexpected issues on the road. The time and effort invested in mastering these skills translate to substantial long-term savings and peace of mind. Unlock savings with our ultimate guide to DIY oil changes to kickstart your journey today!
In essence, the DIY approach transforms auto repair from a daunting challenge into an inspiring experience. Grab your tools, gather your resources, and start your journey in auto repair. You might be surprised at how rewarding it can be. Remember, every skill mastered is a step towards greater independence and confidence in managing your vehicle’s needs. Let’s hit the road with confidence!
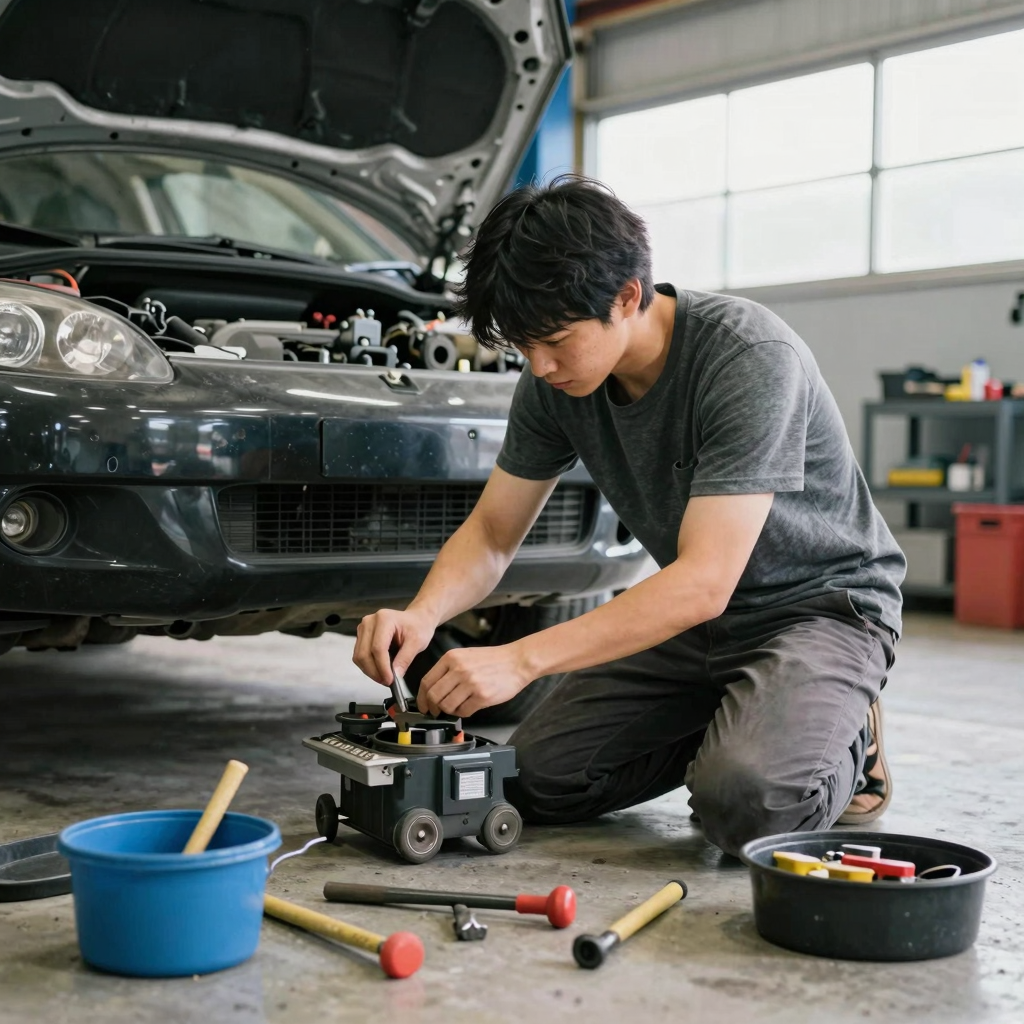
User Testimonials on DIY Auto Repair
“After replacing my transmission fluid pan gasket myself, I saved over $800! It’s empowering to solve these issues on my own and understand my car’s inner workings so much better.”
- DIY Auto Repair Enthusiast, Car and Driver
Many users find that engaging in DIY auto repair not only leads to significant savings on labor costs but also nurtures a deeper understanding of their vehicles, fostering confidence through hands-on experience. For instance, a recent survey indicated that 76% of DIY mechanics felt more confident about their vehicle’s reliability and saved approximately $450 annually on service costs. Learn more about common mistakes that can be avoided with proper DIY maintenance!
To visualize this empowerment further, here’s an image showcasing a person confidently working on their vehicle, embodying the spirit of DIY auto repair:

The Importance of Using Quality Auto Parts for DIY Repairs
When embarking on DIY automotive repairs, sourcing quality auto parts is of utmost importance. Not only do quality parts enhance vehicle performance, but they also play a pivotal role in ensuring safety on the road. Studies have shown that low-quality or counterfeit components can lead to serious complications. For instance, non-OEM brake pads can increase stopping distances significantly, posing severe risks to drivers and passengers alike. Furthermore, inferior parts can lead to increased wear and tear on the vehicle, resulting in costly repairs down the line. According to Consumer Reports, testing revealed that cheap spark plugs contribute to engine misfires and can adversely affect fuel efficiency.
Using high-quality parts, especially those certified by recognized standards, ensures compatibility and longevity. Investing in OEM (Original Equipment Manufacturer) or trusted aftermarket parts not only guarantees proper function but also prevents unexpected breakdowns caused by faulty components. As explained in articles from Car and Driver, opting for cheaper alternatives may save money initially, but they often lead to higher repairs and potential safety hazards.
A reliable source for quality auto parts is Summit Fairings. This reputable supplier is known for its extensive range of performance parts that meet or exceed OEM standards. With their rigorous product testing and exceptional customer support, Summit Fairings is a preferred choice for DIY enthusiasts and professional mechanics alike. Their commitment to quality ensures that you receive components that enhance your vehicle’s performance and safety, making them a worthwhile partner in your auto repair journey.
By choosing quality auto parts and trusting suppliers like Summit Fairings, you are not only improving your vehicle’s reliability but also prioritizing your safety on the road. Don’t compromise on parts when the stakes are so high; make the smart choice for both your vehicle and your peace of mind.
Cost Savings of DIY Repairs versus Professional Repairs
DIY auto repairs can lead to significant cost savings compared to hiring professional services. Understanding these differences can empower motorcycle and auto owners to take on more repairs themselves. The following chart illustrates the cost comparisons:

| Repair Type | DIY Cost ($) | Professional Service Cost ($) | Cost Difference ($) |
|---|---|---|---|
| Oil Change | 50 | 150 | 100 |
| Air Filter Replacement | 40 | 150 | 110 |
| Spark Plug Replacement | 150 | 300 | 150 |
| Tire Maintenance | 0 | 50 | 50 |
| Brake Service | 200 | 500 | 300 |
As represented in the chart, DIY repairs not only save money but also enhance the understanding of your vehicle’s maintenance needs. If you want to dive deeper into the benefits of performing your own repairs, check out this ultimate guide to DIY oil changes. You will discover more ways to keep your vehicle in great shape while saving on costs!