
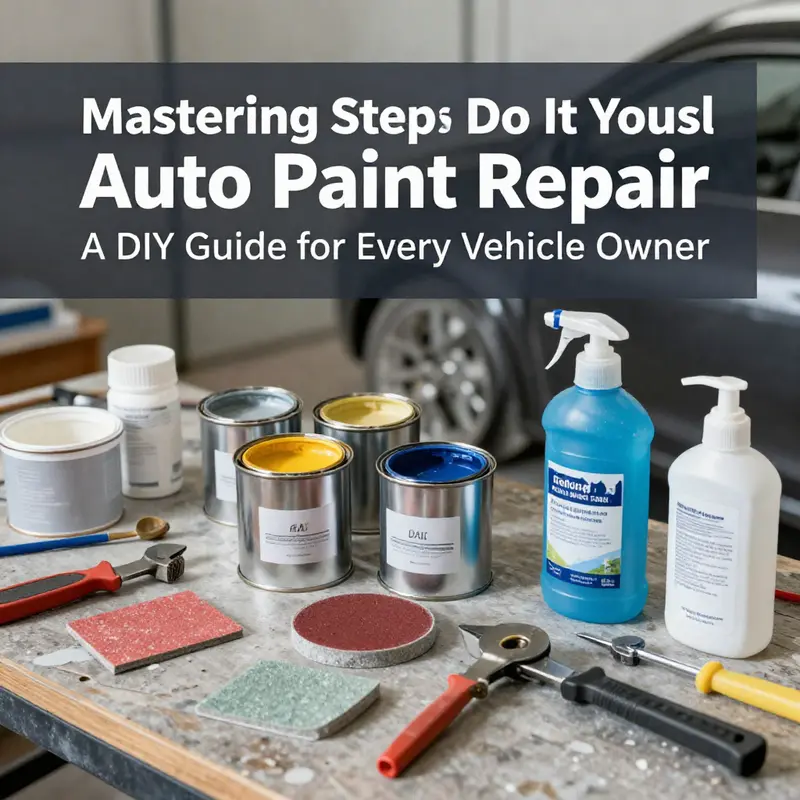
Chips and scratches on your vehicle’s paint not only diminish its aesthetic appeal but can also lead to more significant issues if left unaddressed. Fortunately, motorcycle and auto owners alike can tackle these imperfections themselves without needing to visit a professional. This guide will walk you through essential steps, materials, and finishing techniques to help you successfully repair your vehicle’s paint and restore its showroom shine. In each chapter, we will explore crucial aspects of DIY auto paint repair—from the steps needed to prepare the surface to the best practices for achieving a perfect finish. By understanding these principles, you can not only save money but also gain the satisfaction of knowing that you’ve helped maintain your vehicle’s value and appearance.
From Chip to Finish: A Practical, Patient Path Through Do-It-Yourself Auto Paint Repair
When a chip or scratch mars the surface of a car, the impulse to fix it quickly is strong, but the most lasting DIY repairs come from patience, preparation, and a careful walk through each stage as if you’re teaching the surface to forget the damage. The goal is not a flawless showroom finish but a repair that blends with the existing paint, protects the metal beneath, and preserves the vehicle’s overall value. The process begins, as it should, with a calm assessment. Small chips and shallow scratches may respond to touch-up techniques that fill and color only the damaged area, while larger chips that expose bare metal, or deeper gouges that create a small dent, demand a broader strategy that restores a level, primed surface before color is applied. The best results come from treating the car as a single, coherent piece rather than a collection of isolated spots. If you’re new to the process, consider starting with a simple, small-area repair to build your confidence before tackling more ambitious damage. And if you’re looking for a gentle primer on the basics, you can begin with a friendly overview in the Hello World post, which offers a practical entry point to DIY auto repair. Hello World. The key is to manage expectations and pace yourself so you don’t rush where precision matters most. Patience is not a luxury here; it is the instrument that turns a potentially visible mismatch into a repair your eyes can forgive at a casual glance. The raw truth is that color matching, feathering the edges, and achieving a seamless cure depend less on brute force than on the consistent application of small, deliberate acts performed in the right sequence. This is where the narrative becomes as important as the technique, because the mind-set you bring to the repair dictates the finish you eventually see. You can protect your morale by acknowledging the work as a craft task rather than a sprint, giving yourself permission to recheck, rework, and refine until the repair merges with the surrounding paint as if the damage never happened in the first place. The approach is not about perfection beyond the capability of a DIY enthusiast; it is about disciplined, repeatable steps that produce a durable, aesthetically pleasing result that lasts through the next few seasons of exposure to sun, rain, and road grime. The first critical moment of the repair is damage assessment: precisely whether the chip is a small meteor-shaped nick, a flake revealing metal, or a broader scratch that reaches through the clear into color or primer. For a superficial imperfection, you can rely on a touch-up technique that deposits color in a controlled manner with minimal buildup. For deeper work, you’ll need to level the surface with a filler, a step that sounds simple but requires careful timing and curing. The moment you decide which path to take hinges on your willingness to invest time in the fundamentals rather than rushing toward a quick fix. Once you have a plan, you enter the cleaning phase, the foundation of any durable repair. Dirt, grease, wax, and road grime are the antagonists of adhesion. They create a barrier that prevents primer and color from bonding properly to the metal or plastic beneath. A degreaser or mild soap with warm water can remove these contaminants effectively, but you must rinse thoroughly and dry completely before any sanding or filler goes on. When you wipe the area, you should feel a clean, dry surface beneath your fingertips, free of slickness or residue. The integrity of the repair depends on this stage, and skipping it is the fastest way to a finish that peels or dulls prematurely. Sanding is the next critical phase. For most chips and shallow scratches, a light scuff with fine-grit sandpaper—typically in the 800 to 1500 grit range—will create a micro-rough surface that provides the new paint something to bite into. If the defect is deeper, you’ll want to apply a body filler or auto body putty to level the surface with the surrounding panel. The filler is mixed and applied according to the product instructions, then allowed to cure fully before the area is sanded smooth again. The target is a continuous plane across the touched area, with feathered edges that slope down into the adjacent paint so that the repair is invisible at a normal viewing distance. The color-matching phase follows, and here your attention to detail pays dividends for years to come. Every vehicle has a color code that is usually housed in a door jamb sticker or within the owner’s manual. The exact shade within the spectrum is what makes the repair credible, and the color code is your passport to obtaining a matched color from automotive paints suppliers. Many DIY kits offer custom-mixed paint to approximate OEM colors—though the most reliable match comes from using the original code when possible. Before committing to a full spray, it’s wise to test the color on a hidden area or a scrap panel, watching for undertone differences under different lighting. If the match seems imperfect, small adjustments may be possible with color-tint options, but if you’re uncertain, it might be worth stepping back or seeking guidance. The actual painting begins with a dust-free environment because even a single speck of dust can cause a speckled finish that stands out in the sun. You apply thin, even coats rather than a single heavy layer to prevent runs and sags. Each coat should be allowed to flash-dry for roughly five to ten minutes, a window that lets the solvents evaporate without causing the new layer to cure too quickly and crack later. The number of coats you apply depends on the opacity of the paint and the color match you’re seeking, but the rule of thumb is to build up gradually. Too much at once is a common pitfall; the surface will pull, puddle, and create a dull, uneven look that’s difficult to correct. Once the color is dry to the touch, you can evaluate the blend with the surrounding paint. This is not a static test; it’s a dynamic process of visual tuning. You may notice a slight difference in sheen or shade along the feathered edge that disappears when you add a clear coat, or you may identify a slight halo at the border where the new paint meets the old. If this happens, you’ll need to lightly rework the affected edge, reapply color, and re-check. The intention is to minimize evidence of repair while preserving the car’s original finish. Clear coat, though optional, is strongly recommended for most repairs. It protects the color layer from UV exposure and weather, adds depth, and helps to re-create the glossy layer that unites the repaired patch with the rest of the panel. A clear coat is applied in the same careful, thin-coat manner as the color, with enough patience to allow it to cure without dust contamination. The result should be a coat that lies flat, with a uniform sheen across the repaired area. The curing stage, often overlooked, deserves more time and respect than most DIY projects grant it. Even after the paint feels dry to the touch, you should allow at least 24 to 48 hours for full chemical cure, depending on temperature and humidity. In cooler environments or higher humidity, the cure time will stretch, so plan accordingly. During this period, avoid washing the vehicle or exposing it to rain, and keep the area clear of dust and debris that could settle on the finish. Once cured, the repair undergoes polishing and buffing to blend the new paint into the surrounding finish. A fine polishing compound and a microfiber or foam pad will bring the repaired surface to a comparable level of gloss with the rest of the panel. The goal is not to erase the repair but to harmonize it so the eye does not latch onto the boundary between old and new. Exhaustive buffing is not required; rather, the polish should be gentle and thorough, focusing on the feathered area and extending slightly beyond it so the transition becomes seamless. The finishing stage is often what separates a good DIY repair from a professional result, and it is here that the skills you practice at the bench can translate into a more satisfying, durable outcome. After polishing, a light hand-wax or sealant can protect the surface, especially if you plan to keep the repair for a while. Regular maintenance—gentle washing, avoiding abrasive cleaners, and prompt attention to new chips—will extend the life of the repair and prevent the area from becoming dull or chalky over time. It’s worth acknowledging common missteps so you can recognize and correct them before they become a pattern. Rushing any step invites problems. Skipping surface preparation or using old, dirty cloths to wipe the area can lead to adhesion failure; applying paint in a humid or dusty environment invites texture and grit into the finish. And while color matching is essential, you should avoid forcing a match when the surface is not clean or the underlying primer is exposed; you may end up chasing a problem that simply cannot be solved with a spray can in a home garage. In contrast, a calm, structured approach yields predictable results. It is also important to align your expectations with the limits of DIY tools and environments. If the plan includes a bold color change or a repair on a high-visibility area of a luxury panel, you may be better served by a professional service, but many chip and scratch repairs do not require that level of commitment. For those who want to practice, the rewards go beyond aesthetics. The act of repairing a vehicle yourself strengthens your understanding of the materials involved and builds confidence in handling future maintenance tasks. The process teaches you to respect the paint system as a layered, sensitive technology and to work around it with care, rather than forcing a quick fix that might compromise future repairability. It also nudges you toward a mindset of quality control: verifying color, surfaces, and cures at each stage, rather than racing to the finish line. You can enhance the learning by aligning this activity with broader DIY auto care routines, such as routine wash-and-wax cycles, periodic inspections for paint chips caused by gravel roads, and mindful avoidance of aggressive cleaners that can strip protective layers. The language of the repair—feather, blend, cure, and polish—becomes a vocabulary you carry into broader maintenance tasks, making you a more capable car owner and a more responsible participant in the upkeep of your vehicle’s appearance. When you consider the broader context of DIY auto paint repair, you may recognize that small repairs contribute to longer-term preservation of a car’s value and character. A well-executed touch-up or patch not only minimizes the visible damage but also reduces the likelihood that corrosion will take hold in exposed areas. It is a quiet defense against the slow erosion of metal and undercoating, and it stands as a practical example of how patient, methodical work can yield meaningful results without professional intervention. The journey from chip to finish, though technically demanding, is ultimately a story about stewardship. You care for the vehicle by preserving its finish with materials and practices that respect the original engineering. The single best predictor of success is attention to detail, not bravado or haste. A tidy workspace, clean tools, and a measured approach to each step—scrupulous cleaning, careful sanding, conscientious color matching, measured paint applications, and patient curing—are the ingredients that yield a repair you can be proud of and that others may not even notice at first glance. In the end, the repair becomes part of the car’s narrative, a record of care rather than neglect. If you want to explore deeper techniques, there are a variety of resources that provide extended visual guidance and context for the steps described here. For instance, a detailed, visual walkthrough offers a complementary perspective on the process, including images and clear demonstrations of each stage of the repair. This external guide can serve as a practical reference as you work through any future touch-ups on your own vehicle. For more practical, hands-on advice with pictures, you can consult the external resource: https://www.instructables.com/The-Poor-Man’s-Paint-Job-5-Steps-with-Pictures/. The path to a satisfying DIY auto paint repair is not about heroic speed; it is about disciplined precision, careful color management, and a willingness to iterate until the finish is integrated with the rest of the vehicle’s surface. If you’re curious to see how a broader audience documents their own experiments with paint repair, you’ll find that the shared learnings—dust control, proper air flow, and incremental layering—reassure beginners that they are not alone in a steady, sometimes slow, but ultimately rewarding journey toward a durable, attractive repair. In the end, the goal is modest: the repaired patch should be invisible to casual observers, protect the metal, and preserve the vehicle’s shine for months or even years to come. The recipe for that outcome rests on the discipline to follow the steps, the humility to seek color accuracy, and the patience to let each layer cure before moving on. It is a craft that rewards practice as much as it rewards proper materials, and it invites you to grow more confident with every pass of the spray, every stroke of the polish, and every careful pass with the buffer as you tune the final gleam to align with the rest of the vehicle’s finish.
Materials Mastery for DIY Auto Paint Repair: Selecting Primers, Coats, and Finishes for a Seamless, Durable Finish
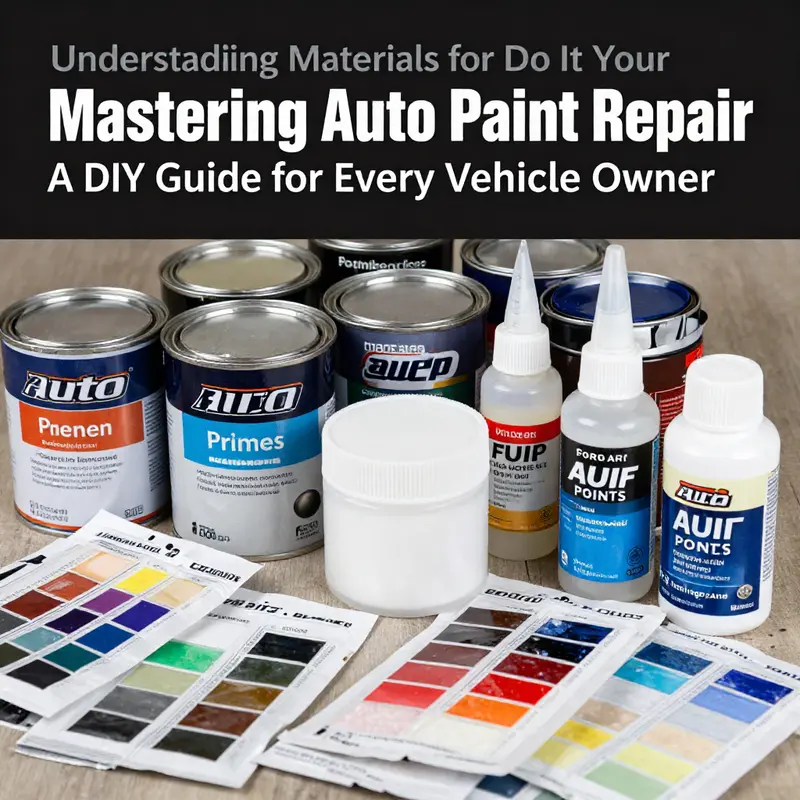
Choosing the right materials is the backbone of any successful do-it-yourself auto paint repair. When you restore a chipped or scratched area, you are really rebuilding a small, controlled multi-layer system that must bond to the existing paint, resist the elements, and blend visually with the surrounding surface. The decisions you make about primers, base coats, clear coats, and the auxiliary materials that support them will cascade through every stage of the project. A thoughtful approach to materials reduces the risk of mismatches, peeling, or an obvious telltale seam between old and new paint. It also helps you understand why some repairs look professional and others look obvious from a distance. The idea is not to chase a perfect factory finish on a budget, but to achieve a durable repair that integrates with the car’s existing finish and sustains its appearance over time.
At the core, you will be dealing with three primary components: primers, base coats, and clear coats. Primers act as the foundation for adhesion and corrosion resistance. They fill minor imperfections and create a uniform surface that supports the next layers. Base coats carry the color and aesthetic you want to restore. Depending on the vehicle and your color code, you might encounter metallic or pearlescent pigments that require careful handling to avoid uneven flash or misaligned flakes. Clear coats sit on top to provide durability, UV resistance, and the high-gloss, smooth finish that makes a repair almost disappear to the casual observer. Understanding the roles of these layers helps you plan your approach from the first wipe of rubbing compound to the final polish.
When you consider surface damage, the distinction between small, surface-level scratches and deeper imperfections matters. For light swirl marks and fine scratches, polishing compounds and fine rubbing compounds can remove defects without removing meaningful layers of paint. The goal is to restore clarity and gloss without thinning the finish or exposing bare metal. If the damage exposes the metal or reveals a dent that has disturbed the surface geometry, you must prepare the area more aggressively. A body filler kit, combined with careful sanding and shaping, can level the surface so the new color and clear coat will lay down evenly. It’s important to let any filler cure completely and to use a sanding block to maintain a flat plane as you refine the repaired zone. This step prevents a pronounced edge where the new paint ends and the old paint begins, which would catch the eye in bright light or at certain angles.
The choice of paint type influences not only appearance but durability and ease of application in a DIY setting. Nitrocellulose-based paints dry quickly and polish readily, making them convenient for quick touch-ups. However, they generally offer weaker resistance to weathering and time can erode their color stability. Modern acid-cured coatings, such as polyurethane systems, provide superior durability, gloss, and resistance to fading and chipping. These materials are more forgiving in terms of long-term performance, especially on panels that are frequently exposed to sun, rain, and road debris. Many contemporary finishes use a dual-layer approach: a base coat with metallic or pearlescent pigments is topped with a clear protective layer. Achieving a uniform appearance between the old and new paint often hinges on aligning the pigment orientation and flash between layers, which is part science and part technique. In practice, this means you must be mindful of the pigment particle orientation, the way light reflects off the surface, and the correct sequence of application to avoid a mismatch that becomes visible under sunlight.
Auxiliary materials serve as the quiet workhorse that makes the primary paints perform as intended. Water-based sanding blocks, rubber sanding pads, and fine-grit papers help you create a smooth, shadow-free surface ready for primer. Masking tapes and protective plastic sheeting shield adjacent panels from overspray and help you maintain crisp edges around the repair site. Safety gear—respirators, gloves, and eye protection—ensures you can work without inhaling fumes or skin exposure to solvents. The right masking approach is crucial; you want clean, straight boundaries that allow the new paint to integrate with the surrounding area while avoiding paint going where it isn’t wanted. These materials may seem like minor components, but they determine the quality of the line where your repair ends and the rest of the vehicle begins.
A practical approach to material selection starts with color code accuracy and environmental conditions. The color code of your car is usually found on a sticker inside the driver’s door jamb or within the engine bay. Matching the base color is essential, especially for small repairs where the blend is visible if the shade is off by even a little. If you are using a spray can designed for automotive work, you must ensure it is compatible with your color code and chosen base coat. Many DIY paint kits provide color-matched base coats and ready-to-use primers and clear coats, which helps maintain consistency and reduces the amount of guessing you must do. For touch-ups or smaller patches, touch-up pens, spray cans, or acrylic refinishing paints can offer straightforward application without the complexity of a full spray booth setup. The emphasis, again, is on compatibility and ease of application without sacrificing finish quality.
To truly understand how materials come together, imagine the repair as a conversation between layers. The primer speaks first, laying down a foundation that not only adheres to bare metal or previously painted surfaces but also communicates with the next layer by sealing micro-porosities and inhibiting moisture ingress. The base coat answers with color, depth, and the visual statement you want from the repaired panel. The clear coat concludes the dialogue with gloss, hardness, and UV protection. Each layer has its own thickness, cure time, and solvent system, and getting these right is often the difference between a repair that looks like a patch and one that reads as a seamless part of the original finish.
For those who want a more tangible path, consider how you will actually apply the materials. In many cases, a spray can approach can be sufficient for small repairs or for practicing technique. However, for deeper repairs or a professional-looking blend, a controlled spray gun or an auto refinishing spray system provides consistent spray patterns and better control over film build. The environment you work in matters as well. Temperature, humidity, and ventilation influence drying times, cure times, and the final appearance. Cold or humid conditions can slow solvent evaporation and lead to sags, runs, or a dull finish. If you are selective about when and where you work, you can reduce these risks. The best DIY outcomes come from planning the process around favorable environmental conditions and building in extra drying time when needed.
A critical point about materials is color matching. Different colors can behave differently under similar lighting. A color that looks perfect indoors may appear slightly off in bright sun. A practical approach is to test the color on a small, inconspicuous area first and allow it to dry fully before proceeding with the full repair. This test helps you determine whether the base coat and clear coat will blend with the surrounding paint under real-world lighting. When you work with metallic or pearlescent finishes, the orientation of pigment particles becomes especially important. Misaligned flakes can create visible banding or patchiness once the clear coat is applied. Achieving a uniform appearance requires careful attention to the direction of the spray and the way the paint flows across the surface during curing.
Beyond color and finish, durability is a design consideration in material selection. The automotive environment subjects finishes to UV radiation, temperature cycling, road salts, and moisture. A durable finish must resist chalking, fading, and micro-abrasions that occur over time. Clear coats with high-gloss, UV-stable resin systems help maintain color depth and protect the base color. The interlayer adhesion between base coat and clear coat is essential; without proper adhesion, the clear coat can peel or delaminate. This is why surface preparation before priming is emphasized, including removing wax or silicone residues and creating micro-scratches that improve mechanical bonding. Inadequate preparation will undermine even the best materials, so the emphasis remains on a clean, properly abraded, and dust-free surface.
In considering the broader DIY ecosystem, you will encounter a spectrum of DIY auto paint kits. These kits are designed to streamline the process and provide a coherent set of products that work together. They typically include paint, primer, filler, sanding materials, and clear coat, along with concise instructions. The advantage of a kit is that it aligns the chemistry of each component, reducing the likelihood of an incompatible pairing. If you are new to repair work, a kit can offer a reliable starting point, while still leaving room for learning how each layer interacts with the others through hands-on practice. While kits simplify decision-making, they do not replace the need for careful surface preparation, color matching, and controlled application. The patch of color on your door panel deserves the same treatment as larger bodywork: meticulous preparation, controlled layering, and patient curing time.
In terms of safety and compliance, always follow the guidelines for ventilation and protective equipment. Work in a well-ventilated area, ideally with an exhaust system that can remove fumes and particulates. Wear an appropriate respirator, eye protection, and gloves to reduce exposure to chemicals and solvents. Dispose of waste materials according to local regulations, because improper disposal of paint thinners, solvents, and used rags can pose a fire or environmental risk. The responsible DIY painter understands that material selection and safety practices are inseparable from achieving a high-quality repair. When you combine proper surface preparation with the right primer, base coat, and clear coat, you elevate your repair from a temporary fix to a durable restoration that helps preserve the vehicle’s resale value and visual appeal.
If you are curious about more technical nuance on material structure, properties, and performance metrics, there is a comprehensive guide that dives into how these formulations behave under real-world conditions. For readers seeking deeper theoretical grounding, the linked resource provides a structure–property–performance perspective that complements the practical steps discussed here. how to repair auto paint scratches. This kind of reference can help you understand why certain materials are selected for specific scenarios, such as high-wear panels or areas that face intense sun exposure. It also sheds light on how to interpret data about adhesion, hardness, and flexibility that come with different primer and clear-coat chemistries.
In practice, the path to a durable, visually seamless repair begins with a clear plan about materials and a steady process of preparation, application, and cure. Start by assessing the damage and cleaning the surface thoroughly to remove wax, oil, and dirt that could interfere with adhesion. After preparing the area, choose a primer that matches the substrate and is compatible with your base color. Apply the primer in thin, even coats, allowing each coat to dry fully before adding the next. When the primer is cured, gently sand it to create a smooth, even surface for the base coat. The base coat should be applied in multiple light coats, with ample drying time between layers to prevent runs and sagging. Finally, apply a clear coat that provides the glossy finish and protective layer needed to seal the color and resist environmental exposure. Allow the finish to cure completely before inspecting the repair under natural lighting and performing any final polishing or blending.
As you work through these steps, keep in mind that the goal is not perfection on the first pass. It is the gradual creation of a continuous, durable finish that echoes the vehicle’s original look. The process is iterative: you may need to re-sand, re-prime, or re-coat to achieve a seamless blend. The value of patience here cannot be overstated. For those who want to extend the scope beyond a quick fix, investing time in learning the nuances of material compatibility, color matching, and layering will pay dividends in the long run through fewer issues and more predictable results.
External resource: https://www.autorepairguide.com/paint-repair-materials-structure-metrics
From Assessment to Shine: Finishing Mastery in Do-It-Yourself Auto Paint Repair

A well-executed finish is where many DIY attempts either prove their worth or reveal their limitations. In the realm of do-it-yourself auto paint repair, finishing techniques are not afterthoughts; they are the culmination of careful prep, precise application, and patient patience. When you look at a repaired panel that mirrors the surrounding paint in color, texture, and gloss, you’re not just seeing pigment; you’re witnessing a craft practised in stages, each building on the last. The journey begins long before the final gloss hits the clear coat. It starts with a candid assessment of damage, proceeds through a disciplined approach to reshaping the metal, and ends with a multi-layered topcoat that obeys the laws of chemistry and time. The aim is a finish that endures sun, rain, road salt, and the inevitable swirls of daily driving, while remaining indistinguishable from the factory look to the casual observer.
The first step in this careful sequence is a thorough assessment. Minor scratches and swirl marks invite a different path from deep dents and bare-metal exposure. The small marks can often be revived with a high-quality automotive polish or compound. This option preserves the original paint and can restore depth and luster without necessitating a complete repaint. Yet when the damage reveals metal, the approach must be more deliberate. Rust, if present, becomes the clock that starts ticking on the panel’s long-term health. Early intervention matters because rust can spread beneath the surface, undermining adhesion and the integrity of your repair. The moment you spot corrosion, it’s wise to address it. The goal is to stop the progression before the metal fatigues or flakes away, and to prepare a surface that will accept new paint as a true, durable layer rather than a fragile veneer.
Once the extent of the damage is understood, you move to metal prep. For deeper issues, where dent repair has stretched or stretched slightly, first focus on restoring a flat, even plane. This often means exposing clean, bare metal, free of old paint and corrosion. Lightly wire-brushing can reveal the sweetness of fresh metal, but the process should not be aggressive. The appearance of a dull, uniform surface is a signal that you’ve reached something stable to begin filling and smoothing. If your assessment finds rust behind the chipped area, the next move is to remove it safely and appropriately. A heat gun can be used to soften old paint and corrosion, followed by careful scraping. The principle here is clear: you want a solid, clean foundation because any contaminant will haunt the finish later, causing adhesion problems or uneven color.
With the metal ready, dent repair follows a time-honored craft. Gently coax the metal back toward its original shape by positioning a dolly behind the panel and tapping from the outside with a body hammer. Work from the edges toward the center; this technique minimizes the risk of drawing the metal and creating a new crown. You’re aiming for a smooth, even contour that mirrors the surrounding sheet metal. Patience matters here. Rushing the hammering can stretch the metal and complicate subsequent sanding and filler work. Once the panel feels flush to the eye and the feel of the surface is consistent, you can consider applying body filler. The filler incorporates into the micro-unevenness, offering a temporary but durable bridge that will sand smooth. Let it dry completely before the sanding begins. Sanding is not a barbaric, brute-force step; it is a precise, feathered process that requires the right grit. Start with a coarser grade to level, then graduate to finer grits to maintain a feathered edge where the repaired area meets the original paint. The aim is to create a seamless transition: you want the repaired patch to disappear under the topcoat when viewed from any angle.
After the surface is flat and smooth, the primer plays its role as the anchor for the color coat. Primer seals the repaired area, improving adhesion and preventing any residual porosity that could trap moisture or air. Allow the primer to cure fully; then perform a light sanding with fine-grit sandpaper, typically in the 1200–2000 grit range. The light touch here matters as much as the grit choice. You’re not removing material; you’re creating a micro-scratch pattern that helps the subsequent color coat grip and level evenly. The primer’s job is to provide a uniform stage for color and clear coats, so any irregularities at this stage will become more obvious after the topcoat is applied. A clean, scratch-free surface makes the difference between a repair that looks good up close and a finish that holds its own from a few steps away.
Color application is where the artistry of DIY finishing begins to show. Matched color is not a myth; it is a practical outcome of careful color code reading and technique. The color coat is applied in thin, controlled layers rather than a single heavy application. Build the finish gradually, allowing each coat to dry before the next. The spray technique is as important as the color selection. The goal is to lay down a smooth, even film with minimal runs and sags. In a well-ventilated space with controlled temperature and humidity, a skilled hand can coax out a surprisingly close match to the surrounding paint. The choice of topcoat material is a defining decision, and for many modern applications polyurethane enamel is regarded as the gold standard due to its durability, chemical resistance, and gloss retention. It isn’t the only option, but it remains a reliable choice for enthusiasts who want a long-lasting, showroom-like finish on daily drivers as well as classics.
The elegance of the topcoat hinges on two key practices: temperature and technique. Temperature affects the viscosity of the paint and the time it takes to dry. Humidity can cause moisture entrapment, resulting in hazing or micro-bubbled finishes. The best practice is to work in a controlled environment, which means a clean, dust-free space with stable temperature and humidity. Thin, even coats are the rule, and the painter’s eye is an essential instrument. The topcoat should be applied in several light coats rather than one heavy sweep. Each layer should be allowed to dry to a tack-free state before the next is applied. This patience pays off in a more uniform color and a stronger bond with the primer and underlying filler. The moment you see even a slight texture or a ripple, you should stop and let the surface cure a full cycle before proceeding. In some cases, a light sanding with a very fine grit after a couple of coats helps to refine the color and ensure the surface sits perfectly flat with the surrounding area.
As the color coats set, a clear coat becomes the final layer of defense and depth. The clear coat provides protection from UV exposure, chemical attack, and minor abrasions while adding a sense of depth that makes the color appear to glow. When applying clear coat, the same discipline of thin, even coats should guide you. The goal is not to overwhelm the color with a thick enamel; it is to build a transparent shield that enhances the hue and adds resilience. A well-formed clear coat deepens the finish and increases resistance to minor nicks and micro-scratches. Once the final coat has cured, the surface layer can benefit from a gentle buffing routine to blend the repaired area with the neighboring paint, restoring a uniform look across the panel. The buffing process should be performed with a dual-action polisher or by hand with a fine polishing compound, using light pressure and overlapping passes. Your objective is to remove only the slight holograms or clear-coat texture without cutting through the color or softening the finish beneath.
A careful polish and blend can make the repair nearly indistinguishable from the surrounding finish. For minor scratches and gentle swirl marks, a high-quality automotive polish can restore luster without requiring further repainting. When the damage is more significant, the polish will reveal the simplified truth that a full, color-matched repair can sometimes be the prudent route only if the surface has been prepared with care and the color coat and clear have been applied evenly. The blend is then the final proof of skill: you should not see a noticeable edge where the repaired area meets the factory paint. The best sign of a successful finish is a uniform reflection with no visible halos or seams when viewed at typical driving angles. The difference between a repaired panel and a factory finish should be hard to discern with a casual glance, which is the ultimate test of finishing excellence in a do-it-yourself project.
The safety equation cannot be ignored in the rush toward a glossy finish. The process involves heat, solvents, aerosols, and potentially dusty environments. Wear protective gear—gloves, eye protection, and a respirator appropriate to the materials you employ. Ensure the workspace has proper ventilation, especially during solvent use and spray application. Ventilation reduces exposure to fumes and helps maintain an environment where dust does not settle on freshly painted surfaces. The safety steps are not merely regulatory; they are essential to the quality of the finish and the health of the person performing the repair. When you follow these precautions, you can focus more fully on the craft and less on the risk aspects. Finishing is as much about discipline and technique as it is about the right materials. The most satisfying results come from a process that respects the science behind paint systems while allowing room for trained skill and careful judgment.
In the end, the finished repair should stand up to close inspection and ordinary exposure. The color should match the neighboring panels in hue, saturation, and brightness. The gloss should be even, with no dull spots or micro-scratches catching the light differently across the repaired area. The texture should feel smooth under a gloved hand, with no bite or roughness where the new coat meets the old. And the finish should endure—resisting minor chemical exposure from cleaners and environmental contaminants without fading or cracking. Achieving this level of quality is not a matter of luck but of applying a deliberate sequence: assess, prepare, straighten the dent, prime, color, clear, and finally finish with polish and protection. Each step informs the next, and the whole workflow becomes a single, cohesive craft rather than a collection of isolated tasks.
For readers seeking a practical, step-by-step reference that aligns with these principles, a detailed guide on best practices in DIY auto paint repair is available online. It provides the tools, materials, and safety procedures that support the finishing process described here and offers a framework you can adapt to your own project. As you revisit the fundamental steps—surface cleanliness, metal preparation, careful priming, precise color application, controlled topcoats, and thoughtful finishing—you will reinforce the discipline that separates amateur touch-ups from a professional-grade repair. A careful, patient approach to finishing not only elevates the appearance of your vehicle but also preserves its value by delivering a durable, long-lasting relatively seamless repair that can weather years of use and repeated exposures to the elements.
Internal link reference for further guidance on scratches and surface refinishing: how-to-repair-auto-paint-scratches.
External resource for additional context and step-by-step techniques: https://www.autogeek.net/diy-auto-paint-repair-guide
Final thoughts
DIY auto paint repair is not just a cost-effective solution to minor blemishes but a fulfilling endeavor that every motorcycle and auto owner can achieve. By carefully following the essential steps, utilizing the right materials, and mastering finishing techniques, you can bring back the original beauty of your vehicle. Embracing this skill not only saves time and money but also empowers you to take pride in the care of your vehicle. So gather your tools, choose your paint, and get started on your repair project—your vehicle will thank you!