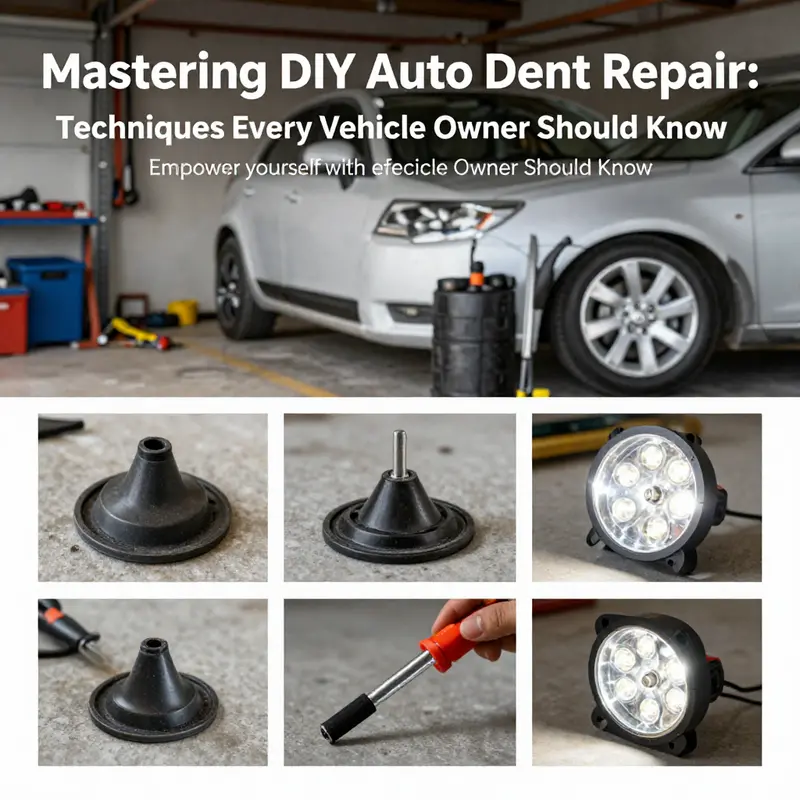
Dents in vehicles are inevitable, whether from a wayward shopping cart or a minor accident. For motorcycle and auto owners alike, knowing how to tackle these minor inconveniences can save money and time. This guide provides valuable insight into effective do-it-yourself methods for dent repair, benefiting not only individual owners but also auto parts distributors, wholesalers, and garages. With the right techniques, tools, and a bit of patience, you can restore your vehicle’s aesthetic appeal and maintain its value. In the following chapters, we’ll explore suction cup dent pulling techniques, effective plunger strategies, and the advantages of using LED tools for enhanced visibility during the repair process. Together, these methods will equip you with the skills to address minor dents efficiently.
Gentle Pulls, Clear Vision: Mastering Suction Cup Dent Pulling Within Do-It-Yourself Auto Dent Repair
A dent, small as a nickel or as wide as a palm, can loom large in a driver’s day. It isn’t just about cosmetics; a dent can feel like a breach in the car’s quiet, a reminder of every stone, every careless car door, every parking lot mishap. Yet within the realm of do-it-yourself auto dent repair, there is a starting point that feels almost forgiving: the suction cup dent puller. This method rests on a simple physics truth—clear suction and controlled pull can coax a panel back toward its original plane without cracking the paint or chasing the dent into a more complicated shape. It’s a method that respects the vehicle’s skin as a living surface, not a rigid metal sheet to be pried into submission. When approached with assembly-line patience and a careful eye, suction pulling becomes more than a hack; it becomes a disciplined practice of assessment, preparation, and execution that anyone can learn to do well.
Begin with an honest assessment of the dent’s character. Suction cup dent pulling excels on shallow, round dents on flat or gently curved panels—think doors, the center of the hood, or a broad fender panel. The idea is to create a vacuum seal, a strong but forgiving hold, and then apply a steady, controlled tug that nudges the metal back toward its original shape. The key is repetition with restraint: small gains achieved gradually lead to a smooth, even final surface. The first moment of this practice is surface preparation. Cleanliness is the quiet enabler of success. Dirt, grease, wax, or polishing residue can prevent a seal from forming properly. A routine with soap and water, or a degreaser, followed by thorough drying, makes the difference between a seal that lasts and one that breaks as soon as you try to pull.
Choosing the right tool is a practical hinge in the process. For beginners, a single suction cup dent puller offers a straightforward entry point. It is affordable, simple to use, and taught widely as the gateway tool for beginners learning how to coax a dent into retreat. If a dent is a touch larger or the surface demands more secure grip, a double suction cup setup can distribute force more evenly and stabilize the pull. The difference may be subtle in the moment, but the effect is meaningful when paint protection is part of the objective. Regardless of the configuration, the seal is everything. The center of the dent must receive a direct, confident press to create a complete seal before any pulling begins. Slipping or partial contact invites edge pull and uneven results, which can leave a telltale dimple or, worse, a scratch in the paint when the seal breaks mid-pull.
As you prepare to pull, keep the motion smooth and deliberate. Press the suction cup firmly onto the center of the dent, ensuring the entire rim is flush with the panel. Then, with a steady rhythm, lift the handle in a controlled, upward motion. The aim is to transfer force through the cup into the metal in a way that reshapes the dent rather than distorting neighboring areas. Jerky tugs, sudden releases, or aggressive plucking can overshoot the mark, creating a shallow center dimple or cracking a compromised paint layer. Small, patient pulls beat big, forceful ones every time. If you watch closely under good lighting, you’ll begin to notice a subtle change in the panel as the metal begins to rise toward the surrounding plane. It’s not dramatic, but it is a skilled, patient process, a dance with gravity and metal that rewards practice.
There is more to the technique than the pure pull. Surfaces matter, and contours matter. Flat or gently curved areas tolerate suction better; on highly contoured surfaces—around folds, edges, or the crown of a roof—the cup can struggle to maintain a seal. In those moments you’ll feel the seal loosen, and you might need to adjust by changing the angle of approach, or by shifting to an alternative method that adheres to the surface. A glue puller kit, which uses adhesive to grab onto the metal and then pulls with a controlled force, can be a more reliable option for those tough curves. It is not as forgiving as suction for a simple dent, but it can be a precise tool when the shape demands it. The transition between methods should be measured, with the recognition that some dents resist suction but give easily to glue-assisted pulls. The goal remains the same: restore, not replace, the panel’s original shape while preserving the paint’s integrity.
Deeper dents present a natural boundary to the suction approach. Suction cups shine on the shallow end of the spectrum. When a dent penetrates more deeply, or when the impact has left subtle, stubborn distortions, the suction cup’s leverage fades. In such cases, attempting to force a deep dent with a simple cup can actually create new distortions, so it’s wise to acknowledge the limit of the tool and consider more powerful options. A slide hammer dent puller or an air-powered system can provide the extra force required to raise deeply set metal or to coax it back into alignment when the surrounding surface is still intact. Yet even when more intensive methods become necessary, the suction cup method remains a foundational skill—an entry point into the mindset of paint-preserving repairs and a reminder of how much control matters when you work near the surface.
Following the pull, a careful inspection becomes the next essential discipline. The post-pull check is a quiet, almost ceremonial moment. Look across the panel in natural daylight, which is a recurring guideline from seasoned practitioners because daylight provides the true shadow and highlight cues that indoor lighting often misrepresents. The natural light helps reveal the panel’s true finish, the presence of any residual ridges, and any subtle lines that indicate uneven distribution of material. A LED inspection lamp is a tool worth mentioning here not as a crutch but as a magnifier for detail. When you angle the lamp just so, you can see ridges that a casual glance might miss. This is how the small gaps are closed and the subtle high spots are smoothed. It’s not flashy, but it is practical; a good eye plus good light equals a flatter, more consistent surface. If you find a slight dimple still present, it is a cue that a gentle push back with a soft tool may be necessary. Over-pulling rarely solves the problem; instead, it can exaggerate curvature errors or create a shallow new irregularity nearby.
Alongside the manual skills, a measured mindset matters. The best results come from a methodical routine rather than a single heroic pull. The process invites a rhythm: clean, seal, pull, inspect, adjust, re-seal, and re-pull if needed. The rhythm grows with experience, and as you gain more confidence, you learn to gauge how much pull is enough before stopping to reassess. The measure of success is not a dramatic change in appearance but a panel that lies flush with the neighboring areas and a paint finish that remains free from cracks or hazing. The paint’s health is a constant variable in this equation. Even with perfect technique, if the paint has already begun to crack or peel, or if the substrate has been compromised by the impact, professional intervention becomes the wise choice. This is not a defeat; it’s a call to respect the limits of DIY work and to know when the risk of further damage outweighs the benefit of a DIY repair.
To deepen the practice beyond the tactile, many practitioners integrate visualization and practice with a reflective mindset. They measure outcomes by the absence of shadows and the uniformity of reflections across the panel, using the LED light as their feedback loop to spot irregularities that the naked eye might miss. The process is almost meditative: a quiet procedure that blends preparation, physical technique, and critical judgment. In this blend lies the value of the suction cup method. It is accessible, it preserves paint, and when wielded with patience, it offers a meaningful improvement with minimal risk. It is also a reminder that DIY auto dent repair is a spectrum, not a single trick. The suction cup technique is a respectful, scalable approach that can introduce newcomers to the discipline, while also offering a reliable tool for quick, on-the-spot corrections that drivers can perform in their own garage or driveway.
For a broader view of how to select and use paintless dent repair tools, this external guide provides a comprehensive overview that complements the hands-on practice described here. It lays out the principles behind tool selection, technique, and the escalation path when a dent proves stubborn. While every vehicle and dent are unique, the underlying logic remains consistent: prepare with cleanliness, seal with care, pull with control, and inspect with daylight. If you want to go beyond the suction cup approach and explore related methods, you can explore additional techniques and learn how to combine them for more complex cases. The practice grows richer as you understand the panel’s behavior in response to different forces and approaches. By embracing these principles, you solidify a foundation that supports reliable DIY dent repair without sacrificing the integrity of your vehicle’s finish.
As you continue to refine your technique, you may find it valuable to connect with learning resources and practical guidance. A straightforward way to build a broader base of knowledge is to explore introductory materials that cover the basics of do-it-yourself auto repair. For those who want a concise primer that you can reference as you work, consider checking out a resource that frames DIY repair fundamentals in approachable terms. This can help you keep your expectations realistic and your approach steady as you progress from suction cups to more varied methods when needed. You’ll appreciate how this knowledge underpins the careful, patient practice that ultimately yields the best cosmetic results on a tight budget.
If you are curious about broader DIY repair principles and want a practical primer to anchor your practice, you may find it helpful to explore a concise guide focused on the basics of do-it-yourself auto repair. It complements the hands-on experience of suction cup dent pulling by providing a mental framework for planning, safety, and progressive skill-building as you tackle more repairs over time. By combining careful technique with a willingness to pause and reassess, you cultivate a durable, paint-safe habit that serves you in many small and meaningful ways.
Internal link for further reading: DIY Auto Repair Basics. This resource can help you situate suction cup techniques within a broader DIY repair mindset, reinforcing best practices while you build confidence for future projects. External resource for deeper tool guidance: you can consult Paintless Dent Repair Tools Guide for a more technical overview of the tools and their proper application. https://www.carecdigest.com/paintless-dent-repair-tools-guide
The Plunger Protocol: Safe, Practical DIY Car Dent Repair on Flat Panels
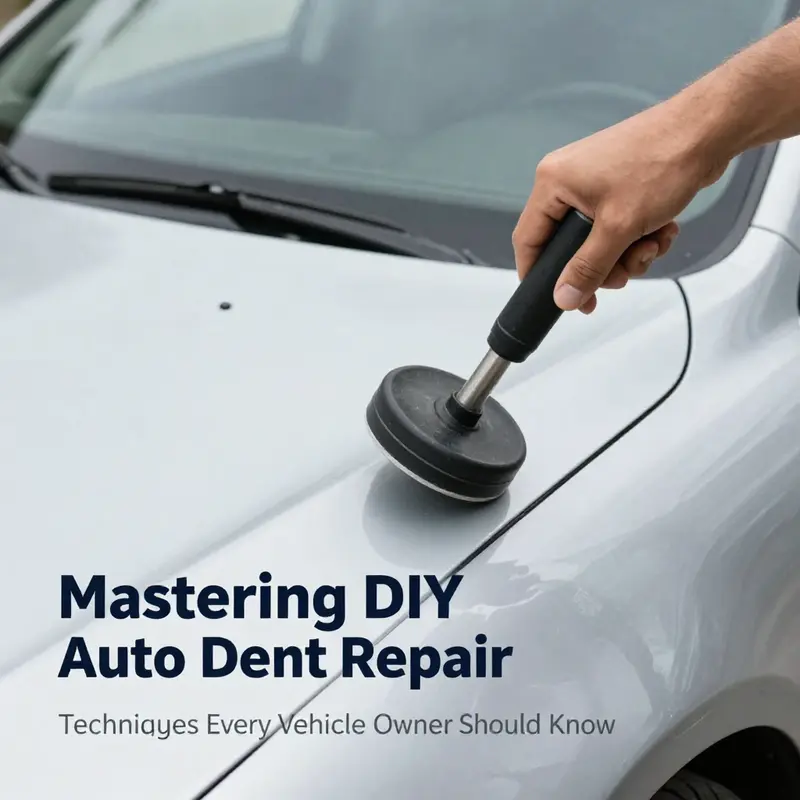
Repairing a minor dent without stepping into a body shop offers a satisfying blend of practicality and control. The plunger method, in particular, invites beginners to test their DIY skills with a tool most households already own. It is not a cure-all, and its success hinges on the dent’s shape, depth, and location. Yet when approached with patience and precision, the plunger technique can pop out shallow deformations on flat panels such as doors and hoods, restoring a smooth profile while preserving the surrounding paint. The appeal lies in its simplicity: no specialized equipment, no heavy heat, and a process that feels almost experimental in its reliance on a simple physical principle—the creation of a vacuum seal that can coax metal back toward its original form. As with any DIY endeavor, the goal is a balance between effective repair and the preservation of the car’s finish and underlying structure. This requires respect for the limits of the method and a clear-eyed assessment of when a dent is beyond the reach of a suction-based approach.
At the heart of the plunger technique is a straightforward physical idea. When you press a large rubber cup against a dent and push down, you expel air from the cup, creating a vacuum seal between the cup and the metal. The subsequent upward pull applies a sudden force that, if the seal remains intact and the metal is pliable enough, can coax the dent outward. The effectiveness increases on surfaces that are flat, free from deep creases, and free of cracked or stretched paint. On such surfaces, the metal possesses enough elasticity to rebound toward its original plane without needing heat or more aggressive pulling. To understand why this works, picture a shallow indentation on a sheet of metal. The surrounding metal has a memory; given a little encouragement, it tends to return to its flat state when the edges can’t resist the pull back to level ground. The plunger acts as a controlled instrument of that pull, offering a symmetric, center-focused push, a rapid downward motion, and a deliberate upward yank. This combination is key: too slow a pull or too light a push often leaves the dent stubbornly in place, while too aggressive an attempt can stretch paint or create new distortions.
Preparation matters as much as technique. Before you even place the plunger on the dent, you want the surface clean, dry, and free of grit that could scratch or dull the seal. Wash the area with mild soap and water, rinse, and dry it thoroughly. Any moisture or dust between the cup and the metal can break the vacuum and reduce the effectiveness of the pull. A common, practical tip is to add a thin film of water or a light soap solution around the edge of the dent. This isn’t about lubricating the surface in a cosmetic sense; it’s about improving the seal by allowing the rubber to grip evenly. The next piece of preparation is to choose the right tool. A large, rubber-cup plunger designed for plumbing—one with a wide, flexible cup—tends to outperform smaller or stiffer versions. The larger surface area distributes force more evenly and can generate a stronger vacuum without requiring extreme force from your hand. If you don’t have a plumbing cup on hand, a kitchen or bathroom sink plunger can serve in a pinch, but avoid those with a rigid core that can bite into the metal or damage the surrounding finish. Alongside the plunger, a practical safeguard is a hairdryer. A brief, controlled warming of the metal—just enough to feel a slight pliability—can help the metal spring back more readily. It’s crucial to avoid overheating, which can soften paint or lacquer and invite further damage. When you combine mild heat with careful, center-focused suction, you create conditions where the metal is more amenable to reform, and you reduce the risk of creating new ridges or waves as you pull.
The technique itself unfolds as a series of small, deliberate actions rather than a single dramatic move. Start by centering the plunger over the deepest part of the dent. Press straight down with steady, even pressure to establish the seal, then push down quickly to expel air and form the vacuum. Immediately switch to a brisk upward pull, keeping the pull vertical and controlled. The goal is not to yank the dent out in one motion but to apply a sequence of pulls that gradually coax the metal back toward a flat plane. People who are new to this method often underestimate how much the repeated, measured motion matters. A single, forceful tug can do more harm than good, especially if the paint is already stressed. Instead, perform several cycles, starting with modest pressure and gradually increasing as you assess the progress after each pull. The most important sign of progress is a soft, consistent rebound around the edges of the dent. If you see any new high spots or radial ripples, ease off and reassess. In some cases, you may need to adjust the angle slightly or re-wet the edge to improve the seal and equalize the pressure.
Visual feedback is a critical ally during the repair. Lighting plays a pivotal role. A bright LED inspection lamp, held at a slight angle to the surface, helps reveal subtle ridges and unevenness that daylight alone can obscure. The lamp’s directional light highlights the contours of the metal as it shifts, revealing whether the center has moved flush with the surrounding panel or if a low spot persists. In addition to the lamp, evaluate the dent under natural daylight. Indoor lighting can cast misleading shadows that either exaggerate or mask the severity of the deformation. If possible, step outside or move near a window to observe the area in daylight after a few pulling cycles. Take note of how the reflections across the panel change as the dent reduces. The goal is a smooth, continuous reflection line that follows the surrounding panel without breaks. This is more than cosmetic; it’s a practical indicator that paint is not being stressed and that the surface is returning to its intended shape.
As you gain experience, you’ll begin to recognize the signs of when the plunger method is likely to succeed and when to stop. Shallow dents on flat panels with intact paint respond best, while deeper imperfections, creases, or dents that involve cracking or lifting of the paint generally require more advanced tools or professional attention. It’s essential to know your limits. If the dent sits near a structural component or inside a seam, the risk of disturbing structural alignment or gasket seating increases, and the cost of a DIY misstep rises. If you are unsure about the integrity of the paint—if you see cracking, bubbling, or a color change around the area—it’s wise to pause and consider alternative approaches or seek counsel from a professional. In such cases, attempting to force a solution with a plunger could result in more extensive cosmetic damage or compromise in the long run. If a dent proves stubborn after several methodical cycles, or if the paint shows signs of damage, take a step back and re-evaluate. Some dings respond better to suction cup dent pullers, which create a different kind of grip and leverage that may suit the particular contour of the damage. The goal is not to chase a quick fix but to achieve a subtle, durable correction that respects the integrity of the panel.
For someone just starting out, the plunger method offers a gentle entry point into the world of do-it-yourself dent repair. It teaches the value of preparation, patience, and observation, and it frames the repair as a process of feedback and adjustment rather than a single, decisive action. This approach aligns with broader DIY principles—practice, measure progress, and respect the material you’re working with. If you’re curious about expanding your toolkit after gaining confidence with the plunger, you can explore broader DIY auto repair guidance in our resource on DIY auto repair basics, which helps you build a foundation in safe practices and core techniques. DIY auto repair basics.
Even with careful technique, it’s important to acknowledge the limits of the plunger method. For dents that are deeper, creased, or on curved surfaces, the suction alone may not suffice. In those cases, a specialized tool designed to pull dents with controlled force can offer better leverage and control. A suction cup dent puller may address contours that a plunger cannot, providing an alternative pathway to a cleaner finish. Alongside any DIY method, maintaining a conservative mindset helps prevent unintended consequences. If you notice any signs of compromised paint or edge lifting, stop, reassess, and consider a later attempt or professional advice. The plunger method is a skill that benefits from conservative experimentation. It teaches you to observe, test, and respond with care, rather than to apply brute force in the hope of immediate perfection. This mindset reduces the risk of creating new damage and helps you approach future dents with greater confidence and nuance.
When you do observe progress, the result is more than cosmetic improvement. It is a small demonstration of how everyday tools, careful technique, and patient observation can restore symmetry to a surface that has temporarily fallen out of alignment. The dent’s return to a smooth plane reflects the resilience of metal as a material and the virtue of approaching repairs in a measured, disciplined way. The experience also offers a practical reminder: not every dent is a DIY project waiting to be solved with speed. Some are better handled with a combination of methods and a careful assessment of structural integrity. If you ever reach a point where the surface shows persistent irregularities or where the edge of the panel seems stressed, it’s wise to consult professionals who can assess the integrity of the panel and ensure that the repair is durable and safe in the long term.
External reference and further reading can deepen your understanding of the plunger technique and its proper application. For a deeper, step-by-step reference, you can consult a detailed guide on dent repair with a plunger. This resource provides practical illustrations of the method and discusses common pitfalls to avoid, offering a broader context for DIY enthusiasts who want to compare approaches and learn what configurations tend to yield the best results. External reference: https://www.familyhandyman.com/article/how-to-fix-a-car-dent-with-a-plunger/
Bright Line, Smooth Finish: LED Illumination for DIY Dent Repair Mastery
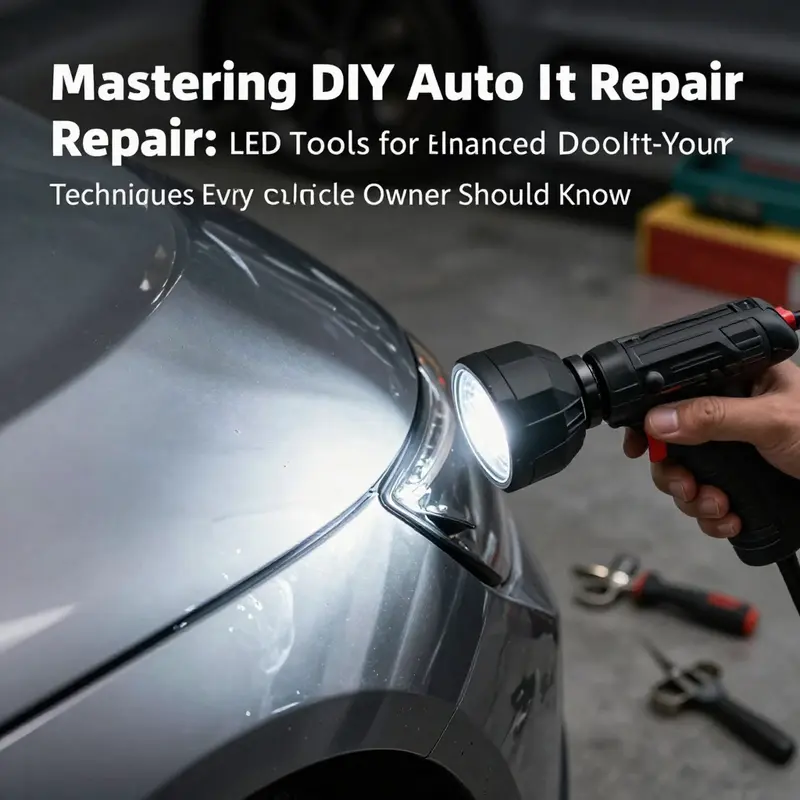
In a quiet garage, a dent on a door panel hides in plain sight until you introduce a bright, focused LED beam. LED dent detection lights are not magic; they are precision tools that reveal depth, edge, and contour by throwing shadows and reflections in just the right way. When you learn to position the light, you transform guesswork into measurement.\n\nHow it works: light travels across curved panels and creates highlights where the surface tilts toward or away from you. A high-CRI LED with a slightly cool to neutral color temperature produces accurate color rendering and sharper edges than a generic lamp. A concave reflector or diffuse lens can spread the glow evenly, preventing hotspots that mask subtle distortions.\n\nPractical setup tips: keep the surface clean and dry; hold the light at a shallow angle; move the beam across the area while watching reflections; vary color temperature if your light offers it to increase contrast.\n\nLess obvious benefits: portable, cordless operation lets you position light from multiple angles without tripping over cords; adjustable mounts allow hands-free support; reflective patterns act as guides for symmetry.\n\nSafety and workflow: use daylight as baseline, verify in several angles, avoid overbrighting; practice on test panels.\n\nIntegrating with technique: LED illumination complements tapping, pulling, and smoothing; use as a feedback loop to refine your approach; with practice you minimize passes and achieve a near invisible repair under natural light.
Final thoughts
Successfully addressing minor dents in vehicles enhances not only their appearance but also their resale value and longevity. Using the techniques outlined in this guide—from suction cup pulls to plungers and LED tools—allows you to tackle these repairs with confidence. Always assess the depth and severity of the damage to choose the most appropriate method. Remember, for deep dents or damage near structural components, seeking professional help is the best course of action. Equip yourself with these skills, and you’ll be ready for any minor mishap your vehicle may encounter.