When it comes to maintaining the allure of your vehicle, the auto clear coat plays a critical role in preserving paint quality and appearance. Whether you’re a motorcycle enthusiast, an auto owner, a repair shop professional, or an auto parts distributor, understanding how to repair auto clear coat damage is essential. This guide dives into practical techniques for minor repairs, explores when to seek professional help for severe damages, emphasizes key considerations for successful repairs, and highlights how the repair environment can impact the outcome. By the end, you’ll have the knowledge needed to tackle auto clear coat repairs with confidence and precision.
Tiny Touch, Big Shine: Precision Auto Clear Coat Repairs for Small Patches
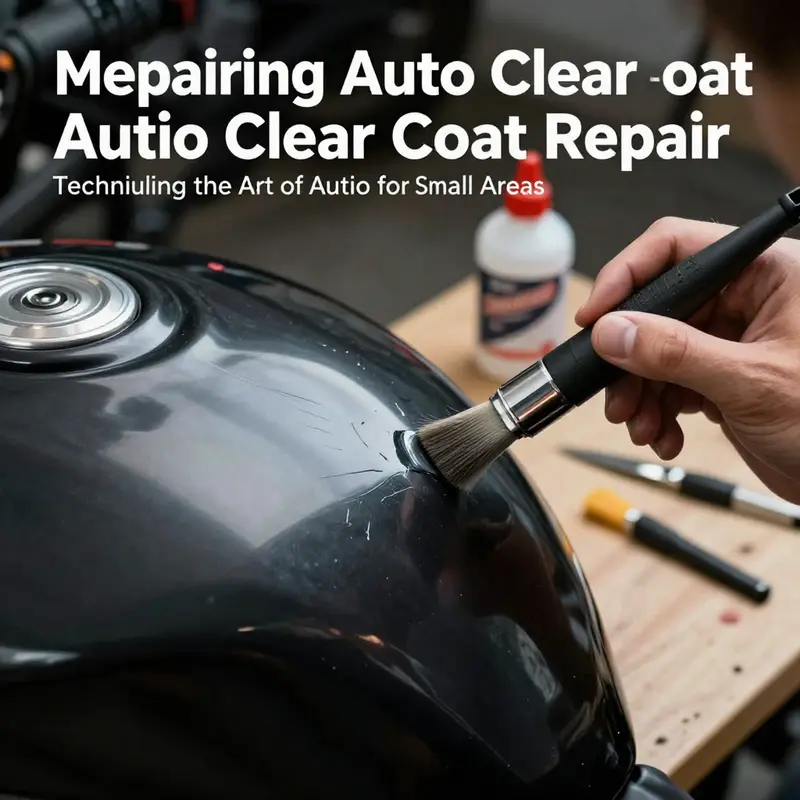
Clear coat damage that starts as a pinpoint chip or a slender scratch can feel discouraging, especially when it sits in a highly visible patch of metal or plastic. Yet, many small areas of clear coat loss are not a herald of doom for a car’s finish. When the damage remains superficial, you can restore gloss and protection with careful technique and the right tools. The goal is not to erase every flaw at once, but to reestablish a smooth, glossy barrier that behaves like factory paint once it cures. A well-executed small-area repair can blend with the surrounding panels so convincingly that the eye notices the repair only up close, if at all. This chapter dives into a practical, step-by-step approach that sticks to the essentials: clean, level, protect, and blend. It also acknowledges the limits of DIY and points toward smarter options when a repair outgrows a patch of clear coating. In practice, the challenge is to manage small imperfections without introducing new ones, and the method hinges on precision, patience, and a quiet workshop environment where dust and temperature are controlled as much as possible. The same discipline that makes a quick scratch disappear can also prevent new damage during the curing window and after the repair is complete, so the plan extends beyond the moment of application. A focused, patient approach to small-area clear coat repair can deliver a finish that looks as good as it performs, with a depth of gloss that mirrors the curvature and contour of the vehicle’s panels.
Begin with a clean slate. Dirt, oil, and wax residues are the enemy of adhesion and even the best repair kit will fail if the surface isn’t pristine. Wash the affected area with a mild soap solution, rinse thoroughly, and dry with a microfiber towel. The goal is to remove any loose particles that could become embedded in the new clear coat or create micro-scratches during the repair process. If the area feels rough or gritty to the touch, a light, controlled polishing can help. Use a damp 2000- to 3000-grit pad and work in small, circular motions. The idea isn’t to strip away clear coat aggressively, but to smooth the surface just enough to provide a uniform substrate for the repair. Rinse often and stop if you see the surface becoming dull or if any new scratches appear. Precision is the watchword here; more aggressive sanding is reserved for larger, more serious damage and should be avoided on tiny chips that you intend to repair at home.
For very small imperfections that haven’t pierced the clear coat, a dedicated repair kit designed for automotive coatings can be a workable solution. These kits typically feature two core elements: a color-matching marker or paint pen for the base coat, and a UV-curable clearcoat marker. The design is deliberately simple: pressure on the marker tip opens a valve and feeds the resin or tint precisely where you need it. The aim is minimal waste and precise deposition—exactly what you want when you’re dealing with a pinhole in the surface. After applying the color layer, you cap the repair with the UV-curable clearcoat. The curing process can be accelerated by sunlight or with a portable UV lamp, producing a hard, glossy finish that bonds to the surrounding clear coat. It’s almost like giving the finish a tiny,, controlled patch from above. The result is a durable layer that, once cured, can be gently polished to blend with the adjacent surface. Cure times vary, but many small-area repairs are ready for light handling after 24 hours and for more thorough polishing a day or two later. The key here is to apply multiple thin coats—never a thick single layer—to avoid runs and to build depth gradually.
The final touch in any small-area repair is blending. After curing, a careful polish with a gentle compound and a dual-action polisher—or even by hand with a soft polishing pad—will help harmonize the repaired patch with the rest of the panel. The objective is not to remove the repair but to micro-sand the edges just enough so that the transition from repaired area to original paint becomes invisible to the casual observer. When done correctly, the repaired zone reflects light consistently across its surface, matching the curvature and micro-scratches of the surrounding clear coat. The process is less about hiding a flaw and more about restoring a seamless surface and a uniform gloss, which often hinges on patience and a light touch rather than brute force.
Those who want to explore beyond the most straightforward options for small-area repairs can consider a broader set of techniques designed for minimization of damage and improved durability. For instance, there are resources that describe how to repair auto paint scratches in a more general sense, which can be useful when the damage isn’t confined to clear coat alone or when the scratch is slightly deeper. A practical route is to read a guide that covers both color-matching considerations and the steps to apply a topcoat in layers, with attention to curing and blending. You can explore a focused guide on how-to-repair-auto-paint-scratches to complement the approach described here and to broaden your toolkit for different kinds of tiny flaws. The link points to a comprehensive guide that emphasizes precision and patience, mirroring the philosophy of small-area clear coat repair. See the guide here: how-to-repair-auto-paint-scratches.
Sap and tree resins present a different kind of micro-challenge. When an isolated sap spot adheres to the surface, the risk is not merely cosmetic; solvents and cleaners can create micro-scratches or soften the existing clear coat if used aggressively. The safest path begins with thorough washing to remove loose dirt, followed by softening the sap with a mild solvent such as isopropyl alcohol or a commercially available tree sap remover. The goal is to loosen the sap without abrading the finish. A soft cloth, not a rough rag or a metal scraper, is used to lift the softened sap away from the surface. Once the sticky material has been removed, it is prudent to decontaminate the area with a clay bar or a dedicated paint cleaner to eliminate adhesive residues and mineral buildup. Finally, a light coat of wax or a synthetic sealant is applied to restore surface protection and to help prevent future sap adhesion. This careful, non-abrasive approach preserves the integrity of the repaired area and helps maintain long-term gloss.
It is essential to acknowledge the limits of DIY techniques. Small patches that are truly superficial can be managed at home with accuracy and patience, but if the scratch or chip has reached the base coat or primer, the repair becomes far more complex. In such cases, color matching, adhesion, and long-term corrosion resistance require controlled conditions and professional equipment—airbrushing with a sprayer, precision masking, and a full refinishing process that ensures the entire panel or a larger area is uniform in appearance. It’s not that a do-it-yourselfer cannot achieve a pleasing result; it’s that the risk of color mismatch, uneven gloss, or inferior adhesion grows as the damage stretches beyond the surface layer. The decision to call in a professional is not a mark of failure but a practical choice to preserve the vehicle’s value and finish. When larger patches are involved, a reputable shop will re-prepare the surface down to bare metal or to the original paint layer, apply primer, spray the base color with precision, seal with multiple clear coats, and finish by a comprehensive polish. This approach yields a factory-like finish that is challenging to reproduce at home.
A further horizon in small-area repair is the advent of self-healing clear coats, which offer an intriguing option for the most delicate scratches. These systems embed elastic resins or microcapsules within the clear coat. When exposed to heat—sunlight or a dedicated source—the material flows and recombines, effectively smoothing shallow scratches that are typically only a few microns deep. The potential of self-healing clear coats lies in their ability to reduce maintenance for minor superficial flaws without the need for repeated polish or topcoat applications. Brands and manufacturers have introduced versions of this concept in different markets, highlighting how modern coatings evolve toward more forgiving finishes. However, the self-healing effect has clear limits: it does not repair deeper scratches that expose the substrate, and its durability depends on the quality of the underlying layers and the dynamics of daily wear. If your vehicle’s coating uses a self-healing system, the repair strategy for tiny flaws becomes a little less about re-sealing and more about triggering the self-healing cycle through proper exposure and curing.
An important practical note threads through all these approaches: environment and handling matter as much as technique. Repairs should occur in a clean, dust-free space. Any dust particle that settles on a wet layer can cause inclusions, which will show up as tiny specks after curing. Temperature also plays a role; lower temperatures slow curing and can lead to uneven gloss, while excessive heat can distort the film or cause premature solvent evaporation. During curing, it is also wise to minimize exposure to water or detergents for at least 48 hours after a base and clear coat repair. This waiting period reduces the risk of lifting or peeling and helps ensure a durable bond between the new layer and the underlying paint. The fundamental idea is to respect the chemistry of the coating system and to avoid rushing the cure.
In navigating the array of options, one unifying principle remains: apply the smallest feasible amount of coating material, in the thinnest feasible layers, and allow each layer to cure. The mind-set is not to flood the area with product, but to build a transparent, protective film that rhymes with the adjacent area. When you balance the patience of a precise, incremental approach with an understanding of what the substrate can tolerate, you improve your odds of achieving a seamless repair that preserves the panel’s optical depth and the panel’s integrity. A patch repaired with care can look as if it never occurred, with the added benefit of guarded protection against the elements.
As you plan the repair, you may be inclined to explore a broader context of coatings and durability to understand why some approaches work better than others. The discussion around self-healing clear coats illustrates a larger principle: coatings are increasingly designed to tolerate minor abuse and to recover from light surface imperfections. While this is not a universal remedy, it signals a trend toward smarter finishes that extend the life of a vehicle’s appearance with less maintenance. In the end, the best DIY path for small patches is the one that respects the limits of the finish, follows a disciplined sequence of cleaning, conditioning, layering, curing, and polishing, and remains mindful of the long-term protection the clear coat provides. For those curious about deeper aspects of scratch repair or color-matching precision, a broader guide on repairing auto paint scratches can serve as a complementary resource, reinforcing the idea that small patches can be managed with technique, patience, and the right tools. External reference to cutting-edge coating technologies is also worthwhile, such as the advanced Smart Gloss+ technology described by leading manufacturers, which illustrates the ongoing evolution of clear coat performance and durability. External reference: https://www.toyota-global.com/innovation/technology/smartglossplus.html
How to Repair Auto Clear Coat for Larger Damage: When to Seek Professional Help
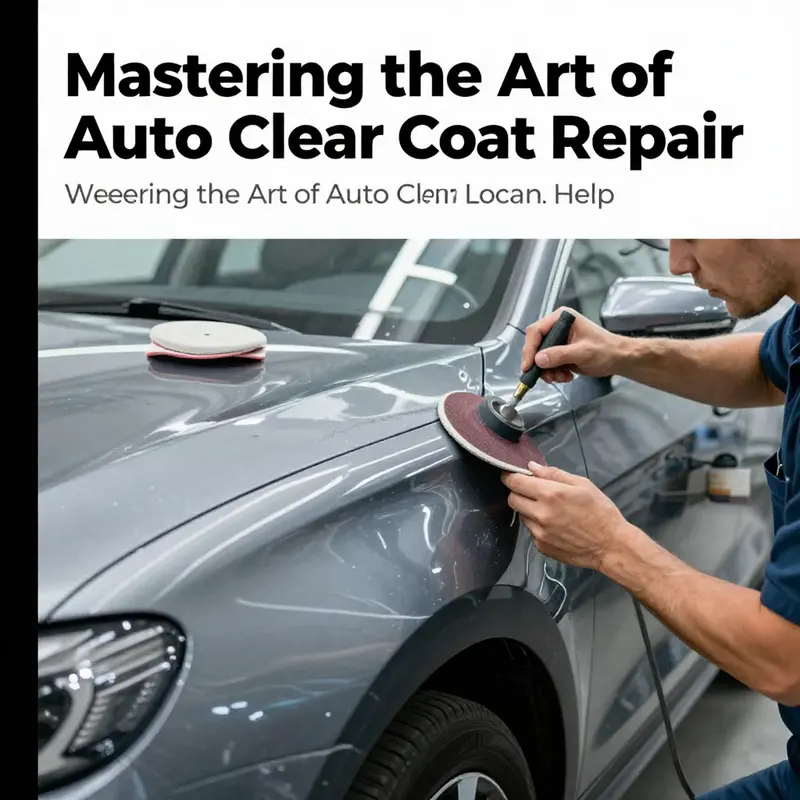
When the damage to a car’s clear coat runs beyond the scope of a quick DIY patch, the urge to reach for a bottle of touch-up paint or a home spray kit can be tempting. Yet large areas of peeling, deep scratches that reveal primer or base coats, or extensive rust formation demand a different kind of expertise. The problem with attempting a large repair at home is not only the risk of a less-than-perfect appearance but also the potential to trap moisture, create adhesion problems, or exacerbate the corrosion that can spread beneath the surface. In these cases, professional intervention is not merely a recommendation; it becomes a practical decision aimed at protecting the vehicle’s value and longevity. Professional shops bring a combination of controlled environments, precise color matching, and the right tools to restore a factory-like finish that a DIY patch rarely achieves. This chapter explores why larger clear coat damage calls for skilled hands, what you can expect during a professional repair, and how to prepare yourself and your vehicle for that process, all while maintaining a clear sense of the real tradeoffs involved in choosing a professional route.
The first, most important reason to involve a pro is surface preparation. Large areas of damage rarely end with a simple topping layer. The clear coat itself may be compromised not just superficially, but in a way that requires reconditioning of the underlying paint system. A professional technician will assess whether the damage has undermined the integrity of the clear coat, the base coat, or even the primer. If the underlying layers are exposed, the tech will methodically remove the damaged material, sometimes down to bare metal, in a controlled, feathered fashion. This is not just about removing color or peeling film; it’s about setting a clean stage for adhesion. Any stray contaminants—oil, wax, old solvents, or sanding dust—can interfere with adhesion later in the process and lead to premature failure. In a shop, this cleaning and sanding happen in a paint booth or a similarly dust-controlled space, where every sweep of the air is accounted for and filtration keeps particles from landing on a fresh surface.
Color matching stands as the second pivotal factor. Even slight variations in color are obvious on a large panel. A shop has access to instrumentation and expertise that most DIY setups cannot replicate. A spectrophotometer or a similar device can analyze your vehicle’s original paint and guide the formulation of a custom pigment mix that blends with the surrounding panels. The goal is a seamless transition from repaired area to existing paint, with no visible line of demarcation. The reality, however, is that color matching is as much an art as a science. Subtle shifts in lighting, aging of surrounding panels, and the lay of the original paint layer can all influence the final appearance. Professionals anticipate this by applying multiple thin coats, performing tests in small, controlled increments, and blending edges through careful sanding and polishing to achieve a natural, factory-like gloss throughout the repaired surface.
The application stage is where the expertise becomes most evident. Large-area repairs typically require a series of layers: a carefully prepared primer to enhance adhesion; multiple coats of base color, applied with a professional spray gun in a dust-free environment; and several layers of clear coat, each cured before the next is applied. The spray process is calibrated to deliver uniform film thickness across the panel, which helps prevent runs, sags, or orange-peel texture. A home DIY setup rarely duplicates this level of control. The professional spray booth not only minimizes dust but also maintains stable temperature and humidity levels that influence how the paint and clear coat dry and cure. This stability reduces the risk of solvent entrapment, solvent pop, or cratering—issues that become visually obvious when looking at a large repaired area from different angles.
Even after the color and gloss have been laid down, the work doesn’t end. Wet sanding and polishing are customary final steps. A technician will carefully level the clear coat to remove any minor imperfections and then buff the surface to a high-gloss finish. The aim is to blend edges so that the repaired panel looks like a single, uniform sheet of paint with the surrounding areas. This step is crucial for avoiding a noticeable boundary between new and original paint. When done well, the repaired section reflects light with the same character as the rest of the car, and a casual observer will be hard pressed to spot the seam or any variation in texture. In contrast, inadequate finishing often leaves a visible line, texture differences, or a dull patch that can erode the overall value of the vehicle over time.
Beyond the technique, the materials themselves matter. A professional shop will source high-performance automotive paints and clear coats designed for durability and UV resistance. They will also have access to equipment such as calibrated spray guns, professional-grade reducers and activators, and reputable clear coats formulated to resist chalking and yellowing. The goal is not merely to cover a defect but to produce a finish that can stand up to everyday wear, weather, and car washing. This is why the cost of a professional repair is higher than most home-done projects. It reflects the investment in tools, controlled processes, and the long-term protection of the vehicle’s finish. The difference can be especially noticeable on metallic or pearl finishes, where the reflective quality depends on precise application and blending across the entire panel rather than a patchy patch.
For a vehicle owner facing large-scale clear coat damage, the decision to seek professional help often rests on a balance of quality, predictability, and time. A shop can give you an honest assessment of whether the damage is limited enough to justify a DIY approach or whether a full panel or large section respray will deliver a more durable and consistent result. In many cases, even if you start with a modest plan in mind, the scope reveals itself to be larger once the surface is opened up and the damage is fully revealed. The professional path not only ensures adherence to a higher standard of appearance but also addresses potential corrosion risk. If moisture has penetrated the underlying layers, slow leaks in those areas can lead to rust that spreads beneath the new coating. A trained technician can identify and treat this at the outset, protecting the metal long after the finish has been restored.
One useful way to frame the decision is to consider the long-term implications. Small chips and minor scratches can often be repaired with tools and materials that keep costs reasonable and the process manageable. Large-scale damage, by contrast, often triggers a cascade of steps that, while ultimately restoring the look, also reset the panel’s history. The repaired area may require more frequent inspection and occasional refinishing if ever subjected to impact or severe weather. A professional job, however, tends to resist such issues more reliably and preserves the car’s resale value by delivering a surface that behaves like the original finish under typical conditions.
If you’re weighing options, you can gain a clearer sense of the path forward by exploring related topics that illuminate the philosophy of repair. For instance, a focused look at how to repair auto paint scratches can help you appreciate the disparity between minor touch-ups and larger corrective work. See How to Repair Auto Paint Scratches for a comparison of scope and technique, which can help you gauge whether your situation fits into the DIY category or warrants professional intervention. How to Repair Auto Paint Scratches. This contrast often makes the decision easier because it clarifies what is truly feasible at home and what should be left to the shop.
Preparation for a professional repair also involves practical steps that can smooth the process and minimize surprises. Start by documenting the damage with clear photos from several angles, including close-ups of the peeling edges and any rust spots. Write a brief description of when and how you first noticed the damage, and note any changes in the vehicle’s condition. This record can help the shop assess the severity and monitor progress over time. Gather relevant information about the car’s original paint finish if you have it, including the year, model, and any known issues with coatings on that particular color family. When you visit the shop for an inspection, bring these notes and be prepared to discuss your budget as well as your expectations for appearance and durability. While the goal is to restore a factory-like finish, you should also understand that some variance is inevitable due to the way pigments age and respond to light over time. The professional will manage those expectations through transparent communication and a detailed plan that outlines each stage, the anticipated timeline, and the required curing periods.
From a care perspective, once the repair is complete, there are practical guidelines that help preserve the result. Don’t wash or expose the vehicle to harsh detergents for at least 48 hours after the final clear coat application, and follow the shop’s specific guidance on care. Where possible, avoid abrasive cleaners and dedicated polishing compounds on the freshly repaired area for several weeks. These precautions aren’t meant to be restrictive but rather to give the new finish the time it needs to cure and harden fully. In environments that are not perfectly clean or in climates with intense UV exposure, the cured clear coat can still benefit from a protective wax or sealant applied at the right interval as recommended by the shop. Such measures help maintain gloss and guard against micro-scratches caused by road debris, while not compromising the integrity of the newly restored finish.
Ultimately, the decision to pursue professional repair for larger clear coat damage hinges on more than the color match or the look. It is a decision about protection, longevity, and the confidence you want when you pull into a sunny driveway or drive through rain-washed streets. The cost, while higher than DIY fixes, is an investment in the vehicle’s structural and aesthetic health. It reduces the risk that hidden corrosion or finish inconsistencies will grow into more serious problems down the line. The tradeoff is straightforward: a professional repair offers the best chance of a flawless, durable result that stands up to time, whereas a DIY approach, while potentially less expensive upfront, carries a higher risk of poor adhesion, color mismatch, and future touch-ups. If your goal is to preserve the integrity of the finish across years and to restore the car’s showroom-like appearance, professional intervention is often the prudent course.
For readers seeking a broader, more procedural understanding of what professional auto body repair entails, Car and Driver provides an authoritative overview of the steps involved in a professional auto body repair process. This resource offers a clear, industry-standard sequence—from inspection and surface preparation through to final finishing and curing—helping set expectations for anyone considering this route. You can read more about the professional process at Car and Driver Auto Body Repair Process.
In any case, the decision should rest on a careful weighing of damage extent, available time, and the value you place on a pristine finish. Large-scale clear coat issues demand precise technique, controlled conditions, and the right materials—elements that define the professional repair path. When you choose to work with skilled technicians, you gain access to an integrated solution that not only patches a problem but revives the vehicle’s original luster, protects against future damage, and preserves its overall value for years to come.
The Quiet Science of Clear Coat Repair: Reading Damage, Preparing the Surface, and Restoring Gloss
The glossy shield that protects a car’s paint is more than a cosmetic layer. When the clear coat shows chips, scratches, or areas of lost sheen, the impulse is to reach for quick fixes. Yet the best outcomes emerge not from haste but from reading what the damage truly is, and then choosing a process that respects the original finish. The journey from a dull, compromised patch to a factory-like gloss begins with a clear eyed assessment. Is the damage confined to the clear coat, or has it breached into the color layer beneath? Has the metal beneath been left exposed, inviting oxidation and future corrosion? These questions matter because they determine the repair path. Minor, surface-level scratches that have not penetrated the color can often be addressed with polishing and gentle refinishing. Deeper areas, or spots where the underlying primer or metal is revealed, call for a more deliberate sequence: feathered blending, primer, color, and then the final clear coat. The distinction is not just about cosmetic appearance but about durability and long-term protection. This is not a ritual of simply spraying over a flaw; it is a careful restoration that seeks to preserve adhesion, color integrity, and the reflective depth that makes the finish look seamless from any angle.
Surface preparation is the hinge on which successful repair turns. Start with a thorough cleaning using a neutral car wash solution to remove grease, wax, and any embedded grime. Dirt left on the surface can trap irregularities under the new layer, creating a bumpy appearance once cured. After washing, seal the area dry with a soft microfiber towel. When the damaged zone is small and shallow, light abrading with very fine sandpaper—typically in the 2000–3000 grit range—can help create a smooth transition edge. The goal is not to cure deeper damage with sanding but to soften the boundary so the new clear coat can blend with the original finish. It’s essential to maintain a wet sanding technique, using water to flush away debris and prevent scratching. The mindset here is precision, not aggression. Over-sanding can remove protective layers, thin the clear coat, or reveal the color layer; both outcomes undermine durability and the final look.
The narrative of repair then proceeds to the materials themselves. For small areas, a touch-up approach tailored to the vehicle’s color is often enough to restore a uniform appearance. The principle is simple: multiple thin coats lay down material without inviting runs, unequal texture, or color fog. The base color layer should dry completely before the clear coat is applied. The clear coat step is more than a protective finish; it is the finishing glaze that provides depth and gloss. This step must be treated with patience, applying several delicate passes rather than a single thick application. The law of thin layers applies here as it does in every refined painting task: thin layers cure more evenly and reduce the risk of future checks or hazing. After the clear coat has fully cured—usually a day or two—the area can be polished to blend with the surrounding surface. A light cut with a polishing compound, paired with a dual-action polisher or even by hand with a soft pad, helps to erase slight ridges and restore the smooth, glassy surface that defines a factory finish.
Within this broader framework, color matching remains a pivotal challenge. Minor repairs that involve only the clear layer rely on the existing paint depth and the exact color of the base coat. But when even a small mismatch is possible, especially on pearl, metallic, or matte finishes, the unique light-reflective properties complicate the repair. The orientation of pigments and the texture of the finish can cause subtle shifts in color or glow under different lighting. In such cases, professional-grade color matching tools and precise spray technique are recommended because a spot repair here risks being obvious, even when the repaired area is small. When color matching is uncertain, the safest course is to extend the repair into a broader panel blend with professional tools and controlled environment to ensure the transition is seamless. For readers seeking practical, step-by-step guidance on color blending and spot refinishing, there is useful background on related paint repair techniques in this article. See how-to repair auto paint scratches for additional context on blending and touch-up strategies that inform clear coat work. The link is meant to offer a broader perspective on achieving a near-invisible repair, without implying specific brand choices or proprietary methods.
When the damage is confined to the clear coat and the underlying color remains intact, a more conservative approach can be employed. Minor clear coat damage can respond to polishing, especially for shallow scratches that have not compromised the paint itself. Some practitioners use a toothpaste-like polish as a mild abrasive to re-level a fine scratch, followed by a dedicated polishing compound. It’s crucial to understand that this approach only restores surface gloss and does not replace missing material. It is a temporary cosmetic measure at best, an interim improvement rather than a durable solution. For longer-term results, it is better to commit to the proper repair path that rebuilds the clear coat in layers and reestablishes the barrier against UV light and chemical exposure.
The more involved scenario—where the damage extends beyond the clear coat—is where the repair becomes a matter of proper sequencing. If the color layer or primer has been compromised, priming becomes essential. A rust-inhibiting primer is particularly important if bare metal has been exposed; applying primer as soon as possible helps prevent oxidation and future corrosion. After priming, the next stage is color application, followed by a clear coat, and finally a thorough buffing to restore uniform gloss and depth. The underlying principle remains the same: each layer must bond to the layer beneath, with the transition carefully feathered to avoid a ridge or visible step. This discipline—feathering and precise layering—distinguishes a durable, factory-like finish from a repair that looks hastily patched.
The environmental and procedural conditions surrounding the repair can significantly influence the outcome. A clean, dust-free space is non-negotiable. Even minute particles can become trapped in a wet coat and ruin the final appearance. The temperature, humidity, and ventilation of the workspace should be controlled to promote consistent curing and reduce solvent evaporation rates that could lead to hazing or fisheye defects. Moreover, the care taken after the repair is completed is decisive for long-term durability. The vehicle should not be washed for at least 48 hours to allow proper curing of the new coatings. Water and detergents during early curing can lift or peel the fresh layers, undermining the result. These cautions are not mere rules; they reflect how chemical interactions, moisture, and surface energy interplay to determine the finish’s longevity.
Beyond the immediate repair, protective measures extend the life of the restored finish. A high-quality wax or ceramic coating applied after curing adds a guarding layer against UV exposure, precipitation, and minor abrasions. The protective layer does not just improve gloss; it enhances resistance to environmental contaminants that might otherwise embed into the surface. Protective products also make future maintenance easier, limiting the likelihood of accelerated wear when washing or cleaning. This concept of post-repair protection aligns with a broader philosophy: restoration is as much about preserving the repaired work as it is about achieving a flawless look. The goal is a durable finish that maintains its luster for years, not a quick cosmetic fix that fades after a few car washes.
Of course, not every repair should be attempted as a DIY project. The scale of the damage matters. If the clear coat loss is extensive or the underlying primer or base coat is exposed, professional repair becomes the more reliable option. A reputable body shop can undertake a sequence that ensures proper adhesion and color matching on a large scale. The work will typically begin with careful area preparation, including feathered sanding back to a clean edge. Primer is applied to guarantee adhesion, followed by paint matching with controlled spray equipment to reproduce the exact shade. The panel is then finished with several layers of clear coat and a careful polishing pass to achieve a flawless, factory-like finish. This approach minimizes color mismatches and texture differences that can be glaring on larger repairs. It also addresses the structural integrity of the panel, ensuring the repaired area behaves like the rest of the surface under micro-motions and heat cycles.
The thread running through these considerations is a balanced blend of diagnosis, preparation, and discipline. The repair is not merely about filling a gap; it is a controlled rebuild of the surface stratigraphy. From the initial assessment to the final polish, every step is aimed at preserving the original interactions of light with the finish. The thickness and uniformity of the clear coat are as crucial as the color’s accuracy, because both contribute to the perceived quality of the repair. When done well, the repaired area does not merely look repaired; it reads as an extension of the vehicle’s original finish, retaining the depth, clarity, and reflectivity that define a high-quality automotive appearance.
For readers seeking further technical depth, the treatment of clear coat damage must be contextualized within the broader practice of automotive refinishing. This includes the use of compatible materials, careful attention to the orientation of pigments in metallic or pearlescent finishes, and the continued emphasis on a controlled environment. It also foregrounds a philosophy of patience: the desire for perfect symmetry should be tempered by the reality of material behavior, dry times, and cure dynamics. The overarching message is that successful clear coat repair hinges on accurate diagnosis, meticulous surface prep, precise layering of materials, and thoughtful post-repair protection. Ideally, these repairs are performed with an eye toward long-term resilience and a finish that endures beyond a few seasons of exposure.
In closing, the repair of auto clear coat is less a single action and more a sequence of informed choices. The path from a damaged area to a seamless surface is paved by careful damage assessment, deliberate feathering of edges, proper priming when required, and disciplined layering of color and clear coat. The greatest victories come not from masking a flaw but from restoring the finish to a state that invites reflection rather than scrutiny. By embracing the principles outlined here—compatibility of materials, controlled environmental conditions, and a measured approach to curing and finishing—car owners and technicians alike can achieve results that look as though the original factory finish remains intact. External references provide additional technical context; for those seeking more structured guidance on the science of clear coat repair, an external resource offers detailed procedures and cautions relevant to professional applications: https://www.autoglass.com/repair-clear-coat-damage.
Breathing Life into a Flawless Finish: The Environment as Catalyst and Constraint in Auto Clear Coat Repair
Nothing happens in automotive refinishing without air, humidity, temperature, and cleanliness acting as unseen co-workers. The environment shapes every decision, from wiping away dust to the final polish that seals a new gloss into the clear coat. When you repair auto clear coat, you choreograph a controlled atmosphere where a precise balance of heat, humidity, airflow, and cleanliness becomes part of the repair itself. In practice, this means reading the room as carefully as you read the car’s paint layers, recognizing that even the best technique can falter if the conditions misbehave. The guidance here is not about exotic tools alone but about aligning your workshop or spray bay with environmental discipline that supports durable adhesion, color consistency, and a finish that can stand up to sun, rain, and the test of time.
To begin, consider the two broad realities of modern clear coats: water-based refinishes and solvent-based refinishes. Water-based systems require heightened attention to humidity. High humidity can slow drying, invite blisters, and hamper film formation. Conversely, solvent-based systems dry more quickly but demand a steady temperature to avoid solvent popping and uneven curing. The sweet spot for many water-based refinish applications sits roughly between 40% and 60% relative humidity, with a stable temperature that keeps the film from shivering as it cures. For solvent-based systems, the target often sits in a comfortable room-temperature range around 68 to 77 degrees Fahrenheit (20 to 25 degrees Celsius) where the solvents can evaporate evenly without chasing or trapping moisture within the film. These ranges are guardrails that help your clear coat lay down smoothly and cure evenly, minimizing the risk of defects that could ruin gloss or longevity of the repair.
In the same breath, ventilation and air quality become non-negotiables. Solvent-based systems shed more volatile organic compounds (VOCs), so a well-ventilated space protects your health and provides an exit route for solvents as they evaporate. Adequate airflow helps avoid surface defects like haziness or fogging that can plague a panel if solvents stagnate. Even with water-based materials indoors, filtered air and a dust-free environment guard against common finish pitfalls. Dust particles can settle into wet clear coats, leaving pinholes or orange peel that shows up only after cure and becomes expensive to correct. The goal is to create a clean air passage that moves air without strong gusts that disrupt the wet film, and to shelter from airborne contaminants like pollen or stray fibers that lurk in ordinary shop environments.
The stage is set with surface preparation, where a clean, dry, and contaminant-free substrate becomes the foundation of adhesion and gloss. Environmental factors are unforgiving here. A surface contaminated with oil, wax, or water droplets risks fisheyes or poor bonding, and dust on damp primer or base coat can ruin a repair. The preparation recipe remains simple but exacting: wash away soil with mild soap and water, dry completely, and inspect for any trace residues. If minor imperfections remain, a very fine grade damp sandpaper can be used to gently polish the surface to a smooth plane. The key is to rinse frequently to prevent sanding debris from creating new scratches. And as you move through this process, you must keep your environment free of dust and moisture. The moment you step outside or open a window to the world, you invite new elements into the work area—the same elements that can derail your hard-won surface preparation.
When the surface is clean and dry, the next decision points revolve around the repair approach itself. For small, localized clear coat loss or minor chips, the most reliable path is a high-quality touch-up approach that matches the vehicle’s color and uses thin, even layers. The layers should dry completely before the next coat is applied, and multiple light coats are preferable to a single heavy one, which risks runs and sags that would only become apparent after curing. Then comes the crucial topcoat step. The clear coat topcoat—applied in the same cautious, feathered fashion as the base layer—provides the protective gloss and forms the durable film that bears up against UV exposure and weathering. The timing of curing is climate-sensitive; curing durations stretch in high humidity and shorten in extremely dry or hot conditions. In many cases, a full cure of the clear can take 24 to 48 hours, after which the panel can be gently polished to blend the repaired area with the surrounding paint. A dual-action polisher or a soft polishing pad used with a gentle compound helps achieve a seamless finish that reflects the factory-like depth of the original paint.
For larger areas or more extensive damage, the environmental equation grows more complex. When the clear coat has begun to lift with no protective layer left over the primer or base coat, the repair generally swings toward professional service. Large-scale repairs involve sanding back to bare metal or the original paint layer, feathering the edges so the new layers can blend naturally. A primer coat is sprayed to assure adhesion and a uniform base. The base color is applied with a spray gun to match the car’s precise shade, and then multiple layers of clear coat are laid down to protect and restore the glossy finish. The environmental control remains essential throughout this process, with strict attention to humidity, temperature, and air quality to avoid color mismatch and an uneven appearance. The final polish in this scenario is used to harmonize the repaired panel with the car’s other surfaces, leaving a finish that looks like it rolled off the factory line.
This environmental discipline extends beyond the shop floor into the post-repair window. A crucial guideline is the wait period after any paint or clear coat work. It is wise to avoid washing the vehicle for at least 48 hours after a repair because water and detergents can interfere with curing and may cause lifting or peeling of the new layers. This is not an arbitrary delay; it is a deliberate step to ensure the film forms a cohesive, durable layer over the prep and paint that just took place. Similarly, the work area should remain free of dust and debris until the film has fully cured. Even when working with water-based materials indoors, the presence of a stable environment is a safeguard against the very conditions that cause micro-contaminants to mar a seemingly perfect finish. Because the environmental landscape can shift with the weather, technicians often rely on climate-controlled repair bays, precision humidity gauges, and air filtration systems to sustain the consistent conditions that yield predictable results.
There is a practical rhythm to managing the environment. Start by establishing a stable baseline, then monitor and adjust. Real-time tracking of humidity and temperature is not a luxury; it is a safeguard that keeps the film from failing or looking irregular. For instance, a sudden drop in humidity can cause a clear coat to cure too quickly, leading to a rough texture. A sudden rise can slow the cure, inviting sagging or prolonged tackiness. The body of knowledge here emphasizes that you should adapt your process to the ambient conditions and to the chemical nature of the system you are using. In other words, your technique must bend to the environment, not the other way around. If the space shows a trend toward dust or pollen, you pause, clean, and seal the air, perhaps employing a temporary hood or portable filtration. If the humidity rises unexpectedly, you may delay spraying until it stabilizes within the target window or adjust the environment with humidification or dehumidification to reestablish the ideal range.
The environmental narrative also intersects with technique in a way that reveals how the two work together to prevent common defects. A wet film that dries too quickly in a dry, warm environment can shrink unevenly, creating micro-cracks or a rough surface once polished. A humid or cool environment can trap moisture and cause clouding or solvent pop, the tiny bubbles that appear when solvents evaporate too slowly and leave behind a tacky surface. Dust control, while a technical challenge, becomes a tactical one, necessitating a dust-free approach right from the wash bay to the spray booth. Even the substrate’s surface energy can be altered by environmental exposure. Substrates left damp or exposed to high humidity can show delayed adhesion or gloss separation, underscoring the need for a clean, dry, and stable workspace.
The choice between water-based and solvent-based systems is not made in isolation of the environment, but with it in mind. Water-based systems, by their nature, partner with a climate that supports gentle, consistent true film formation and minimal moisture entrapment. Solvent-based systems, while robust and quick-drying, demand a steady temperature to prevent rapid solvent loss that can lead to pinholes or a satin finish as the surface cures. Each system invites a discipline of its own—one that aligns the spray setup, the gun adjustment, and the work sequence with a reliable and predictable environmental profile. The result is a repair that not only looks right when it leaves the shop but also preserves its integrity for the long haul, resisting the elements and the everyday wear of street life.
In practice, the environment becomes a partner that informs every decision. If you encounter a panel with minor imperfections, you might engage with a careful surface refresh followed by a controlled repair at the advised humidity and temperature. You will find that your best outcomes arise when you treat the air and the surface as integral parts of the process rather than external constraints. The subtlety lies in the consistent alignment of process, materials, and environment. A well-ordered environment reduces the risk of color mismatch and gloss variance, delivering a finish that speaks to the car’s original quality. In that sense, environment is not a passive backdrop; it is an active collaborator, shaping how smoothly the work proceeds, how evenly the color lays down, and how durable the result will be over time.
To connect these principles with practical experience, consider a scenario of a typical repair bay operating under ideal environmental management. The bay maintains a controlled temperature range around 70 degrees Fahrenheit, with humidity kept between 45% and 55%. The air is filtered, and the workflow minimizes the introduction of dust from outside. The technician cleans the car, conducts a meticulous surface prep, and then selects either a water-based or solvent-based finish with full awareness of how the environment will affect curing. The spray process itself is adjusted to the environmental conditions, with adjustments to spray parameters to accommodate the film’s behavior under current humidity and temperature. The result is a repaired area that not only appears seamless but also holds its gloss and clarity over time. This is the practical realization of the theory: environment as a constant, reliable partner that supports the craft of repair rather than a variable that undermines it.
If you want a quick touchstone for broader repair philosophy, consider a foundational post that starts with the basics of repair mindset and how to approach color and finish with care. It’s a useful companion to the more technical environmental guidance here and can help you frame your approach when the weather forces you to adapt. Keeping in mind these principles helps you stay focused on the environmental realities that drive results, while still applying the right methods for small fixes or larger restorations. Hello World post offers a friendly reminder that the repair process begins with observation, preparation, and steady technique rather than guesswork. Keeping in mind these principles helps you stay focused on the environmental realities that drive results, while still applying the right methods for small fixes or larger restorations.
Ultimately, the environment is the stage where the repair story unfolds. It conditions the drama of curing, the poetry of gloss, and the resilience of the finished surface. By recognizing its role and learning how to negotiate the day’s climate, you equip yourself to deliver auto clear coat repairs that stand up to time and weather. The physics of film formation, the chemistry of adhesion, and the discipline of dust control all converge in a single outcome: a finish that looks as if it belongs on the car from the moment it rolled off the line. The long-term payoff is not only a visually flawless panel but also a coating that maintains its clarity, depth, and protective properties for years to come.
External resource for extended environmental best practices in automotive refinishing: https://www.easicoat.com/automotive-refinish-paints-guide
Final thoughts
Repairing auto clear coat damage is a valuable skill for anyone who wants to maintain the aesthetics of their vehicle. By mastering techniques for both minor and severe damages, understanding essential considerations, and enhancing the repair environment, you can ensure successful repairs that rejuvenate your vehicle’s appearance. Remember, whether you opt for a DIY approach for small imperfections or seek professional guidance for larger issues, keeping your vehicle looking its best is always within reach.