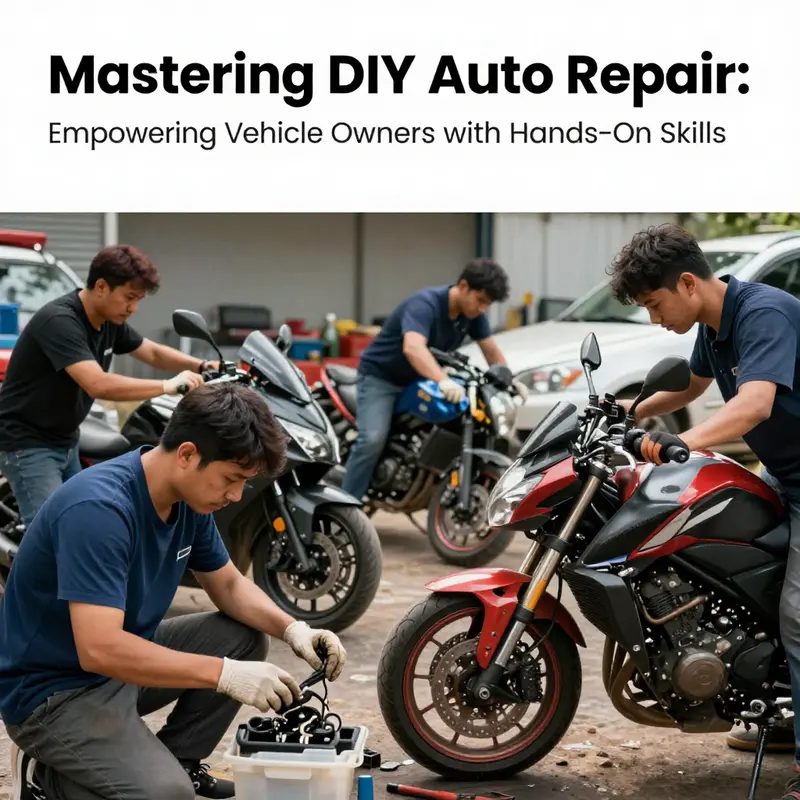
In an age where vehicle owners are often at the mercy of auto repair shops, DIY auto repair emerges as a revolutionary movement empowering motorcyclists and car owners alike. By taking control of maintenance, you not only save money but also deepen your relationship with your vehicle. From understanding the basics of your vehicle to learning essential diagnosis techniques and tools, this comprehensive guide is designed for motorcycle aficionados, auto enthusiasts, and professionals in the auto parts distribution and repair sectors. Each chapter builds on this knowledge, illuminating the cost benefits and available resources to foster a vibrant DIY community. Join us as we explore the ins and outs of DIY auto repair and equip you with the skills and confidence to tackle vehicle issues head-on.
Hands-On Car Care: Mastering DIY Auto Repair by Reading Your Vehicle Inside and Out
Across many driveways and storefront garages, a quiet transformation has been under way. More drivers are choosing to treat car care as a hands-on craft rather than a distant service industry. DIY auto repair is less about turning wrenches in a vacuum and more about reading the language your vehicle speaks every day. It’s about understanding why your car behaves a certain way, what each system is there to do, and how those parts work together to keep you moving. This isn’t a manifesto for abandoning professional help; it’s a practical invitation to build competence, confidence, and a better relationship with the machine you rely on. The first step, always, is safety. The thrill of discovery can be tempting, but the driveway is not a stage for risk. Never trust a hydraulic jack alone to hold up a car. Jack stands are essential supports that prevent a tragedy from turning a simple repair into a fatal accident. Gloves and eye protection protect you from sharp edges and unexpected splashes, while good ventilation matters when dealing with fluids or chemicals. A well-lit, organized workspace reduces mistakes and makes it easier to notice small but significant cues: a corroded terminal, a tiny leak, a vibration that wasn’t there last week. These details are not nuisances but signals about the health of the car’s systems. Understanding those signals begins with a map of the vehicle’s core life support networks. The battery sits at the heart of the electrical system. A dead or weak battery can be caused by corrosion, worn terminals, or simply a long period of inactivity. Brakes are the guardians of stopping power, a safety gate that must work reliably every time you press the pedal. Tires and suspension influence the ride, handling, and contact with the road, while fluids—engine oil, coolant, brake fluid—keep moving parts lubricated, cool, and clean. When you approach the car, you’re not just doing one job; you’re maintaining a dynamic system where a small change in one area can ripple through others. A practical way to begin is to observe symptoms, then trace them to their likely systems. A slow crank, a grinding brake, or a dip in the coolant level can reveal where attention is needed. This method works especially well for routine maintenance tasks, which are the gardening of the automotive world: regular, careful care that yields long-term dividends. For many owners, the most immediate payoff comes from growing the ability to handle straightforward tasks at home. A battery replacement, a brake pad swap, or a fresh oil change becomes not only a save on costs but a proof of capability. Consider the battery change as a model of how DIY repair often proceeds. If a vehicle won’t start or shows a low voltage reading, the steps are clear, though they require careful execution. Start by turning off the engine and removing the key. Open the hood and locate the battery. Disconnect the negative terminal first—the black one marked with a minus sign—to minimize the risk of short circuits. Then remove the positive terminal. A typical battery weighs 30 to 40 pounds, so ensure you have a secure grip and a steady stance. Remove the hold-down clamp, lift out the old battery, and place the new one in the tray. Reconnect the positive terminal first, then the negative, tighten the clamps, and attempt a start to confirm the repair. It’s wise to consult the owner’s manual for the correct size, voltage, and cold-cranking amps, and to inspect the terminals every few months to prevent unexpected failures. The sense of accomplishment that follows such a moment is not vanity; it’s evidence that the car and the driver can communicate and understand one another. Replacing brakes offers a similar mix of discipline and reassurance. In a real-world scenario, a driver might notice a grinding sound or diminished braking response. A common DIY approach involves replacing the brake pads, a job that many do with modest tools and careful attention to the caliper and rotor condition. The basic arc of the task is straightforward: raise the car, remove the caliper, compress the piston with a C-clamp, install the new pads, and reassemble. The most important caveat is not to overlook rotor wear; if the rotors are warped or deeply scored, resurfacing or replacement becomes necessary for safe operation. The underlying principle in both battery and brake work is always to replace in a way that preserves or restores the system’s original geometry and lubrication points. Tools matter just as much as technique. A solid DIY toolkit should include a socket wrench set, standard and metric wrenches, a sturdy floor jack and jack stands, a torque wrench, a set of screwdrivers, an oil filter wrench, and essential safety gear. With the right tools, a careful plan, and a calm, deliberate pace, many common tasks can be completed with a level of satisfaction that earns the next challenge. The mindset that accompanies this approach is crucial. DIY repair is not about heroic, last-minute fixes but about steady, informed steps, built on accurate information and a growing understanding of the car’s interior logic. It helps to adopt a habit of small experiments, documenting what you learn with every repair, so you can reference your own notes when an unfamiliar fault arises. It is also important to acknowledge the limits of DIY work. Modern vehicles increasingly rely on computer systems and complex diagnostics that require professional-grade tools and expertise. Airbag modules, advanced braking systems with electronic control, and major engine or transmission work are areas where hesitation is wise, and where a professional diagnosis may prevent more costly mistakes. In these cases, an OBD-II scanner can be a useful first step, translating a vehicle’s fault codes into actionable clues. If the codes point toward an issue that is straightforward and safe to address, DIY repair can proceed; if not, seeking professional help is prudent. The beauty of this approach lies in its adaptability. A garage-door view of DIY auto repair allows a driver to balance risk and reward, choosing tasks that align with skill level and time. This is how beginners build competence: by starting small, relying on trusted repair guides, and gradually progressing to more demanding jobs as confidence grows. A practical mindset for a DIYer is to treat every repair as a learning opportunity. Read the codes, understand the symptom, verify the likely system involved, and choose a path that emphasizes safety, accuracy, and resourcefulness. When you want to explore a broader primer on these principles, you can consult a comprehensive overview such as A to Z Auto Repair, which offers a wide spectrum of guidance to new and seasoned DIY enthusiasts alike. A to Z Auto Repair. As you gain experience, you’ll find that much of the road to repair competence is about cultivating a careful habit of inspection, measurement, and incremental improvement. You’ll also notice a broader benefit beyond saving money: a deeper sense of control over the vehicle you depend on, coupled with the ability to make informed decisions about when to push forward and when to pause and seek professional assistance. For those who want to supplement hands-on practice with external insights, reputable online resources can provide fresh perspectives and troubleshooting strategies. An example external guide emphasizes practical, step-by-step tips for common DIY repairs and highlights safety as the non-negotiable prerequisite. Its recommendations align with the approach described here: start with safety, understand the system, apply methodical steps, and escalate only as necessary. You are building a repertoire of reliable habits that endure across makes and models. With time, the car becomes less mysterious and more like a familiar partner, speaking through warning lights, noise cues, and performance signals. In this sense, DIY auto repair is not merely about the speed of fixes; it’s about cultivating a practical literacy that nourishes confidence, reduces unnecessary cost, and enhances the long-term relationship between driver and machine. As you move forward, treat every project as a continuation of this chapter’s thread: safety first, systems understood, tasks scaled to your skill, and always learning from both successes and missteps. For further reading and a broad toolkit of practical tips, explore the external resource linked above. Finally, remember that the best DIY repairs are those performed with intention and patience, not rushed corner-cutting. The road ahead invites curiosity, discipline, and a steady hand, which is precisely the craft of DIY auto repair. If you’re curious to dive deeper into fundamentals and expand your at-home repertoire, keep this mindset close and let the journey unfold. For ongoing practical guidance and community-tested insights, consider continuing your exploration with trusted DIY resources and the occasional professional consultation when needed. External resource: https://www.mechanicsfiles.com/diy-auto-repair-tips/.
Arming the Garage: Building a Practical Toolkit for Real-World DIY Auto Repair
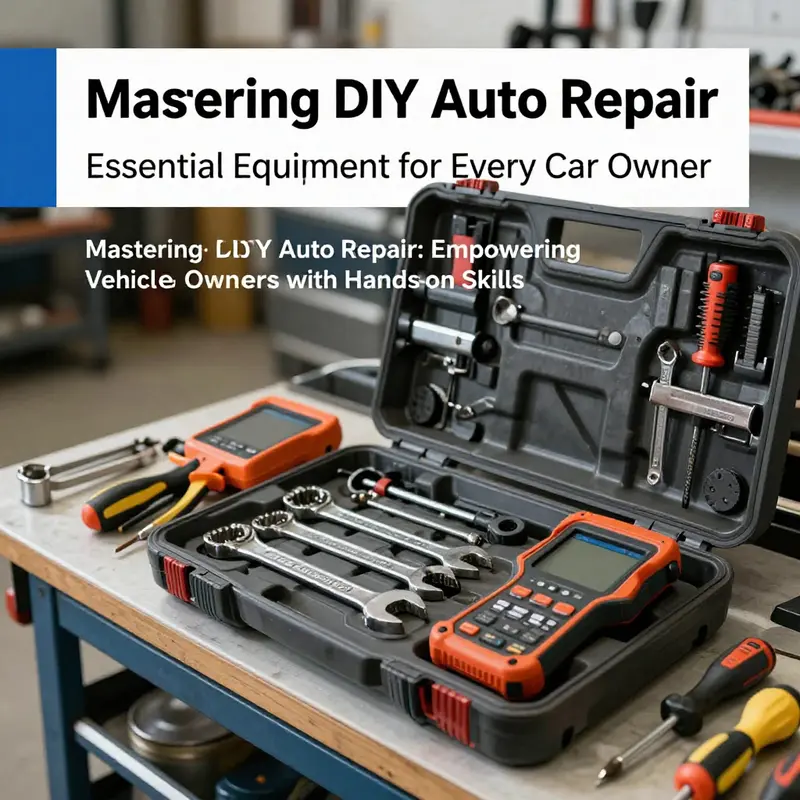
When car trouble strikes, the idea of turning a wrench yourself can feel empowering and intimidating at once. The reality is that DIY auto repair rests on more than willpower; it rests on a reliable toolkit. A well-chosen set of tools turns uncertain tasks into doable ones, helps you diagnose problems with confidence, and protects you and your vehicle from accidental damage. Tools are not a luxury; they are the language you use to talk to your car. From the moment you decide to roll up your sleeves, you begin building a relationship with your machine, learning its quirks, its tolerances, and the thresholds at which a quick fix becomes a careful repair. The toolkit you assemble will shape which jobs you tackle first, how safely you work, and how quickly you move from diagnosis to a lasting solution. It is a quiet partner that grows with you, turning what could be a setback into a constructive, hands-on learning process.
Starting small is wise. You don’t need every tool known to automotive repair to begin. A thoughtful toolkit focuses on tasks you can do in a weekend with a clear safety plan and enough room to learn. Quality matters, but so does fit. Tools that feel good in your hand, stay true under load, and resist wear after repeated use will last longer and perform more reliably than a stash of bargain items that fail when you need them most. Ergonomics matter: comfortable handles, well-balanced setups, and tools that don’t slip under pressure reduce fatigue and the chance of slips that could damage fasteners or skin. A clean workspace, good lighting, and a place to lay out parts and fasteners contribute as much to success as the tools themselves. As you gain experience, you’ll refine your collection, swapping out aging pieces and adding specialized items for the stubborn tasks that keep showing up in your car’s lifecycle. This is a gradual, practical process rather than a one-time purchase.
At the core of any DIY toolkit are the hand tools that go to work on fasteners. Open-end and box-end wrenches cover most tasks, but combining them with socket wrenches gives you reach and grip across a range of bolt sizes. A basic set should include a spectrum of metric and SAE sizes so you can work on vehicles from different regions. A sturdy adjustable wrench offers flexibility in unpredictable spots, though it should be used with care on tight fasteners to avoid rounding edges. For screws and panels, a reliable pair of screwdrivers—flat and Phillips—will handle most fasteners you encounter behind trim panels or on light components. Pliers—needle-nose for precision and slip-joint for general gripping—help you hold parts, pull wires, and manipulate small hardware in cramped spaces. Finally, a dependable hammer—ball-peen or claw—serves for persuading stubborn components and aligning parts during reassembly. Keeping these basics organized in a rugged toolbox makes a surprisingly big difference when you need to move quickly. The goal is a calm, efficient workflow, even when space is tight and the clock is ticking.
Beyond the basics, specialized tools unlock the ability to perform tasks with the same care as a shop, but in your driveway. A torque wrench matters more than you might think; many repairs hinge on proper tightening. Following the manufacturer’s torque specification is essential for critical fasteners such as engine plugs and wheel lugs. A solid jack and jack stands create a safe workspace under the car, turning a potentially dangerous situation into a controlled repair environment. While jacks lift the vehicle, stands bear the weight, giving you the freedom to move around the undercarriage with confidence. For ignition and fuel system maintenance, a spark plug socket with a rubber insert protects delicate ceramic plugs during removal and installation. A grease gun becomes invaluable when lubricating suspension joints, tie rods, and other chassis points that rely on timely lubrication to maintain smooth operation. These tools bring a higher level of control and reduce the risk of accidental damage during disassembly and reassembly. As you grow more ambitious, you’ll find yourself rotating through a few specialized tools tailored to your preferred tasks, from brake work to cooling system checks, always prioritizing safety and alignment with your vehicle’s design.
Storage and organization deserve attention too. A heavy-duty metal toolbox with drawers or a robust roll cart keeps every tool within arm’s reach while protecting them from moisture and dust. Organization isn’t a luxury; it’s a safety measure. When you can see what you need at a glance, you minimize the chances of dropping fasteners or losing a critical piece in a crevice. A well-labeled layout—grouping wrenches, sockets, and specialty tools—speeds up work and reduces frustration. As your collection grows, consider compartmental trays or magnetic mats to keep fasteners sorted by size and type, preventing mix-ups that can derail a repair sequence. A thoughtful storage solution also makes it easier to transport your tools to a different workspace or a friend’s driveway, turning each repair session into a small, organized operation rather than a scavenger hunt. The sense of control that comes from a tidy, predictable toolkit can transform anxiety into clarity, especially when you’re dealing with tight spaces or unfamiliar vehicles.
For those who want a clear starting point, a comprehensive starter kit can be appealing. A ready-to-use set often combines a broad range of hand tools, a handful of specialty items, and a portable case designed for automotive work. The appeal lies in breadth: you gain the confidence of having a complete kit on day one and avoid the fragmentation of piecemeal shopping. Still, it’s wise to review the contents against the tasks you expect to take on first. Ensure the set includes both metric and SAE sizes, common socket sizes, and a set of screwdrivers with magnetic tips. If you want to tailor your kit toward your specific vehicle or maintenance plan, you can upgrade by adding a few specialized pieces later. The goal is to build a flexible foundation you won’t quickly outgrow, allowing you to handle routine maintenance like oil changes, filter replacements, and tire rotations with greater ease and precision. This approach minimizes wandering in the tool aisle and keeps your early investments meaningful.
As you plan, it helps to connect your toolkit with the broader knowledge base of DIY auto repair. A well-designed guide covers not only the tools but how to approach each task safely, how to read fault codes, and how to determine when a repair is within your scope. For readers seeking a concise, practical roadmap through common repair tasks and the knowledge behind them, consider exploring a broad overview resource such as A-to-Z Auto Repair. A-to-Z Auto Repair. This link sits in the context of a larger conversation about empowering drivers to diagnose and address minor issues without immediate professional help, while keeping safety front and center.
Of course, the best toolkit cannot replace judgment. Some systems—airbags, advanced driver assistance sensors, high-voltage components in hybrid and electric cars—require specialized equipment and formal training. Attempting to bypass procedures or force a fix can lead to injury or costly damage. Part of prudent DIY practice is to identify the tasks you can safely complete in your current setup and recognize when it is time to consult a professional. The goal is steady progress and safer work, not perfection on day one. Start with straightforward tasks, document your steps, and verify vehicle function after each job. As you learn, you’ll gain a sense of which tools help you work more efficiently, where you need better lighting, or which accessories make cleanup and maintenance less burdensome. The journey blends curiosity with discipline, and the payoff is a car you understand a little better and a garage that feels less like a showroom for repair shops and more like a workshop you own.
In practice, the value of a toolkit grows with experience. Each fix teaches you more about your car’s architecture, the subtle differences between models, and how small adjustments in torque, alignment, or lubrication ripple into performance. A mindful approach to buying and using tools also saves money in the long run; cheap tools save little if they break under load, but investing in reliable, comfortable designs pays dividends through fewer stripped fasteners, longer tool life, and more confident reparability. The path to self-reliance isn’t a sprint; it’s a careful, incremental journey. You’ll learn to prioritize tasks, maintain order in your workspace, and keep a running inventory of tools and parts. The more you practice, the more natural DIY maintenance becomes, turning a routine oil change or a simple brake check into an opportunity to extend your car’s life and your own knowledge. The toolkit you build today becomes the foundation for many future projects, from regular upkeep to more ambitious undertakings, always anchored in respect for the vehicle’s design and your own safety.
Ultimately, a well-chosen toolkit is not a gadget collection, but a set of enablers. It reduces the friction between diagnosing a fault and executing a repair, increases your autonomy, and expands the range of maintenance you can safely perform. The right tools protect you, your vehicle, and your time, turning uncertain limitations into equipped capability. With patience, curiosity, and careful planning, DIY auto repair becomes less mysterious and more approachable, a practical extension of car ownership rather than an intimidating challenge. The tools you buy today can support you through many future projects, from routine maintenance to more ambitious undertakings, as long as you respect the limits of your knowledge and the vehicle’s design. The garage becomes a workshop, and the car, once a captive machine, responds with incremental reliability as you build competence, one task at a time.
External resource: https://www.amazon.com/dp/B0B6XWJH9L?th=1
Reading the Car’s Silent Signals: Practical DIY Diagnosis Techniques
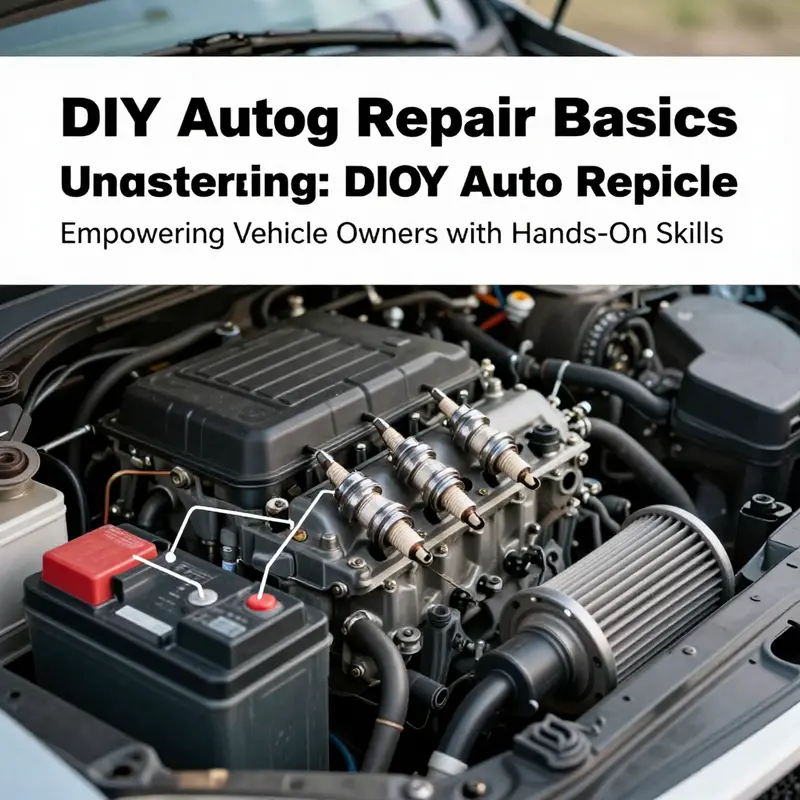
Diagnosing a car problem at home is less about guesswork and more about listening to the vehicle’s quiet signals and translating them into a practical plan. Modern cars are full of electronic minds and a web of sensors that speak in subtle clues rather than loud declarations. A symptom like a rough idle, a stumble during acceleration, or an illuminated warning light is not the fault itself but a breadcrumb pointing toward the root cause. The DIY diagnostic mindset relies on structure, the right tools, and reliable references, and it also requires knowing when a problem is simple enough for home fix and when it is safer to call in a professional.
Begin with the power source, because power is the fuel behind every electrical behavior. If a component is electronic or controlled by a computer, a lack of power is a common culprit. Confirm the circuit is alive before chasing a sensor or actuator. A quick check of the 12V supply can save hours of hunting in the wiring loom. A blown fuse is not a symptom in disguise; it is the vehicle’s safety mechanism telling you where the problem begins. When replacing a fuse, ask why it blew and inspect the circuit for short circuits, overloaded devices, or damaged wiring. This step keeps you from chasing the idea of ‘more power’ and keeps you grounded in a testable reality.
From power, move to the obvious yet often overlooked: physical connections. Connectors, plugs, and cables are the first line of defense for system reliability. A damaged power cord or frayed plug can produce intermittent faults. When inspecting a harness or a plug, look for cuts, kinks, or heat damage. A practical test is to gently flex the cable near the connection while the system is powered; if the device flickers or fails with movement, the culprit is often a broken conductor inside the insulation. This simple check eliminates many common failures and teaches you to prioritize straightforward explanations before diving deeper into the system.
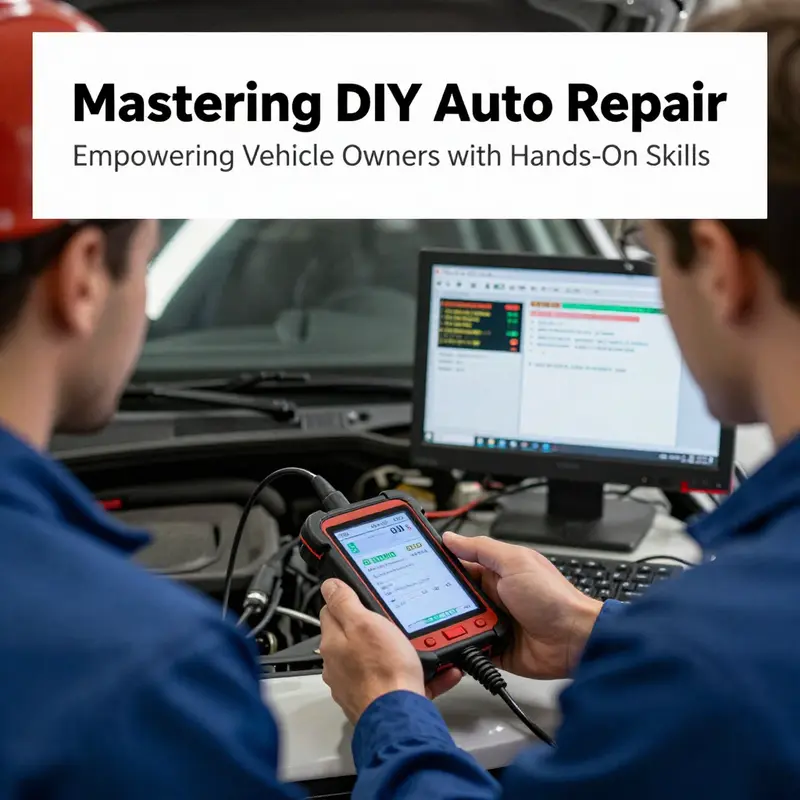
The next layer is data. In the modern car, data lives in codes and live sensor readings. An OBD-II scanner is your gateway to this world. Connect the scanner to the diagnostic port and the onboard computer reveals fault codes that narrow possibilities. A code like P0301 indicates a misfire in the first cylinder and points you toward a likely area—ignition, fuel delivery, or compression—depending on accompanying data. Interpreting these codes requires cross-checking with trusted databases or apps that translate jargon into actionable steps. Treat codes as guides toward probable causes rather than definitive parts, and couple them with live data—fuel trim, ignition timing, misfire history—for a fuller picture of the engine’s operation.
Beyond codes, the art of diagnosis rests on fundamental troubleshooting techniques that apply across systems. A brake squeal is easier to handle when you look beyond the noise: assess pad wear, rotor condition, and caliper function, and relate wear patterns to driving history. The same logic works for electrical components, air systems, or cooling loops. The goal is to form a testable hypothesis based on observable evidence and to verify it with safe, repeatable checks. Maintain a running checklist so you know what you’ve confirmed, what remains uncertain, and what data supports each decision point. In practice, work from the simplest, least invasive checks toward more involved tests, reserving disassembly for when motivation and a safe plan exist.
Even a disciplined approach has limits. Modern vehicles host complex networks of sensors and controllers that can interact in surprising ways. If a fault is intermittent, if multiple unrelated symptoms appear, or if safety-critical systems are involved, you may reach a point where seeking professional help is prudent. DIY diagnosis is powerful, but it is not a substitute for professional testing when safety or reliability is at stake. The benefit is learning to distinguish simple, solvable problems from genuinely intricate ones and knowing when to escalate.
As the field evolves, so do the tools. On-demand repair kits, designed for specific makes and common fault codes, reflect a trend toward targeted maintenance. When paired with OBD-driven insights, they can speed repairs and reduce waste, while anchoring your practice in a larger ecosystem of information and safer execution. For broader guidance on structuring your approach, consider practical outlines like those found in trusted repair resources that explain the steps from diagnosis to repair in everyday language.
Ultimately, effective DIY diagnosis is iterative and personal: learn your vehicle’s normal behavior, document changes, and build a mental map of what is typical. Patience, careful testing, and a respect for safety converge to produce dependable outcomes. When you succeed, you gain a practical understanding of vehicle health that informs routine checks and targeted replacements, all grounded in evidence rather than guesswork. The journey from a blinking light to a confident, data-driven repair is a path you can travel with the right questions, trustworthy sources, and a method that keeps you safe and informed behind the wheel.
Finally, if you want additional hands-on guidance on diagnosing electrical or sensor-related issues in everyday equipment, look for practical, beginner-friendly resources that walk you through common fault patterns and repairs in plain language.
Savvy Savings and Safe Maintenance: The Real Cost Benefits of DIY Auto Repair
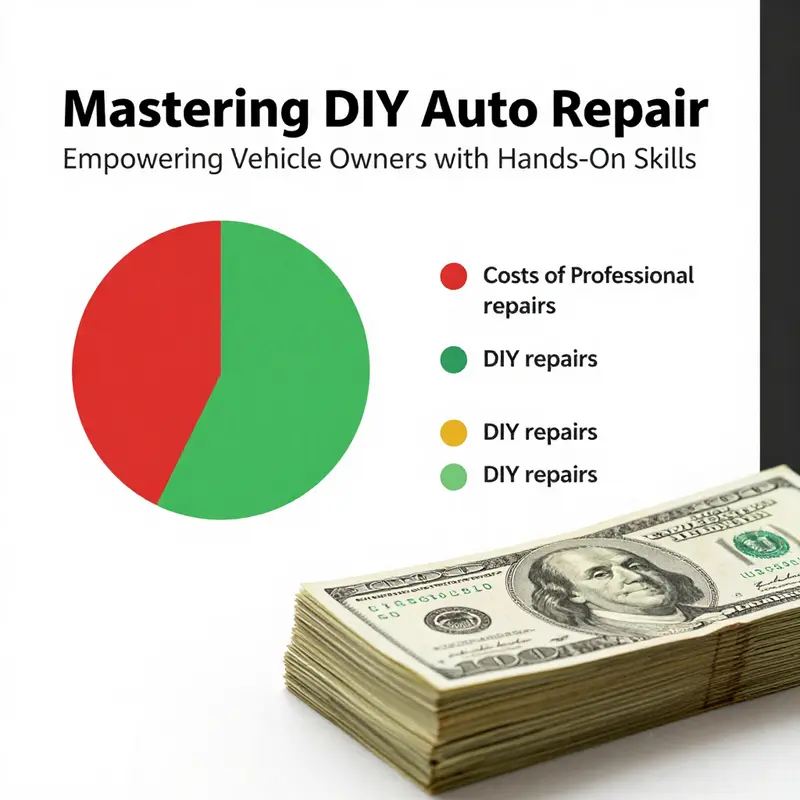
Car owners often find that the math behind maintenance tells a clear story: doing routine upkeep yourself lowers costs without compromising safety. DIY auto repair isn’t about turning every project into a garage experiment; it’s about mastering the basics with careful planning, the right tools, and reliable guidance. The financial payoff comes from reduced labor charges and the ability to purchase parts at retail prices rather than shop rates. For many, a simple oil change can cost sixty dollars or more at a shop, while a DIY change might run twenty to forty dollars in consumables, plus disposal and small supplies. The savings accumulate quickly and are complemented by the confidence that comes from understanding how a car works and from spotting early warning signs. A solid toolkit, access to manuals, and affordable diagnostic tools enable a nonprofessional to handle routine maintenance safely while escalating only when expertise is required. Of course, not every repair belongs at home: brakes, steering, and advanced electronics carry safety risks, and mistakes can be costly. The prudent approach blends high-utility DIY tasks with professional support for complex work, creating a disciplined strategy that protects both budget and reliability. For readers seeking a practical starting point, routine tasks like oil changes and air-filter swaps offer tangible savings and an approachable learning curve that reinforces dependable vehicle ownership.
Tools and Tribes: Navigating Online Resources for DIY Auto Repair

DIY auto repair has moved from fringe hobby to mainstream practice as drivers embrace greater control, lower costs, and clearer understanding of their own machines. The shift is fueled by two forces: smartphones and the car’s onboard diagnostics. A modern vehicle speaks in codes, telling you when a sensor is failing or a misfire is happening. With a modestly priced OBD-II scanner or a diagnostic app, a curious owner can pull these codes, compare them to online manuals, and begin to map out a plan. The aim is not to replace a professional entirely, but to build confidence for routine maintenance—oil changes, air-filter replacements, tire rotation— and for diagnosing the more routine faults that rarely require factory-grade tools or specialist training. The path can be empowering yet intimidating, and that tension explains much of the community and resource landscape that has grown around this practice.
Online tools provide scaffolding. In repair planning, a vehicle-specific guide can outline the typical symptoms, likely culprits, estimated labor time, and parts needed. Such guides help you budget, order parts, and estimate the time a task will take. When you invest time in learning a task, you gain a sense of progress that paid shops rarely show. A sturdy starting point is essential; a well-structured guide can prevent the mistake of chasing too many potential faults at once. The Internet also houses a broad library of step-by-step tutorials that translate mechanical procedures into approachable steps. Instead of guessing, you can watch a dry-runs video that shows how to remove a wheel, replace a brake pad, or reseat a radiator hose, then cross-check the information with the vehicle’s service manual. A practical approach is to treat each project like a small project with a checklist, a clean workspace, and proper safety equipment.
Video tutorials are a staple. They turn complex disassembly into observable sequences, and they often provide tips that manuals gloss over—torque sequences, protective steps, or the order of operations that keeps components from being damaged. The best lessons are not flashy but clear, patient, and repeatable. They invite a learner to pause, rewind, and practice until every step feels natural. For someone balancing work and family life, a well-curated playlist can replace the classroom, giving a sense of mastery the first time a fix works. It is important, though, to cross-reference what you see with the written steps, because a video can omit the prerequisites that prevent a rookie mistake. The goal is not to imitate a professional, but to become a competent observer who can handle the kind of routine maintenance that keeps a car reliable and safe on the road.
Beyond tools, the social fabric matters as much as the manuals themselves. Online communities offer a space to describe symptoms, share wiring diagrams, and compare experiences. You can find seasoned hobbyists and curious beginners alike exchanging notes about stubborn squeaks, misfire codes, or a stubborn oil leak. The value lies in questions asked with measurements in hand and a willingness to verify claims before applying a fix. In such forums, a simple move—checking for a bad ground or confirming a code with a live data stream—can save hours and spare parts. For many, these spaces function like a cooperative workshop: supportive, sometimes brisk, but always oriented toward practical problem-solving. They teach you to translate a fault code into a test plan, and they remind you that you are not alone on the bench. Over time, this collaborative learning builds confidence that turns hesitation into measured, repeatable steps for everyday car care.
For those who want structured knowledge, learning platforms offer courses that cover automotive fundamentals and more advanced diagnostics. Courses typically present theory first, then hands-on practice, followed by challenges that mimic real-world scenarios. Completing such coursework provides a solid foundation you can apply while you work through your car’s faults. A practical way to anchor your learning is to treat it as a loop: read a module, watch a video, practice on a bench, and then apply the same skills on your vehicle. As you grow more confident, you notice patterns—wearing parts, recurring symptoms—that point to subsystems. This broader education makes it easier to distinguish DIY tasks from those that require a professional eye. When you want a compact roadmap, consider a comprehensive guide that covers the essentials, and then augment with hands-on practice and community feedback. A useful reference point is a broad, practical resource that walks readers through common tasks step by step, and which can be reinforced by an internal link to a more detailed primer within the same site: A-to-Z Auto Repair.
Then there are the on-demand repair kits and parts bundles that tailor themselves to specific cars and symptoms. The idea is to reduce the guesswork by delivering the right gasket, the right filter, or the right seal in a package labeled for your VIN or your trouble code. While these kits can streamline routine replacements—oil filters, air filters, and wiper blades—their use demands judgment. If the fault seems to involve the alternator, a physiology of the charging system, or a deep electrical fault, you may be better served by professional supervision. DIY repair thrives on a careful balance: you gain practical skills and save money on common tasks, but you must know the boundary between feasible self-help and risks that could worsen a problem. In practice, this means starting with small, safe tasks that deliver tangible improvements and documenting your steps so you can repeat or adjust the process in the future. The more you practice, the more you learn to read the car’s signals, the more confident you become in deciding which tasks stay DIY and which require pro consultation.
Ultimately, the success of DIY auto repair rests on three pillars: clear information, reliable practice, and community accountability. The information you gather from online guides should be cross-checked against the vehicle’s service manual and, when possible, verified by a second source. Practice means setting up a workspace that prioritizes safety: a level surface, proper jacks and stands, eye protection, gloves, and a way to isolate the battery before handling electrical components. Community accountability comes in the form of honest feedback from peers who can spot a risky shortcut and suggest a safer alternative. The process takes time, but its payoff is not merely financial. It is the satisfaction of understanding your own vehicle, making small repairs with confidence, and turning a car into a dynamic project rather than a mystery. As you deepen your knowledge, you will begin to assemble a mental map of your car’s subsystems—engine, transmission, electrical, braking—and the typical wear patterns that accompany each. That growth translates into calmer decisions at the shop, shorter tow bills when repair options are uncertain, and, ultimately, a smoother relationship with your own automobile.
For readers who want a concise gateway to practical steps, these online collections organize tasks by scope and by car model, helping you pick a logical sequence instead of chasing irrelevant guesses. External resource: https://www.repairpal.com/tools/diy-repair-guides
Final thoughts
Embarking on the journey of DIY auto repair opens up a world of possibilities for motorcycle and auto owners alike. By understanding your vehicle, equipping yourself with the right tools, mastering diagnostic techniques, and reaping the financial rewards, you position yourself to take control of your vehicle’s maintenance. As resources continue to evolve, with communities fostering support and sharing wisdom, every driver can confidently embrace the challenge of self-repair, empowering themselves and ensuring their vehicles remain in top condition. The road ahead is yours to navigate—get started on your DIY auto repair adventure today!